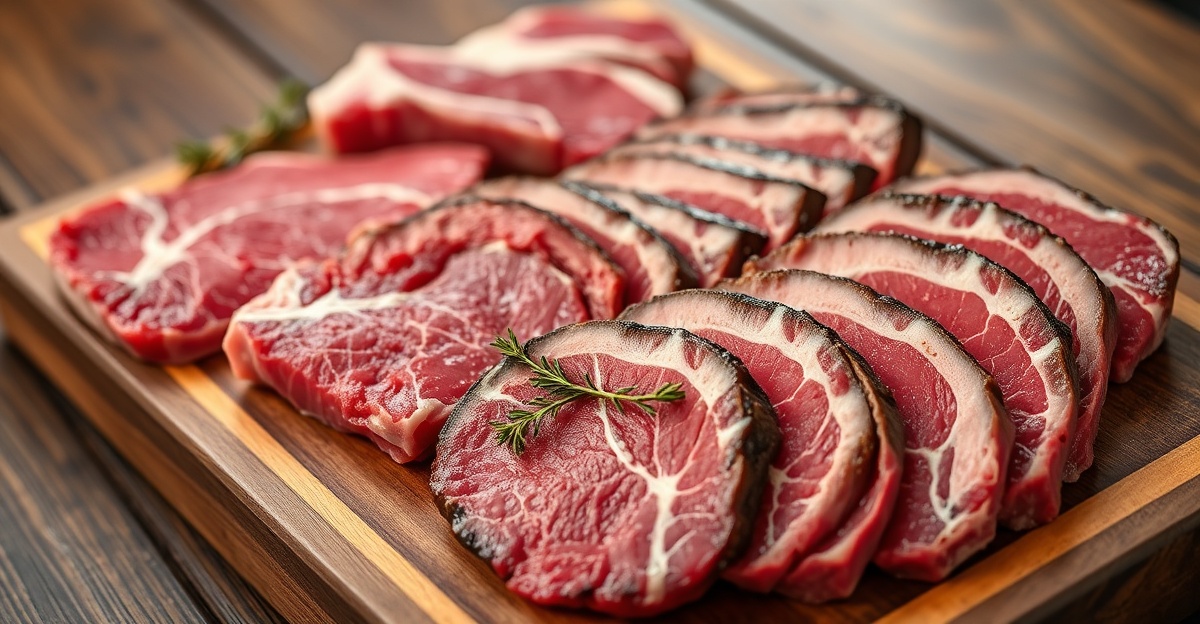
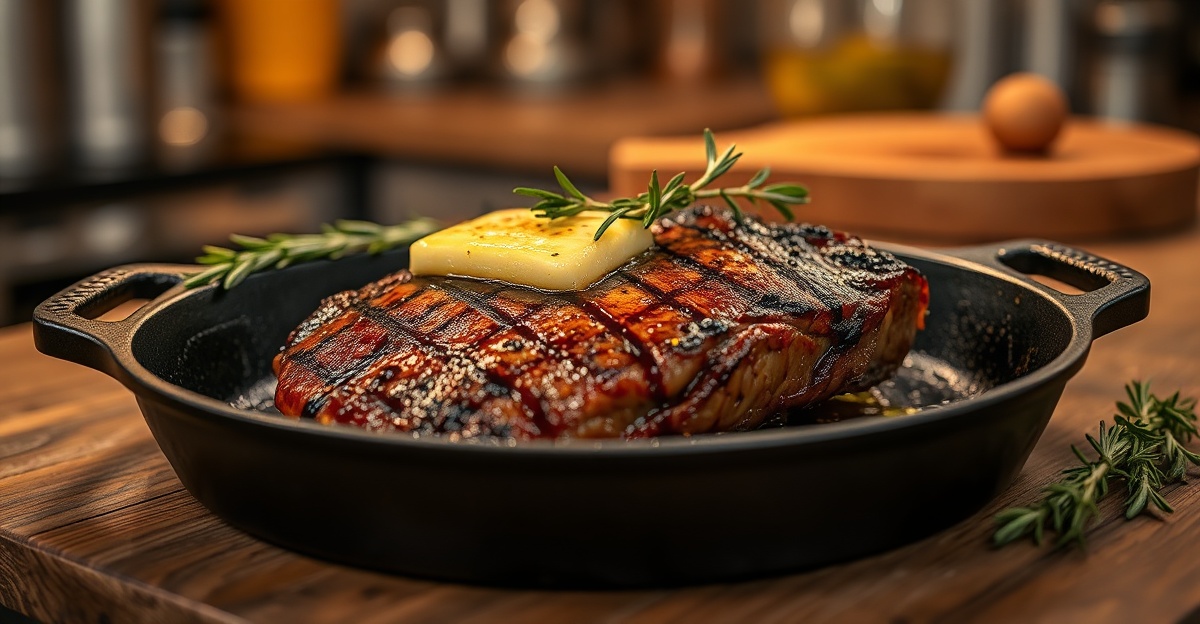
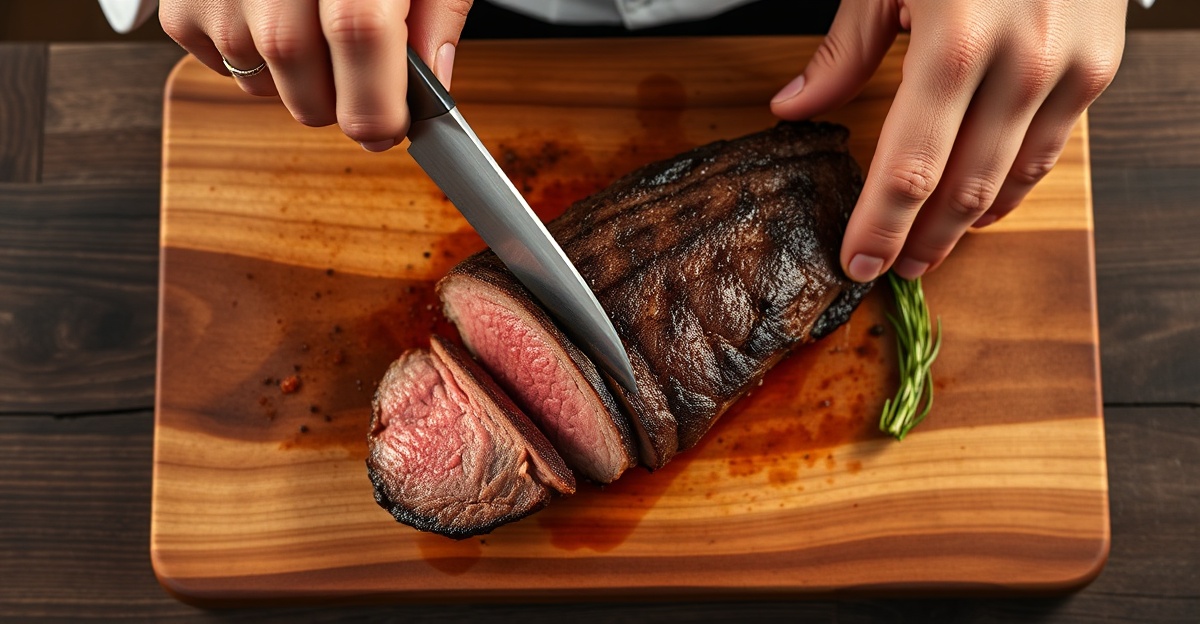
A steak temperature chart is the single most useful tool in any cook’s arsenal. Whether you’re cooking over charcoal, in a cast iron skillet, or using the reverse sear method, internal temperature is the only reliable measure of doneness. Here are the exact numbers you need.
Steak Temperature Chart (°F and °C)
Use a reliable instant-read thermometer and pull your steak 5°F below your target. Carryover cooking will do the rest.
Doneness
Pull Temp (°F)
Final Temp (°F)
Final Temp (°C)
Texture
Blue Rare
110°F
115°F
46°C
Cool, almost raw center
Rare
120°F
125°F
52°C
Cool red center
Medium Rare
125°F
130–135°F
54–57°C
Warm red center, juicy
Medium
135°F
140–145°F
60–63°C
Pink center, firmer
Medium Well
145°F
150–155°F
66–68°C
Slightly pink, less juicy
Well Done
155°F+
160°F+
71°C+
Gray throughout, firm
Chef’s tip: Medium rare (130–135°F) is the sweet spot for most cuts. Fat renders, juices redistribute, and texture hits peak tenderness.
Understanding Carryover Cooking
Carryover cooking happens when you remove the steak from heat. The exterior is hotter than the center, and heat continues moving inward — raising the internal temperature by 5–10°F during resting.
Thin steaks (under 1 inch): Rise ~5°F — pull at target minus 5°F
Thick steaks (1.5–2 inches): Rise ~8–10°F — pull at target minus 8–10°F
Reverse-seared steaks: Minimal rise (low and slow already equalized temp) — pull at target minus 3°F
Best Doneness by Steak Cut
Not all cuts peak at the same temperature. Fat content, muscle fiber structure, and thickness all affect when a steak hits its best texture.
Cut
Recommended Doneness
Target Temp (°F)
Why
Ribeye
Medium Rare
130–135°F
Fat cap renders, marbling liquefies
New York Strip
Medium Rare – Medium
130–145°F
Dense muscle benefits from slight extra heat
Filet Mignon
Medium Rare
130–135°F
Low fat means drying out is the enemy
T-Bone / Porterhouse
Medium Rare
130°F
Two muscles = cook to tender side (tenderloin)
Flank / Skirt
Medium Rare
130–135°F
Go higher and these chewy cuts get tough fast
Chuck / Rump
Medium – Medium Well
140–150°F
Collagen needs more heat to soften
How to Take Steak Temperature Correctly
Use an instant-read thermometer — probe leaves as thick as 1/8 inch give you a reading in 2–3 seconds
Insert from the side — not the top. You want the probe tip centered in the thickest part of the meat
Avoid bone and fat — both register higher temperatures than the surrounding muscle
Check multiple spots on T-bone and thick cuts — the strip side runs hotter than the tenderloin
Clean between readings — cross-contamination matters on raw-to-rare steaks
T-Bone trap: The strip side of a T-bone cooks faster than the tenderloin. Aim your thermometer at the tenderloin — if it’s at 130°F, the strip is already done.
What Each Doneness Level Looks Like
Visual cues help, but they’re not reliable on their own. Use them alongside temperature for confirmation.
Rare (125°F): Deep red center, cool to the touch, very soft when pressed
Medium Rare (135°F): Bright pink-red center, slightly warm, springs back slowly
Medium (145°F): Pink center surrounded by gray, warm, moderate resistance
Medium Well (155°F): Thin pink line in center, firm but not hard
Well Done (160°F+): Uniform gray-brown, firm throughout, minimal juice
Resting: The Final Step
Once your steak hits the pull temperature, rest it. Resting allows juices — forced toward the center by heat — to redistribute throughout the meat. Skip this step and those juices end up on your cutting board.
Thin steaks (under 1 inch): 3–5 minutes
Standard steaks (1–1.5 inches): 5–8 minutes
Thick steaks (1.5+ inches): 8–10 minutes
Tent loosely with foil if resting more than 5 minutes to retain heat without steaming
Frequently Asked Questions
What temperature is medium rare steak?
Medium rare steak has a final internal temperature of 130–135°F (54–57°C). Pull it off heat at 125°F and let carryover cooking do the rest.
What temperature should I pull steak off the grill?
Pull it 5–8°F below your target doneness temperature. For medium rare, that means pulling at 125°F. The steak will rise to 130–135°F while resting.
Is 145°F safe for steak?
Yes. The USDA recommends a minimum internal temperature of 145°F (63°C) for whole beef cuts, followed by a 3-minute rest. This is considered medium doneness. Note that many people safely eat rarer steaks — the risk lies mainly in ground beef, not whole muscle cuts.
Can I use a meat thermometer on a thin steak?
Yes, but insert from the side rather than the top. For steaks under 3/4 inch, use a thin-probe thermometer and angle it in at a low angle to get an accurate center reading.
What’s the difference between pull temperature and final temperature?
Pull temperature is when you remove the steak from the heat source. Final temperature is what the steak reaches after resting, accounting for carryover cooking. Always use pull temperature to time your cook.
The best steak cut combines three critical elements: marbling, tenderness, and flavor intensity. These characteristics determine whether you’ll enjoy a memorable meal or a disappointing plate.
Marbling—the white fat lines running through the red meat—forms the foundation of superior steak quality. Fat melts during cooking and carries flavor compounds throughout the muscle, making heavily marbled cuts like ribeye and wagyu inherently more delicious than lean alternatives. Prime and Prime Plus grades feature superior marbling compared to Choice or Select grades, which directly impacts taste and juiciness.
Tenderness depends on muscle structure and connective tissue density. Steaks from less-worked muscles (like the tenderloin) remain naturally tender, while cuts from heavily exercised areas (like the chuck) require marinating or special cooking methods. The rib section and short loin produce tender steaks because these muscles don’t bear much of the animal’s weight during its lifetime.
Flavor intensity varies by cut based on muscle composition and fat content distribution. Fattier cuts develop richer, beefier flavors through fat rendering. Leaner cuts can taste mild unless cooked with high-heat methods that create a flavorful crust through browning reactions.
The three markers of premium steak quality:
Abundant marbling (intramuscular fat) that renders during cooking for enhanced flavor
Low connective tissue density enabling natural tenderness without special preparation
High myoglobin and fat content for concentrated beef flavor development
Ribeye: The King of Marbled Steak Cuts
Ribeye stands as the gold standard among premium steak cuts because it delivers exceptional marbling throughout the entire muscle. This premium selection comes from the rib section of the cow, where muscles see minimal movement, preserving tenderness while surrounding fat renders into rich, savory flavor during cooking.
The marbling pattern in ribeye separates it from leaner alternatives completely. Prime-grade ribeyes contain 8-12% intramuscular fat, while Prime Plus specimens exceed 12% fat content. This abundant marbling means every bite carries concentrated beef flavor—the fat acts as a natural flavor carrier that melts between muscle fibers as the steak cooks.
When you sear a ribeye at high temperature, the rendered fat creates a caramelized crust while keeping the interior juicy and tender. Cooking flexibility makes ribeye dominate steakhouse menus and home kitchens alike—the fat content insulates the meat from drying out during preparation.
Ribeye delivers high marbling content (8-12% fat in Prime grade), rich beefy flavor from abundant intramuscular and surface fat, and cooking versatility ranging from pan-searing to grilling without requiring special techniques. The rib section’s naturally tender muscles combined with heavy fat distribution make ribeye forgiving for both beginners and advanced cooks seeking the best steak cut for flavor.
Filet Mignon: Ultra-Tender Premium Cut
Filet mignon represents the pinnacle of tenderness among beef cuts, coming from the tenderloin muscle that runs along the cow’s spine. This muscle does almost no work during the animal’s lifetime, resulting in meat so soft it can be cut with a fork.
The tenderloin’s location and minimal movement create naturally low connective tissue density. Unlike rib muscles that support the animal’s weight and develop collagen networks, the tenderloin remains protected and underutilized throughout the cow’s life. This structural advantage means filet mignon requires no marinading, tenderizing hammers, or slow-cooking techniques—the meat arrives impossibly soft simply through proper cooking temperature.
Lean muscle composition defines filet mignon’s character and premium pricing structure. With only 3-4% intramuscular fat in Prime grades, filet mignon lacks the marbling abundant in ribeye or New York strip cuts. This leanness means the steak doesn’t carry the same concentrated beef flavor that fat-rich cuts provide naturally.
Filet mignon delivers maximum tenderness from the least-used muscle on the cow (the tenderloin), contains minimal intramuscular fat (3-4% in Prime grade), and commands premium prices—$45-$60 per pound retail—due to limited yield and consistent textural excellence across all preparation methods.
Premium pricing reflects filet mignon’s scarcity and consistency as the best steak cut for texture. A single tenderloin yields only 4-6 steaks compared to dozens of cuts from the rib section. Restaurants charge $50-$75 per serving because diners specifically seek this muscle’s unmatched tenderness and willingly pay premium prices for guaranteed quality.
New York Strip: Balance of Flavor and Texture
The New York strip occupies the middle ground between ribeye’s marbling intensity and filet mignon’s pure tenderness. Cut from the short loin section, this steak delivers a firmer bite than ribeye while maintaining enough intramuscular fat to develop rich, beefy flavors without requiring heavy sauces.
Marbling in New York strip averages 5-8% intramuscular fat in Prime grades—substantially less than ribeye’s 8-12% but more abundant than filet mignon’s 3-4% content. This moderate fat distribution creates a distinct advantage: the steak develops a flavorful crust when seared while the leaner muscle structure produces a firmer, meatier texture that many beef enthusiasts prefer over softer alternatives.
The short loin muscles that produce New York strip see moderate use during the cow’s life, creating connective tissue levels between the heavily exercised chuck and the sedentary tenderloin. This means New York strip arrives tender enough to cook without marinating, yet firm enough to deliver textural satisfaction with defined grain lines visible when sliced properly.
New York strip steak combines 5-8% intramuscular fat content for moderate marbling, firm and defined texture from the short loin muscle, and consistent performance across grilling, pan-searing, and broiling methods. Many consider this the best steak cut for balanced beef flavor and satisfying bite without requiring fat supplementation like filet mignon.
T-Bone and Porterhouse: Two Cuts in One
T-bone and porterhouse steaks offer something no other cut delivers: two distinct muscles separated by a T-shaped bone, giving you ribeye-style texture on one side and filet mignon tenderness on the other. These bone-in cuts come from the short loin section where the strip muscle and tenderloin meet, creating a single steak that satisfies multiple preferences.
The bone itself conducts heat directly into the meat during cooking, creating faster and more even temperature distribution than boneless cuts. The bone also contributes subtle flavor compounds that dissolve into the surrounding meat during the searing and resting process, making many consider this among the best steak cut options for flavor development.
Size distinction between T-bone and porterhouse matters significantly for cooking results. A T-bone’s smaller tenderloin portion cooks quickly because the muscle is thin and lacks intramuscular fat to insulate it from overcooking. The strip side requires longer cooking to reach medium-rare temperature, creating timing challenges during preparation.
T-bone steaks contain both New York strip and filet mignon separated by a T-shaped bone, with the tenderloin side measuring less than 1.25 inches thick at its widest point. Porterhouse steaks are structurally identical but require the tenderloin section to measure at least 1.25 inches in thickness, making them substantially larger and typically costing $50-$75 per pound at retail.
Porterhouse steaks solve timing problems through sheer size. The thick tenderloin section (1.25+ inches) provides enough mass to cook alongside the strip without temperature differential issues. Both sides reach medium-rare simultaneously when using proper high-heat searing techniques, making porterhouse significantly more forgiving than T-bone during preparation.
Choosing Your Perfect Steak Cut
Selecting the best steak cut depends less on which muscle is objectively superior and more on matching the meat’s characteristics to your cooking method, budget, and flavor preferences. The perfect steak exists at the intersection of what you enjoy eating, how you plan to cook it, and what you’re willing to spend per pound.
Your cooking method dramatically influences which cut will deliver optimal results. Filet mignon excels in cast-iron skillet cooking because its tender structure doesn’t require aggressive heat or extended cooking time. Ribeye thrives on outdoor grilling where fat can render slowly over indirect heat, dripping away excess grease while the marbling bastes the meat from within naturally.
New York strip performs equally well on cast iron, grill, or broiler because its moderate fat content and firmer muscle structure conduct heat predictably across different cooking surfaces. T-bone and porterhouse steaks demand careful heat management due to their two distinct muscles, making them best suited for high-heat searing followed by oven finishing.
Cooking method compatibility for the best steak cut selection: Cast-iron skillet cooking suits filet mignon and New York strip; outdoor grilling favors ribeye with higher fat content; broiler cooking works well for strip steaks; oven-finishing technique is essential for T-bone and porterhouse steaks due to dual-muscle composition.
Budget considerations shift perspective on premium cuts significantly. At $45-$60 per pound, filet mignon represents the highest price point justified by unmatched tenderness rather than intense flavor. Ribeye at $30-$50 per pound offers more intramuscular fat and beef flavor intensity for slightly less money, making it the preferred choice for diners seeking maximum flavor per dollar spent.
Personal preference for flavor intensity versus tenderness should guide your selection process. If you prioritize impossibly soft, fork-tender texture and don’t mind supplementing lean meat with sauce, filet mignon justifies its premium price. If you want concentrated beef flavor with textural chew and don’t mind higher fat content, ribeye delivers maximum satisfaction as the best steak cut for flavor enthusiasts.
Identify your primary cooking method (cast iron, grill, broiler, or oven-finishing technique)
Determine your flavor priority from maximum tenderness to maximum beef intensity
Calculate your per-steak budget including desired thickness and portion size
Match preferences to filet mignon (tenderness), ribeye (flavor), New York strip (balance), or porterhouse (experience both)
Purchase from a butcher when possible for superior marbling consistency and custom cutting thickness
Frequently Asked Questions
What is the most tender steak cut?
Filet mignon is the most tender steak cut, sourced from the tenderloin muscle that receives minimal exercise, resulting in exceptionally soft texture and fine grain.
Which steak cut has the best flavor?
Ribeye typically offers the best flavor due to its high marbling content (20-25% intramuscular fat), which creates rich, buttery taste and intense beef flavor.
What's the difference between T-bone and Porterhouse steaks?
Porterhouse steaks contain larger tenderloin sections (minimum 1.25 inches) while T-bone steaks have smaller tenderloin portions (minimum 0.5 inches), both featuring the same T-shaped bone.
How do I choose between ribeye and New York strip?
Choose ribeye for maximum marbling and rich flavor, or New York strip for balanced marbling with firmer texture and more moderate pricing.
Not all steaks cook equally well when you learn how to cook steak in oven methods. The cut you choose determines whether you’ll end up with a perfectly crusted exterior and a tender, juicy interior or a disappointing, unevenly cooked result. Understanding which cuts work best helps you plan meals with confidence and avoid wasting premium beef.
Rib-eye steaks excel in oven cooking because their generous fat marbling self-bastes the meat throughout the cooking process. New York strip steaks offer leaner, beefier flavor while still maintaining enough intramuscular fat for moisture. Filet mignon provides tenderness but requires careful attention since it lacks protective fat layers.
T-bone and Porterhouse steaks work beautifully if you’re comfortable managing the different cooking rates between the strip and tenderloin sections. Chuck eye steaks deliver exceptional flavor at a lower cost and perform reliably in high-heat oven settings.
Best oven steaks include: Rib-eye steaks contain 6-8% intramuscular fat for consistent tenderness. New York strip steaks offer 2-3% marbling with bold beef flavor. Filet mignon provides maximum tenderness but minimal fat. T-bone and Porterhouse steaks combine two cuts in one. Chuck eye steaks deliver rich marbling at budget-friendly prices.
Thickness matters significantly for even cooking when learning how to cook steak in oven. Steaks thinner than 1.25 inches cook too quickly on the surface before the interior reaches your target temperature, often resulting in overcooked edges. Aim for steaks between 1.5 and 2 inches thick—this thickness allows the exterior to develop a proper crust while the center reaches medium-rare or medium without drying out.
Fat content and marbling determine how forgiving your steak will be during cooking. Heavily marbled steaks with white fat running throughout the meat stay tender even if slightly overdone. Look for USDA Prime or high-Choice grades with visible fat streaks.
Essential Equipment and Preparation Steps
Successful oven cooking hinges on having the right equipment and preparing your steak properly before heat hits the meat. The tools you use and how you ready your beef determine whether you’ll achieve restaurant-quality results or fall short of expectations. Proper preparation makes mastering how to cook steak in oven achievable for home cooks.
A cast-iron skillet is your most valuable tool for oven steak cooking. Cast iron retains heat exceptionally well, distributing it evenly across the steak’s surface and creating the flavorful brown crust that defines a quality sear. Stainless steel pans work as a secondary option, though they don’t hold heat quite as effectively.
Essential tools for oven steak cooking include: a cast-iron skillet (10-12 inches) for even heat distribution, an instant-read meat thermometer for accurate doneness testing, kitchen tongs for safe handling, paper towels for patting steaks dry, and a sharp knife for slicing. A baking sheet or trivet helps protect your oven rack, while aluminum foil allows tenting if browning becomes too dark.
Steak preparation directly impacts your final results. Remove your beef from the refrigerator 40 to 60 minutes before cooking—room temperature meat cooks more evenly throughout, preventing a cold center surrounded by overcooked edges. Pat the surface completely dry with paper towels; moisture prevents proper browning and steam rises instead of searing.
Season generously with kosher salt and coarse black pepper right before cooking, never hours ahead. Salt drawn from the surface by osmosis creates a sticky film that inhibits browning; applying it immediately before heat allows flavors to penetrate without disrupting the sear. This timing is crucial when you cook steak in oven methods.
Step-by-Step Oven Steak Cooking Method
The searing step transforms your steak from raw beef into restaurant-quality meat with a caramelized exterior. Heat your cast-iron skillet over high heat until wisps of smoke appear—this typically takes 2 to 3 minutes depending on your stovetop’s power. The pan must be searingly hot; if it’s merely warm, you’ll steam the meat instead of searing it.
Press the steak gently against the pan for the first 30 seconds—this ensures maximum contact between the meat and heat source, promoting even browning. Resist the urge to move it around; let it sit undisturbed for 3 to 4 minutes on the first side. A properly seared steak develops a dark brown, crusty exterior that locks in juices and creates complex, savory flavors through the Maillard reaction.
To sear a steak properly for oven cooking: (1) Heat cast iron over high heat until smoking appears, (2) Add high-smoke-point oil and swirl to coat, (3) Place seasoned steak on pan and press gently for 30 seconds, (4) Leave undisturbed for 3-4 minutes without flipping, (5) Flip once and sear the second side for 2-3 minutes, (6) For steaks thicker than 1.75 inches, sear the edges upright with tongs for 15-20 seconds per side.
Transfer the seared steak to your preheated 425°F oven immediately. This is the core technique when you cook steak in oven—combining stovetop searing with oven finishing. Place the cast-iron skillet on the middle rack where heat is more consistent. A 1.5-inch steak typically requires 8 to 12 minutes in the oven, while a 2-inch steak needs 12 to 18 minutes.
Stop cooking based on internal temperature, not time alone. Remove the steak from the oven when it reaches 5 to 10 degrees below your target doneness—the residual heat will push it the final few degrees while it rests. Insert your instant-read thermometer horizontally into the thickest part of the steak, avoiding any bone or fatty areas that could give false readings.
Internal temperature targets for oven-cooked steaks: Rare = 120°F, Medium-Rare = 130-135°F, Medium = 135-145°F, Medium-Well = 145-155°F, Well-Done = 155-160°F. Remove steaks from the oven 5-10 degrees before target temperature to account for carryover cooking during the 5-minute resting period.
Once your steak reaches the target temperature, immediately transfer it to a cutting board or warm plate. Allow the steak to rest for 5 to 10 minutes before cutting—this patience pays off when you master how to cook steak in oven properly. During resting, muscle fibers relax and reabsorb the juices that cooking forced outward.
Resting and Serving Your Oven-Cooked Steak
Resting transforms a good steak into an exceptional one. When heat penetrates the meat, muscle proteins contract and squeeze out moisture toward the surface. Allowing 5 to 10 minutes of rest gives those muscle fibers time to relax and reabsorb the expelled juices, distributing them evenly throughout the meat. A steak that goes straight from pan to plate loses this precious liquid to your cutting board instead of your palate.
Temperature continues rising during rest—a phenomenon called carryover cooking. A steak removed at 125°F will climb to approximately 130-135°F by the time you cut into it. This is why removing your steak 5 to 10 degrees below target temperature matters when you cook steak in oven.
Rest oven-cooked steaks for 5 to 10 minutes before slicing or serving whole. During this period, muscle fibers relax and reabsorb cooking juices, maximizing tenderness and juiciness. Temperature rises 5 to 10 degrees through carryover cooking, so remove steaks from the oven when they’re slightly below your target doneness rather than at it.
Slicing technique determines whether your steak remains tender or becomes tough and stringy. Always cut perpendicular to the direction the muscle fibers run—slicing across the grain rather than along it shortens the fiber length and makes each bite easier to chew. For a whole steak presentation, slice against the grain at roughly 0.5-inch intervals if you prefer individual pieces.
The type of steak you’re serving influences how you present it. Boneless steaks like rib-eye and New York strip slice cleanly and look elegant when fanned on a plate. T-bone and Porterhouse steaks are impressive served whole—the bone adds visual appeal and allows diners to enjoy the meat on both sides.
Proper slicing technique: (1) Identify the grain direction by examining the muscle fibers running through the steak, (2) Position your knife at a 90-degree angle to these fibers, (3) Use smooth, downward cuts rather than sawing motions, (4) Slice to approximately 0.5-inch thickness for optimal tenderness and presentation, (5) Serve immediately on warm plates to maintain heat and texture.
Accompaniments elevate oven-cooked steak from good to restaurant-quality. A compound butter infused with garlic, fresh herbs, and sea salt melts across the warm steak surface, adding richness and complexity. Classic steakhouse sides—loaded baked potatoes, creamed spinach, roasted asparagus, or grilled mushrooms—complement the steak without overwhelming it.
Wine pairing decisions should follow simple logic. Full-bodied red wines with moderate tannins—Cabernet Sauvignon, Malbec, or Bordeaux blends—pair naturally with fatty, marbled steaks like rib-eye. Leaner cuts like New York strip and filet mignon work beautifully with medium-bodied reds such as Pinot Noir or Côtes du Rhône.
Seasoning decisions after cooking should be minimal. Your steak received kosher salt and pepper before searing, creating a flavorful crust. Additional seasoning at the table allows diners to adjust to their preference without the chef dictating the final taste. Resist the urge to add multiple sauces or heavy toppings—they mask the quality and craftsmanship visible in a perfectly cooked steak.
Frequently Asked Questions
What temperature should I cook steak in the oven?
Cook steak in a preheated 400-450°F oven after searing. This temperature ensures even cooking while maintaining a tender interior.
How long does it take to cook steak in the oven?
Oven cooking time varies by thickness and desired doneness: 3-5 minutes for medium-rare, 5-7 minutes for medium, and 7-9 minutes for medium-well in a 1-1.5 inch thick steak.
Should I flip steak when cooking in the oven?
No, do not flip steak during oven cooking. The searing process before oven transfer provides the crust, while the oven cooks evenly from all sides without flipping.
Can I cook frozen steak in the oven?
While possible, it's better to thaw steak completely before oven cooking for even results. Frozen steak requires longer cooking times and may cook unevenly.
Getting the right equipment transforms how to cut steak from frustrating to fluid. A dull knife tears meat fibers, while a sharp blade creates clean, professional slices that showcase your cooking. Beyond the knife itself, your cutting board, thermometer, and fork all play supporting roles in achieving restaurant-quality results at home.
A chef’s knife between 8 and 10 inches works best for most steaks. The blade needs to be sharp enough to glide through meat without pressure—test it on paper or tomato skin. High-carbon stainless steel holds an edge longer than regular stainless, though it requires more maintenance. Hone your knife weekly with a honing steel to realign the blade, and sharpen it every few months using a whetstone or professional sharpening service.
Your cutting board should be at least 12 by 18 inches to give you workspace and safety. Wood boards like maple or teak grip meat naturally and won’t dull your blade as quickly as plastic or glass. A meat thermometer (instant-read digital models work fastest) tells you when your steak hits the exact doneness you want—medium-rare sits at 130-135°F. A carving fork with two long tines stabilizes the meat while you slice, preventing slippage and keeping fingers clear of the blade.
Essential tools for cutting steak: An 8-10 inch chef’s knife sharpened weekly with a honing steel, a wood cutting board at least 12 by 18 inches, an instant-read digital meat thermometer for doneness checking, and a two-tined carving fork for meat stabilization.
Understanding Grain Direction in Different Cuts
Muscle fibers in meat run in specific directions depending on which part of the cow the cut comes from. Understanding grain direction is the single most important factor in how to cut steak correctly—slicing against the grain shortens those fibers, making each bite tender, while slicing with the grain leaves long fibers intact and creates a chewy texture.
Different steak cuts have different grain patterns. A ribeye has grain running in multiple directions because of its location in the rib section, making it more forgiving if your knife angle isn’t perfect. A strip steak has grain running lengthwise along the steak’s long side. A flank steak has very pronounced grain running diagonally across the entire surface. A sirloin’s grain can vary depending on where it comes from—the upper portion has different fiber orientation than the tip.
Visual inspection reveals grain direction before you cut. Look at the steak’s surface and you’ll see fine lines running across the meat—those are the muscle fibers. Run your finger along those lines to feel which direction they travel. In some cuts like flank, the grain is so obvious you can see it from arm’s length away. In others like ribeye, the fibers are less pronounced, so look closely at the meat’s natural striations. Angling your cutting board under better light helps you spot these patterns more easily.
To identify grain in your steak: Look for fine lines or striations running across the meat’s surface, feel those lines with your finger to determine their direction, and remember that proper grain identification means slicing perpendicular to those fibers for maximum tenderness.
Step-by-Step Steak Cutting Technique
Resting your steak before cutting is non-negotiable if you want juicy results. When you cook steak, the heat pushes moisture toward the surface and the center. Cutting immediately after cooking lets all that juice run out onto the plate instead of staying in the meat. A 5-10 minute rest at room temperature allows the muscle fibers to relax and reabsorb those juices throughout the meat. Thicker cuts (over 1.5 inches) benefit from the longer end of that window, while thinner steaks need just 5 minutes.
During resting, tent your steak loosely with aluminum foil—just enough to keep it warm without trapping steam that could make the exterior soggy. The steak won’t cool down significantly in 5-10 minutes, and the residual carryover cooking is minimal at this point. Don’t cover it completely or you’ll undo the browning and crust you worked to develop. A loose tent lets heat escape gradually while the interior temperatures stabilize.
Rest cooked steak for 5-10 minutes before cutting to allow muscle fibers to relax and reabsorb internal juices. Thicker cuts (over 1.5 inches) need the full 10 minutes, while thinner steaks require only 5 minutes. Tent loosely with foil to retain warmth without trapping excess steam.
Once resting is complete, position your knife at a 90-degree angle to the grain direction you’ve already identified. Hold the knife handle with a relaxed grip—tension makes your cuts uneven and slows you down. Your other hand grips the carving fork, positioning its tines into the meat’s side to stabilize it. The fork prevents the steak from sliding across your board as you apply downward pressure with the knife.
Your blade should do the work, not your muscle. Use smooth, even strokes from the knife’s heel to its tip, letting the sharp edge glide through the meat rather than sawing back and forth. Applying steady downward pressure while pulling the blade toward you creates a single clean slice in one motion. Sawing motions tear muscle fibers and create a ragged edge that looks less appetizing and feels less tender on the tongue.
For slice thickness, aim for ¼-inch to ½-inch slices depending on the cut and how you plan to serve the steak. A standard ⅜-inch slice balances visual appeal with practical eating—thick enough to stay warm longer but thin enough to cut easily with a fork. Thinner slices (¼ inch) work better for cuts with pronounced grain like flank steak, since they feel more tender in the mouth. Thicker slices (½ inch) showcase premium cuts like ribeye or tenderloin, especially when grain is less directional. Consistency matters more than hitting a specific measurement—aim for uniform thickness throughout so each slice cooks and cools at the same rate if you’re serving multiple pieces.
How to cut steak step-by-step: Rest cooked steak 5-10 minutes with loose foil tent, identify grain direction through visual inspection and finger testing, position knife at 90-degree angle perpendicular to grain lines, hold carving fork in non-knife hand to stabilize meat, use smooth downward strokes from knife heel to tip, cut slices between ¼-inch and ½-inch thick depending on steak type, and maintain consistent thickness across all slices for even cooling.
Cutting Against the Grain: Why It Matters
Muscle fibers in beef are organized into bundles that run in specific directions based on the animal’s anatomy and the steak’s location on the carcass. When you cut perpendicular to these fibers—against the grain—your knife severs them into shorter pieces. Shorter fibers feel more tender in your mouth because they require less chewing force to break apart, while longer fibers intact after cutting with the grain create resistance and a chewy sensation.
The science is straightforward: meat tenderness depends on fiber length. A ribeye from the rib section has grain running in multiple directions because that muscle moved in many ways during the animal’s life. A strip steak’s grain runs lengthwise, making it critical to identify that single dominant direction. A flank steak’s pronounced diagonal grain is immediately visible and demands respect—cut it the wrong way and even a perfectly cooked steak becomes tough and unpleasant to eat.
Cutting against the grain shortens muscle fibers, reducing chewing resistance and creating a tender texture. The grain direction varies by steak cut: ribeye has multidirectional grain, strip steak runs lengthwise, and flank steak displays pronounced diagonal striations. Identifying and cutting perpendicular to these fiber bundles is the single most important factor in achieving restaurant-quality tenderness.
Most home cooks make the mistake of cutting steaks without first identifying grain direction. They slice at whatever angle feels natural, sometimes with the grain, sometimes across it, and inconsistently within the same steak. This creates a disappointing eating experience where half the slices are tender and half are tough—a dead giveaway that proper cutting technique wasn’t applied. Another common error is cutting too thickly when the grain is pronounced, as in flank steak. A ½-inch slice with long fibers still intact feels chewy regardless of how well you cooked it.
Sawing motions rather than clean, confident strokes also undermines the benefits of cutting against the grain. When your knife tears through muscle fibers with back-and-forth pressure instead of a single smooth stroke, it damages the fiber structure itself and creates a ragged surface. The tenderness advantage of proper grain cutting disappears because the fibers are mechanically damaged. A sharp blade moving in one fluid downward motion through perpendicular fibers creates clean edges that feel silky on your tongue.
Premium cuts like tenderloin and ribeye are more forgiving because their grain is less directional or less pronounced. You can cut these steaks at slightly imperfect angles and still achieve acceptable tenderness. Budget cuts like flank, skirt, and round steak demand precision—their obvious, single-direction grain structure means cutting with the grain instead of against it produces noticeably tough results. Understanding your specific steak cut and its grain pattern before you pick up your knife separates mediocre results from exceptional ones.
Specific Techniques for Different Steak Cuts
Ribeye steaks present a unique challenge because their grain runs in multiple directions rather than one dominant path. The ribeye comes from the rib section where the muscle moved in many different ways during the animal’s life, creating a complex fiber structure. This multidirectional grain is actually forgiving—you can cut at slightly imperfect angles and still achieve tender results because at least some of your cuts will be perpendicular to some of the grain directions present in the meat.
Start by examining your ribeye from different angles under good light. You’ll notice faint striations running in several directions across the surface. Choose the most prominent grain pattern you can identify and position your knife perpendicular to that primary direction. For ribeye, achieving perfect precision on every single slice is less critical than with other cuts, so don’t stress if your angle isn’t exactly 90 degrees—the multidirectional nature of the muscle fibers forgives minor imperfections.
For ribeye cutting: Identify the most prominent grain direction on the meat’s surface, position your knife at a 90-degree angle to that primary fiber orientation, and cut ⅜-inch to ½-inch slices using smooth downward strokes. Ribeye’s multidirectional grain means slight angle variations won’t significantly impact tenderness, making it a forgiving choice for less experienced cooks.
Use a carving fork to stabilize the ribeye’s side as you cut, applying steady downward pressure while pulling the knife toward you in one fluid motion. The large eye of fat running through the center of a ribeye can make it slightly more slippery on the cutting board, so anchor the meat firmly with your fork hand before each stroke. Aim for consistent ⅜-inch to ½-inch thickness to showcase the beautiful marbling and tender texture that makes ribeye so prized.
Filet mignon, also called tenderloin, is the most tender cut available because the tenderloin muscle does minimal work on the living animal. This extreme tenderness means grain structure is less pronounced and matters less than with other cuts. The grain in filet mignon generally runs lengthwise along the muscle, but because the meat is already so tender, cutting technique focuses more on presentation than on achieving additional tenderness through precise grain-cutting.
Before cutting filet mignon, identify the general grain direction running along the length of the meat. Position your knife at a perpendicular angle to that direction, but understand that even imperfect cuts will result in tender eating because the muscle fibers are naturally shorter and more delicate than those in tougher cuts. Filet mignon allows you to prioritize appearance and your desired slice thickness without worrying that grain-cutting technique will dramatically impact tenderness.
Filet mignon requires identifying lengthwise grain and cutting perpendicular to it, but the meat’s natural tenderness means exact angle precision is less critical than with other cuts. Cut filet mignon into ½-inch to ¾-inch thick slices to showcase its premium quality and buttery texture. The tenderloin’s minimal grain directional emphasis means you can focus on visual presentation and consistent thickness rather than compensating for tough muscle fibers.
Flank steak presents the opposite challenge from ribeye: instead of multidirectional grain, flank has extremely pronounced, obvious grain running diagonally across the entire surface. This muscle, located on the cow’s abdominal area, moves in one consistent direction during the animal’s life, creating clearly visible striations you can see from arm’s length away. Cutting flank steak with the grain instead of against it results in long, tough fibers that make even a perfectly cooked steak feel chewy and unpleasant.
Visual inspection of flank steak is straightforward because the grain lines are so obvious. Look at the meat’s surface and you’ll immediately see diagonal striations running across it—these are muscle fibers you must cut perpendicular to. Run your finger along those lines to confirm the direction, then position your knife at a 90-degree angle to those diagonal fibers. Unlike ribeye, there’s no room for imprecision here; cutting with or nearly with the grain on flank steak creates a noticeably inferior eating experience.
Flank steak has pronounced diagonal grain that demands precision cutting. Identify the obvious grain lines running diagonally across the meat’s surface, then position your knife perpendicular to those fibers. Cut flank steak into thin slices—¼-inch to ⅜-inch—because shorter pieces of long muscle fibers feel more tender than thicker slices. This combination of perpendicular angle and thin thickness is essential for transforming flank’s naturally chewy muscle into a tender eating experience.
Skirt steak shares flank’s pronounced, unidirectional grain but comes from a different location on the animal—the plate, which lies below the rib. Like flank, skirt steak demands identification and respect for grain direction because the muscle fibers run in one dominant direction. The grain in skirt steak runs lengthwise along the meat’s long dimension, making it immediately visible when you examine the raw steak on your cutting board.
Position your knife perpendicular to skirt steak’s lengthwise grain, understanding that this cut is even less forgiving than flank for improper grain cutting. Some parts of skirt steak can be quite tough even after proper cooking, so precise grain-cutting and thin slicing are non-negotiable if you want acceptable texture. The muscle moved in one primary direction during the animal’s life, creating muscle fibers that are longer and more resistant to chewing than those in ribeye or tenderloin.
Skirt steak grain runs lengthwise along the meat’s long dimension and demands perpendicular cutting for edibility. Cut skirt steak into thin slices—¼-inch to ⅜-inch—using smooth downward knife strokes perpendicular to the obvious fiber direction. Skirt steak’s naturally tough muscle structure means that improper grain cutting or thick slicing creates an unpleasantly chewy result, so this cut requires more precision than forgiving cuts like ribeye or tender cuts like filet mignon.
Common Mistakes and Professional Tips
Cutting steak at the wrong temperature ruins texture and presentation faster than any other mistake. Most home cooks pull their steak off the heat and immediately slice it, or they wait until it cools completely to room temperature. Both approaches create problems—hot steak bleeds juice onto the plate while cold steak becomes dense and less flavorful because the fats solidify. The ideal cutting window is when your steak has rested for 5-10 minutes and sits at approximately 130-140°F internally, warm enough to feel pleasant on your tongue but cool enough that juices have reabsorbed into the meat.
Cut steak when it reaches 130-140°F internally after a 5-10 minute rest. This temperature range allows muscle fibers to relax and retain juices while remaining warm enough for optimal flavor and texture. Cutting too hot (above 150°F) causes immediate juice loss; cutting too cold (below 110°F) makes fats solidify and reduces the eating experience’s quality.
Temperature control extends beyond the cutting moment to how you handle the meat after slicing. If you’re plating steaks for immediate service, keep cut slices on a warmed plate and serve within 2-3 minutes of cutting. The residual heat from a hot plate maintains temperature while preventing the meat from sitting in its own juices, which causes the exterior to become soggy. For a steakhouse-style presentation, some restaurants plate slices slightly fanned with a light drizzle of pan sauce or compound butter, which adds flavor while the warmth keeps the meat at serving temperature.
Presentation separates a home-cooked steak from a restaurant-quality experience, and slicing technique directly impacts visual appeal. Consistent thickness creates a professional appearance because each slice catches light the same way, highlighting the meat’s color and marbling. Ragged, uneven slices torn by sawing motions look amateur and signal to diners that the cooking process wasn’t handled with care. A sharp knife creating clean, straight edges makes even a simple plated steak look elegant and intentional.
Professional plating of cut steak requires three elements: consistent slice thickness (uniform width throughout), clean edges created by single smooth strokes, and proper plate temperature. Arrange slices slightly overlapping or fanned on a heated plate, serve within 2-3 minutes of cutting, and complement with finishing touches like fleur de sel, cracked pepper, or compound butter. This presentation style signals care and technical skill to diners.
The angle and arrangement of slices on the plate affect how diners perceive the steak’s quality. Arrange premium cuts like ribeye or filet mignon with slices slightly overlapping in a fan pattern, which showcases the beautiful cross-section and marbling while making the portion look substantial. For tougher cuts like flank or skirt that are served sliced, arranging thin slices in a shingled pattern (overlapped like roof tiles) emphasizes that the thinness is intentional and complements the cut’s characteristics. Avoid piling slices haphazardly or standing them upright on edge, which looks careless and prevents sauce or juices from coating the meat evenly.
Storing cut steak properly preserves quality for leftovers or meal prep, though whole steaks always maintain superior texture. If you’ve cut more steak than you’ll serve immediately, store slices in an airtight container in the refrigerator at 40°F or below. Exposure to air causes oxidation, which turns the meat’s surface gray-brown and creates unpleasant flavors. An airtight container prevents this degradation and maintains moisture, keeping the meat tender rather than allowing the exterior to dry out.
The timeframe for storing cut steak is shorter than whole steaks because slicing increases the surface area exposed to bacteria and air. Eat refrigerated cut steak within 3-4 days for best quality; after that window, flavors decline and texture deteriorates noticeably. For longer storage, freeze cut steak in a vacuum-sealed bag or airtight container at 0°F or below, which halts bacterial growth and preserves quality for 2-3 months. Thaw frozen cut steak in the refrigerator overnight before reheating, never at room temperature, to prevent bacterial multiplication.
Store cut steak in airtight containers at 40°F or below and consume within 3-4 days for optimal quality. Freezing in vacuum-sealed bags at 0°F extends storage to 2-3 months. Thaw frozen steak in the refrigerator overnight and reheat gently in a low oven (275°F) to restore texture without overcooking the interior.
Reheating cut steak requires a gentler approach than initial cooking because the meat is already cooked and prone to overcooking if exposed to high heat. A low oven at 275°F takes 8-12 minutes to bring cold cut steak back to serving temperature without drying the exterior. Alternatively, a quick sear in a cast-iron skillet over medium heat for 30-60 seconds per side restores the crust and warms the interior, though this method requires attention to prevent burning. Understanding how to cut steak properly the first time reduces the need for reheating later.
Plate temperature itself becomes a professional tool when you understand its impact on steak presentation and the dining experience. A warm plate—preheated in a 200°F oven for 10-15 minutes—keeps cut steak at serving temperature longer and prevents the meat from cooling unevenly. Cold plates absorb heat from the steak’s bottom surface, cooling it quickly while the top surface remains relatively warm, creating an inconsistent eating experience. Restaurant kitchens maintain stacks of hot plates for exactly this reason: the technical detail of plate temperature separates professional service from careless plating.
Frequently Asked Questions
How long should steak rest before cutting?
Let steak rest 5-10 minutes after cooking to allow juices to redistribute throughout the meat, preventing juice loss when slicing.
What's the best knife for cutting steak?
A sharp 8-10 inch chef's knife or carving knife with a thin blade works best for clean, precise cuts through cooked steak.
How thick should steak slices be?
Cut steak slices ¼ to ½ inch thick for optimal texture and easy chewing, adjusting based on the specific cut and preference.
Can you cut steak when it's hot?
Avoid cutting steak immediately when hot as juices will run out; wait for resting period to ensure moist, flavorful slices.
New York Strip Steak Guide: Cut, Flavor, Doneness, and Best Cooking Methods
The New York strip is one of the most recognizable steaks in the world—and for good reason. It has bold beef flavor, a satisfying bite, and enough fat along the edge to stay juicy when cooked correctly. If ribeye is the “rich and buttery” option, New York strip is the “clean, beef-forward classic.”
This guide explains exactly what New York strip is, where it comes from, how it compares to ribeye, which doneness works best, and how to cook it on both grill and skillet for consistent steakhouse results at home.
🥩 Pro Tip For New York strip, thickness matters more than brand labels. A 1.25–1.75 inch strip with good marbling will usually outperform a thinner “premium” steak.
What Is New York Strip Steak?
New York strip (also called strip steak, striploin, top loin steak, or Kansas City strip in some regions) is cut from the short loin section of the cow, behind the rib area. This muscle does less work than many other parts of the animal, so it remains relatively tender, but it still has a firmer texture than ribeye or filet mignon.
Its key signature is a strip of external fat along one side, plus moderate internal marbling. That structure gives New York strip its identity: concentrated beef flavor, cleaner mouthfeel than ribeye, and excellent crust potential when seared properly.
New York Strip vs Ribeye: Which One Should You Choose?
Flavor
Ribeye is richer and butterier because of heavier marbling. New York strip tastes more “beefy” and direct, with less fatty sweetness.
Texture
Ribeye is softer and more forgiving. New York strip is firmer with more chew, which many steak lovers prefer.
Fat Profile
Ribeye has marbling throughout. New York strip has a stronger edge fat cap and less internal marbling.
Best Use
Choose New York strip when you want a classic steak bite and pronounced beef flavor without ribeye-level richness.
🌡️ Key Takeaway If you like structured texture and a cleaner fat profile, New York strip is usually a better choice than ribeye.
How to Choose a Great New York Strip
1) Marbling Quality
Look for fine white flecks throughout the center of the meat. Avoid steaks with almost all fat concentrated only in the outer edge.
2) Thickness
Target 1.25 to 1.75 inches. Thin strips overcook quickly and don’t build enough crust before center temp rises too far.
3) Beef Grade
USDA Prime: more marbling, very forgiving
USDA Choice: excellent everyday value
USDA Select: leaner and easier to dry out
4) Color and Surface
Fresh strip should be bright cherry-red to deep red (depending on packaging and aging method), with no gray patches and no excessive liquid pooling.
Best Doneness for New York Strip
New York strip performs best at medium-rare to medium. That range keeps texture juicy while rendering edge fat and preserving flavor balance.
Doneness
Pull Temp
Final Temp After Rest
Rare
120–125°F (49–52°C)
125–130°F (52–54°C)
Medium-Rare
125–130°F (52–54°C)
130–135°F (54–57°C)
Medium
135–140°F (57–60°C)
140–145°F (60–63°C)
Medium-Well
145–150°F (63–66°C)
150–155°F (66–68°C)
For most home cooks, pulling at 128–132°F gives the safest path to a perfect medium-rare strip.
⚠️ Common Mistake Cooking New York strip to well-done and expecting tenderness. This cut has less internal fat than ribeye, so overcooking quickly makes it dry and chewy.
How to Cook New York Strip in a Skillet
Ingredients
1 New York strip steak (1.25–1.75 in thick)
Kosher salt
Fresh black pepper
High-smoke-point oil
2 tbsp butter (optional)
Garlic + thyme/rosemary (optional)
Method
Dry and season: Pat dry thoroughly. Salt 40 minutes ahead (or right before cooking if short on time).
Preheat pan: Heat cast iron until very hot.
Sear side one: 2–3 minutes without moving.
Sear side two: 2–3 minutes, then sear fat edge for 20–40 seconds.
Butter baste: Lower heat slightly, add butter, garlic, and herbs, then baste briefly.
Check temp: Pull at target temperature.
Rest: 5–8 minutes before slicing.
This method gives a deep crust and controlled doneness, especially useful for weeknight cooking.
How to Grill New York Strip
Grill cooking highlights the strip’s beef flavor with smoke and char.
Two-Zone Grill Setup
Hot zone: direct searing
Medium zone: finishing to target temp
Steps
Preheat grill thoroughly.
Sear each side 1.5–3 minutes over direct heat.
Move to indirect/medium zone if needed to finish.
Pull at target temp and rest 7–10 minutes.
For very thick strips (2 inches+), reverse sear gives better edge-to-edge control.
🥩 Pro Tip On grill, place the fat cap side toward the hottest section for brief rendering. This improves flavor and reduces chewy edge fat.
Should You Marinate New York Strip?
Usually not necessary. New York strip already has strong beef flavor and enough tenderness for direct seasoning. Heavy marinades can mask its character.
Better options:
Simple salt + pepper + butter baste
Dry brine overnight for deeper seasoning
Finishing sauce after cooking (chimichurri, peppercorn, red wine reduction)
Best Sauces and Sides for New York Strip
Top Sauce Pairings
Peppercorn cream sauce
Chimichurri
Garlic-herb butter
Blue cheese butter
Great Side Dishes
Crispy potatoes or mashed potatoes
Roasted mushrooms
Grilled asparagus
Simple green salad with acidity (lemon/vinegar)
Use contrast: rich steak plus bright, acidic components gives better balance.
Common New York Strip Mistakes
Not rendering fat edge
Fix: hold steak on fat side briefly with tongs.
Pan not hot enough
Fix: preheat longer. Gray steak means weak Maillard reaction.
No resting period
Fix: rest at least 5 minutes to keep juices inside.
Slicing with the grain
Fix: slice against the grain for tenderness.
⚠️ Common Mistake Pressing steak down repeatedly with a spatula. That squeezes juices out and hurts crust quality.
Nutrition Snapshot
Exact values vary by trim and grade, but New York strip is generally high in protein, rich in iron and B vitamins, and moderate-to-high in fat. Compared to ribeye, it is often slightly leaner while still delivering full steakhouse flavor.
Final Takeaway
New York strip is the benchmark steak for people who want pure beef flavor with a structured bite. Buy it thick, cook to medium-rare or medium, render the edge fat, and rest before slicing. With those steps, this cut becomes one of the most dependable and impressive steaks you can cook at home.
Dry-Aging, Wet-Aging, and Flavor Development
New York strip responds very well to aging. Wet-aged strip keeps a cleaner, more straightforward beef character and often feels juicier. Dry-aged strip develops nuttier, concentrated flavor with subtle funk and deeper savory notes. If you are building a premium home steak experience, a 21- to 35-day dry-aged strip is a strong upgrade.
For weeknight cooking, high-quality wet-aged Choice still performs extremely well. The key is consistency in sourcing and thickness, not just label prestige.
How to Handle New York Strip for Meal Prep
If you buy steaks in larger packs, portioning and storage technique directly affects final quality. Keep individual steaks wrapped tightly, remove excess air, and chill at stable refrigerator temperature. For freezing, vacuum seal where possible. Thaw slowly in the fridge, then dry thoroughly before cooking. Rapid thawing at room temperature can create uneven surface moisture and weak sear results.
A practical workflow is to season after thawing, then dry brine overnight for the next day’s cook. That gives you cleaner crust and more reliable doneness.
Serving New York Strip for Guests
For dinner parties, cook two large strips to medium-rare and slice against the grain on a board just before serving. This lets guests choose portion size and keeps service smoother than managing multiple individual steaks. Finish with flaky salt and a side sauce rather than drowning the meat directly. You preserve crust while still offering flexibility.
If some guests prefer higher doneness, quickly return sliced portions to a warm pan for 20–40 seconds without overcooking the whole steak.
Wine and Beverage Pairings
New York strip pairs best with medium-to-full-bodied reds that support its beef intensity without overpowering texture. Cabernet Sauvignon, Malbec, Syrah, and Tempranillo are classic choices. If you prefer beer, choose amber ales, stouts, or dry-hopped IPAs depending on whether your side sauce is creamy or herb-forward.
For non-alcoholic pairing, sparkling water with citrus or unsweetened black iced tea helps cut through fat and refresh the palate between bites.
Final Practical Checklist
Buy thick (1.25+ inches)
Pat dry completely
Salt early when possible
Sear hard, finish controlled
Use thermometer
Rest before slicing
Slice against grain
If you follow this checklist consistently, New York strip becomes one of the easiest premium steaks to master at home.
FAQ: New York Strip
Should I trim the fat cap before cooking?
No. Keep it during cooking for flavor and moisture support. Trim after cooking if you want a leaner serving.
Can I cook New York strip from frozen?
You can, but results are less consistent. Thaw slowly in the refrigerator for best texture and even doneness.
Is New York strip good for beginners?
Yes. It is easier than many people expect, especially when you use a thermometer and proper resting time.
Pan or grill—what is better?
Both are excellent. Pan gives more control and easy basting; grill adds smoke and char depth.
The difference between a disappointing steak and an outstanding one often comes down to doneness. Cook it 10 degrees too far and texture, juiciness, and flavor all suffer. But doneness is not about memorizing rules—it is about understanding what happens inside the meat as temperature rises, and matching that to your preferences and the cut you chose.
This guide covers every standard doneness level, exact temperature targets, visual cues, texture tests, and how different cuts respond at each stage. Whether you prefer your steak cool and red or fully cooked through, you will know exactly what to aim for and how to get there.
🥩 Pro Tip Always pull steak 5°F below your target doneness. Carryover cooking continues even after the pan, and resting lets internal temperature climb to your ideal final state.
What Is Steak Doneness?
Doneness refers to the internal temperature and corresponding color, texture, and moisture of cooked steak. As heat penetrates the meat, proteins denature, fats melt, moisture redistributes, and color shifts from red to pink to brown.
Different people prefer different levels because preferences for chew, juice, and flavor intensity vary. There is no “correct” doneness—only the one that matches your taste and the characteristics of your cut.
150°F+ (66°C+): Most moisture expelled, proteins fully coagulated, gray-brown throughout.
🌡️ Key Takeaway Higher temps = firmer texture + less moisture. Lower temps = softer texture + more juice. Choose based on cut fattiness and personal preference.
The 6 Standard Doneness Levels
1. Blue Rare (Very Rare)
Pull temp: 115–120°F (46–49°C) Final after rest: 120–125°F (49–52°C) Appearance: Seared outside, cool deep red inside, almost raw Texture: Extremely soft, very juicy Best for: Ultra-premium cuts with excellent marbling (wagyu, high-grade ribeye) Notes: Not for everyone. Surface must be seared properly for food safety.
2. Rare
Pull temp: 120–125°F (49–52°C) Final after rest: 125–130°F (52–54°C) Appearance: Bright red center, thin cooked band at edges Texture: Soft, very juicy, slight resistance Best for: Tender cuts like filet mignon, ribeye, strip Notes: Marbling has not fully melted yet; better for leaner cuts or very high-quality beef.
3. Medium-Rare
Pull temp: 125–130°F (52–54°C) Final after rest: 130–135°F (54–57°C) Appearance: Warm red center, wider pink zone Texture: Tender, juicy, some spring when pressed Best for: Almost all premium steaks—ribeye, strip, filet, porterhouse Notes: This is the sweet spot for most steak lovers. Marbling melts nicely, texture stays tender, flavor is full.
🥩 Pro Tip Medium-rare is the most forgiving target. Even if you overshoot slightly, the steak usually remains juicy and flavorful.
4. Medium
Pull temp: 135–140°F (57–60°C) Final after rest: 140–145°F (60–63°C) Appearance: Warm pink center, outer zones fully cooked Texture: Firmer bite, less juice, still moist if well-marbled Best for: Fattier cuts like ribeye; people who want cooked-through pink without dryness Notes: A safe choice for mixed groups. Balances doneness with moisture retention.
5. Medium-Well
Pull temp: 145–150°F (63–66°C) Final after rest: 150–155°F (66–68°C) Appearance: Faint pink center, mostly gray-brown Texture: Firm, noticeably drier, some chew Best for: Ground beef patties, less-tender cuts, or personal preference Notes: Premium steaks lose much of their moisture and tenderness here. Choose fattier cuts if cooking to this level.
6. Well Done
Pull temp: 155°F+ (68°C+) Final after rest: 160°F+ (71°C+) Appearance: Gray-brown throughout, no pink Texture: Very firm, dry unless heavily marbled Best for: Specific dietary needs, strong personal preference Notes: Most chefs discourage well-done for expensive cuts, but if you prefer it, cook lower and slower to preserve as much moisture as possible.
⚠️ Common Mistake Cooking filet mignon or lean sirloin to well-done. These cuts have little fat to protect texture, so they turn tough and dry.
Insert probe from the side into the thickest part. Avoid bone or fat pockets. This is the only truly reliable method.
Method 2: Touch Test
Compare steak firmness to the base of your thumb when making different hand gestures. This is a rough guide, not precise:
Relaxed hand = rare
Thumb to index = medium-rare
Thumb to middle = medium
Thumb to ring = medium-well
Thumb to pinky = well done
Method 3: Visual Cut Test
Slice a small section to check color. Works but releases juices. Only use if you do not have a thermometer.
Doneness Recommendations by Cut
Cut
Best Doneness
Why
Ribeye
Medium-rare to medium
Melts marbling, keeps tenderness
Filet Mignon
Rare to medium-rare
Lean; overcooking dries it out
New York Strip
Medium-rare to medium
Firm texture, benefits from slight fat rendering
T-Bone/Porterhouse
Medium-rare
Balances strip and tenderloin sides
Sirloin
Medium-rare
Lean; higher temps make it chewy
Flank/Skirt
Medium-rare max
Thin, cooks fast; well-done = shoe leather
Carryover Cooking: Why Resting Matters
After you remove steak from heat, internal temperature continues rising 5–10°F during rest. This is called carryover cooking. If you cook to your exact target without accounting for carryover, your steak will overshoot.
Solution: Pull steak 5°F below your goal, rest 5–8 minutes, and it will land perfectly.
🌡️ Key Takeaway Medium-rare lovers pull at 125–130°F. After rest, internal temp climbs to 130–135°F—exactly where you want it.
Adjusting for Thickness
Thick steaks (2+ inches) need gentler heat or reverse sear to avoid overcooking edges while hitting center temp. Thin steaks (under 1 inch) cook so fast that medium-rare is hard to achieve—they often jump straight to medium or beyond.
Best thickness for control: 1.25–1.75 inches.
Common Doneness Mistakes
Mistake 1: Cooking by Time Alone
Fix: Time varies with thickness, pan heat, and starting temp. Always use a thermometer.
Mistake 2: Cutting Too Soon
Fix: Rest at least 5 minutes so juices stay inside the meat.
Mistake 3: Not Accounting for Carryover
Fix: Pull early and let residual heat finish the job.
Mistake 4: Overcooking Lean Cuts
Fix: Filet and sirloin taste best rare to medium-rare. Past that, they lose moisture fast.
⚠️ Common Mistake Trusting visual cues alone. Color can mislead depending on lighting and marinade. Temp never lies.
How Marinades and Aging Affect Appearance
Marinated steaks or dry-aged beef may look darker or redder than typical. This can throw off visual doneness checks. Stick to thermometer readings for consistency.
Final Word: Know Your Number, Hit It Every Time
Memorize your preferred pull temperature and you will never second-guess yourself again. Great steak is not mysterious—it is just controlled heat applied to a known target.
Start with medium-rare (pull at 130°F). Adjust from there based on what you like. Once you dial it in, you will cook better steaks than most restaurants.
How Cooking Method Changes Doneness Results
Doneness targets stay the same, but cooking method changes how quickly you reach them and how evenly heat spreads through the meat.
Skillet Searing
Fast crust, strong flavor, and rapid temperature climb. Great for 1–1.5 inch steaks. Requires careful timing and active management.
Grill (Two-Zone)
Adds smoke and char flavor. Use direct heat to sear, indirect heat to finish. Excellent for thicker steaks because temperature can be controlled gradually.
Reverse Sear
Best for 1.75-inch+ steaks. Slow oven or indirect heat first, then hard sear at the end. Produces very even doneness and minimal gray band.
Sous Vide + Sear
Most precise method for hitting exact doneness. You set water bath temp, then sear for crust. Texture is consistent but some cooks miss the gradual gradient from edge to center.
🥩 Pro Tip If you often miss your target by one doneness level, switch to reverse sear for thick steaks—it dramatically improves consistency.
Why Rest Time Matters as Much as Temperature
Steaks continue to cook off-heat and the juices redistribute during resting. Skip this step and your plate fills with liquid while the steak dries out in your mouth. Resting is not optional if you care about texture.
Thin steaks: rest 3–5 minutes
Standard steaks (1.25–1.5 in): rest 5–8 minutes
Large bone-in steaks: rest 8–12 minutes
For cleaner presentation, tent loosely with foil—do not wrap tightly, or you’ll steam the crust.
Doneness for Groups: How to Please Everyone
When cooking for guests with different preferences, use this strategy:
Cook one large steak (ribeye, strip, or porterhouse) to medium-rare.
Slice and serve the center pieces to rare/medium-rare eaters.
Return edge slices briefly to pan for medium or medium-well guests.
This avoids overcooking an entire expensive steak just to satisfy one preference.
⚠️ Common Mistake Cooking multiple steaks to different doneness in one pan without tracking temps. Label each steak or use one at a time to avoid confusion.
Altitude, Pan Type, and Other Variables
Small technical factors can shift your outcome:
Cast iron stores heat and browns aggressively.
Stainless steel gives excellent crust but needs better oil control.
Nonstick is safer for eggs, not ideal for steak crust.
High altitude can subtly affect moisture loss and cook timing.
Starting temp (fridge-cold vs tempered) changes timing significantly.
That is why your “7-minute steak” may take 5 minutes one day and 9 minutes another. Use temperature, not memory.
🌡️ Key Takeaway Build your own personal doneness log: cut, thickness, method, pull temp, and result. Two or three sessions are enough to become highly consistent.