Category: Grilling Guides

Equipment, techniques, and tips for grilling

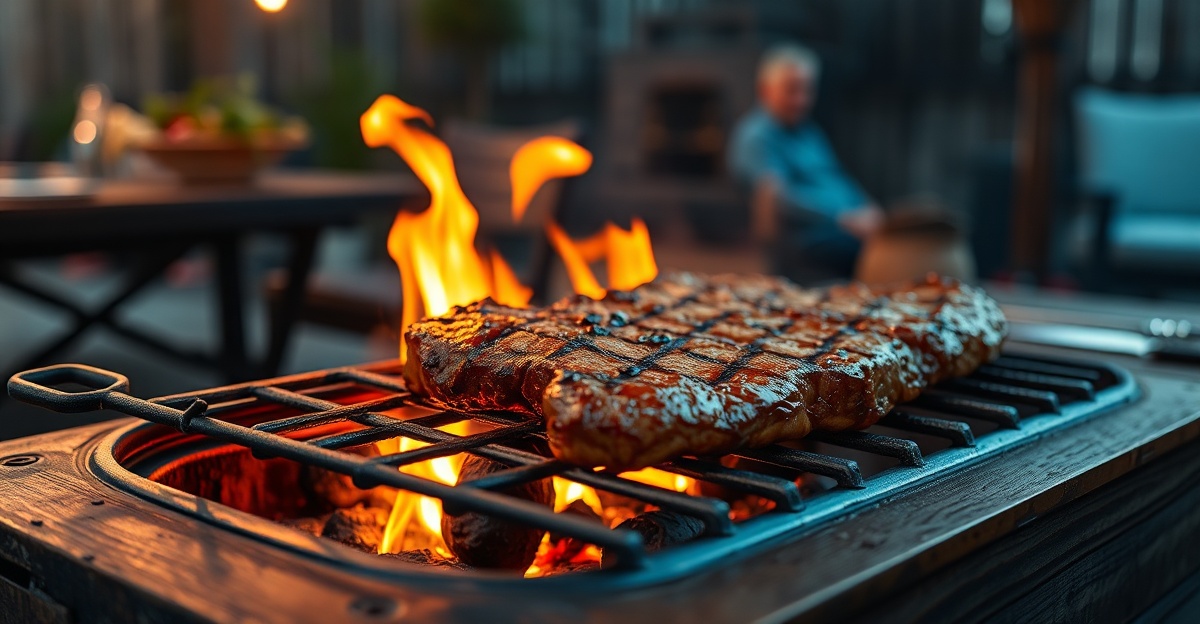
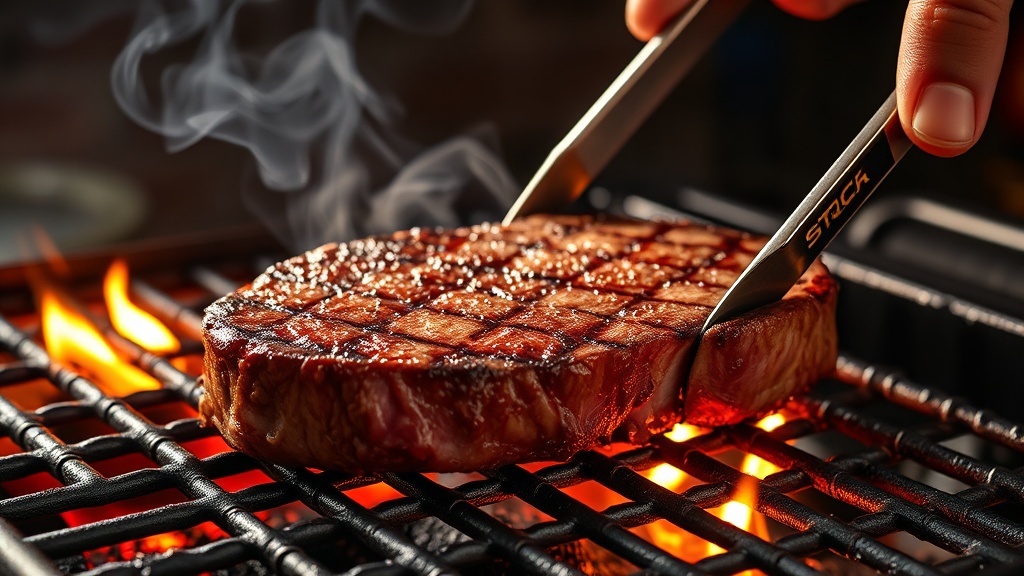
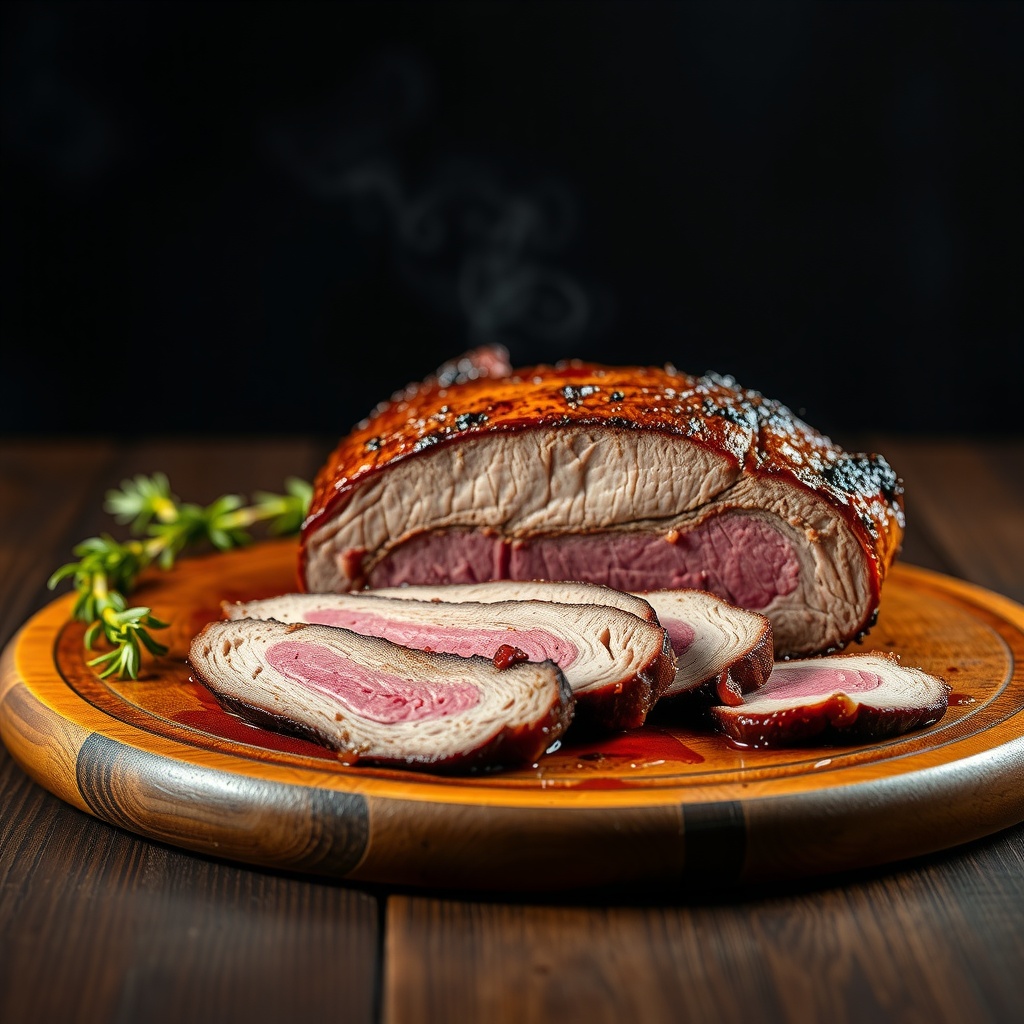
  • The Complete Guide to Brisket Smoking: Master the Art of Low and Slow

    The Complete Guide to Brisket Smoking: Master the Art of Low and Slow

    Smoking a brisket is one of the most rewarding challenges in BBQ culture. This cut of beef transforms from tough to tender through patience, technique, and understanding the science behind low-and-slow cooking. Whether you’re a backyard beginner or looking to refine your method, this guide covers everything you need to know about brisket smoking.

    Understanding Your Brisket Cut

    Before firing up your smoker, understanding brisket anatomy makes a significant difference. A whole packer brisket consists of two muscles: the flat and the point. The flat is leaner and slices beautifully, while the point contains more marbling and fat, making it ideal for burnt ends.

    When selecting your brisket, look for good marbling throughout and a thick, even fat cap. USDA Choice grade offers excellent results for most home pitmasters, though Prime grade delivers even more marbling. Plan on one pound per person when calculating portions.

    Essential Equipment and Setup

    Successful brisket smoking doesn’t require expensive equipment, but certain tools improve consistency. A reliable smoker—whether offset, pellet, kettle, or electric—that maintains steady temperatures between 225-275°F is essential. A quality meat thermometer with dual probes lets you monitor both chamber and internal meat temperature without opening the lid.

    For fuel, many pitmasters prefer oak or hickory for brisket, though mesquite, cherry, and pecan also work well. Avoid over-smoking with heavy woods; you want complementary smoke flavor, not overpowering bitterness.

    The Trimming Process

    Proper trimming sets up better bark formation and even cooking. Remove the thick fat cap down to about 1/4 inch, creating an even surface. Trim away hard fat and silver skin, which won’t render during cooking. Square off uneven edges so the brisket cooks uniformly.

    Some pitmasters separate the point from the flat for more control, though beginners often find keeping the whole packer together more forgiving. The fat between the two muscles naturally bastes the leaner flat during cooking.

    Seasoning Your Brisket

    Traditional Texas-style brisket uses a simple 50/50 blend of coarse black pepper and kosher salt. This classic approach lets the beef and smoke shine. Apply seasoning generously—the “Dalmatian rub” should coat the entire surface.

    For variation, add garlic powder, onion powder, or paprika, but remember that brisket smoking is about beef flavor enhanced by smoke, not masked by spices. Season at least an hour before smoking, or overnight in the refrigeround for deeper penetration.

    The Smoking Process

    Preheat your smoker to 250°F for optimal results. Some pitmasters go as low as 225°F for extra tenderness or as high as 275°F to speed the process—both work, though cooking times vary significantly.

    Place the brisket fat-side up or down depending on your heat source. Fat-side up allows rendering fat to baste the meat; fat-side down protects the leaner flat from direct heat. In offset smokers with heat from the side, many experts recommend fat-side toward the firebox.

    Maintain clean, thin smoke throughout. Heavy white smoke creates bitter, acrid flavors. You want barely visible blue smoke after the first hour. Add wood chunks or chips every hour or so, but don’t overdo it—smoke absorption happens primarily in the first few hours.

    The Stall and the Wrap

    Around 150-170°F internal temperature, brisket enters “the stall”—a frustrating plateau where temperature barely rises for hours. This happens as moisture evaporates and cools the meat. You can wait it out (patience rewarded with better bark) or wrap the brisket to push through.

    The “Texas crutch” involves wrapping in aluminum foil at the stall, trapping moisture and speeding cooking. Butcher paper offers a middle ground—it allows some moisture escape while still accelerating the cook. Unwrapped brisket develops the best bark but takes longest.

    If wrapping, wait until good bark has formed, usually around 165-170°F internal. Add a splash of beef broth, apple juice, or nothing at all, then seal and return to the smoker.

    Knowing When It’s Done

    Forget target temperatures alone—brisket is done when it’s done. Most finish between 195-205°F internal, but texture matters more than numbers. The brisket should feel like soft butter when probed. A thermometer or skewer should slide in with minimal resistance, like probing room-temperature cream cheese.

    Test multiple spots, especially in the thickest part of the flat. Undercooked brisket is chewy; overcooked disintegrates. The sweet spot gives with gentle pressure while still holding its shape.

    The Crucial Rest Period

    Never skip the rest. Brisket needs at least one hour, ideally two to four hours, wrapped in a towel inside a cooler. This redistributes juices throughout the meat and allows carryover cooking to finish the process. Many competition teams rest for six hours or more without quality loss.

    The internal temperature will remain safe for serving as long as it stays above 140°F, which a well-insulated cooler maintains easily.

    Slicing and Serving

    Slicing technique transforms good brisket into great brisket. Always slice against the grain for maximum tenderness. The flat and point have different grain directions, so you’ll need to adjust your angle when moving between sections.

    Slice the flat about pencil-thickness for traditional presentation. The point can be cubed for burnt ends or sliced slightly thicker. A sharp slicing knife makes clean cuts without shredding the meat.

    Common Mistakes to Avoid

    New brisket smokers often make predictable errors. Cooking too hot rushes the process and creates tough meat. Opening the smoker frequently drops temperature and extends cooking time. Under-seasoning leaves bland bark. Slicing with the grain results in chewy, stringy texture.

    Perhaps the biggest mistake is impatience—great brisket cannot be rushed. Plan for 1-1.5 hours per pound at 250°F, though every brisket cooks differently based on thickness, density, and individual characteristics.

    Final Thoughts

    Brisket smoking combines art and science. Your first attempt might not be perfect, but each cook teaches valuable lessons. Keep notes on temperature, timing, wood types, and results. Over time, you’ll develop instincts for your specific equipment and preferences.

    The journey from selecting a raw brisket to slicing tender, smoke-kissed slices takes practice, but few BBQ achievements match the satisfaction of mastering this craft. Fire up your smoker, embrace the process, and enjoy becoming part of the brisket smoking tradition.
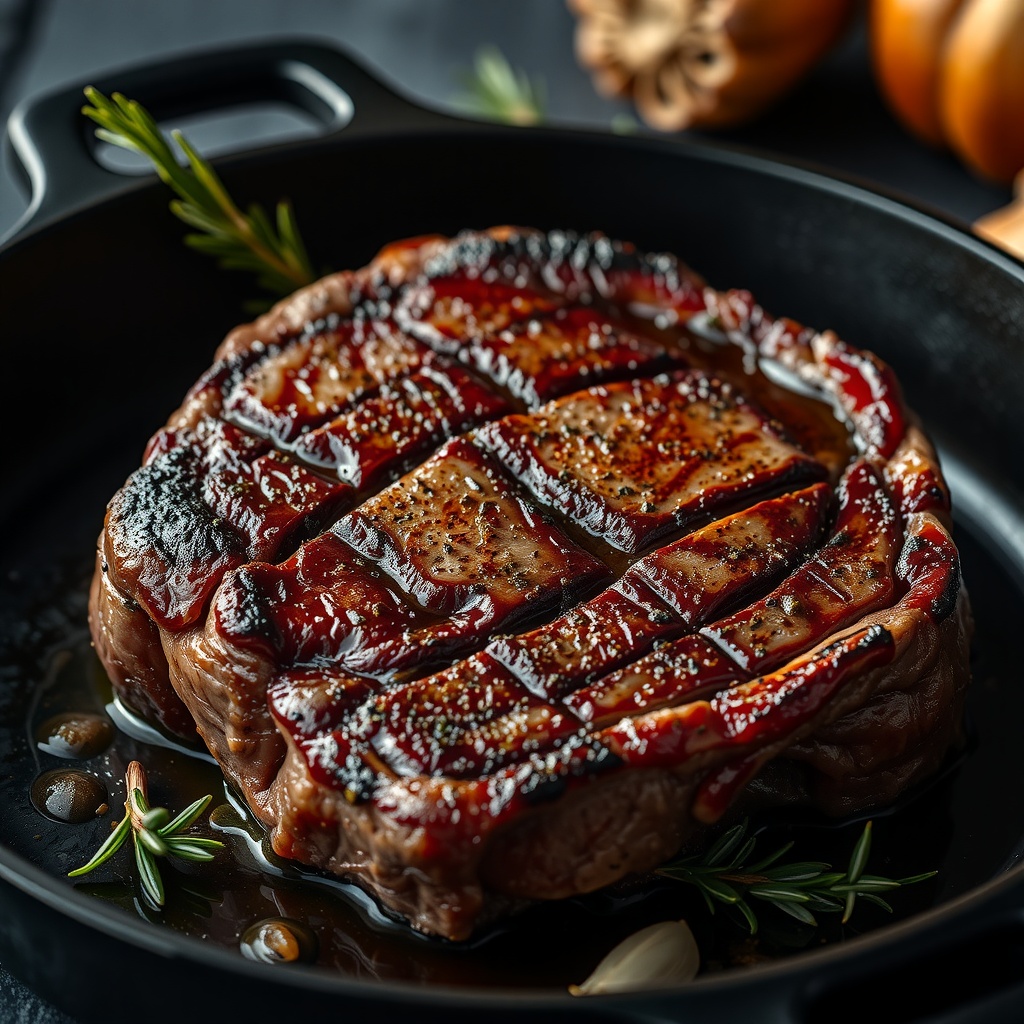
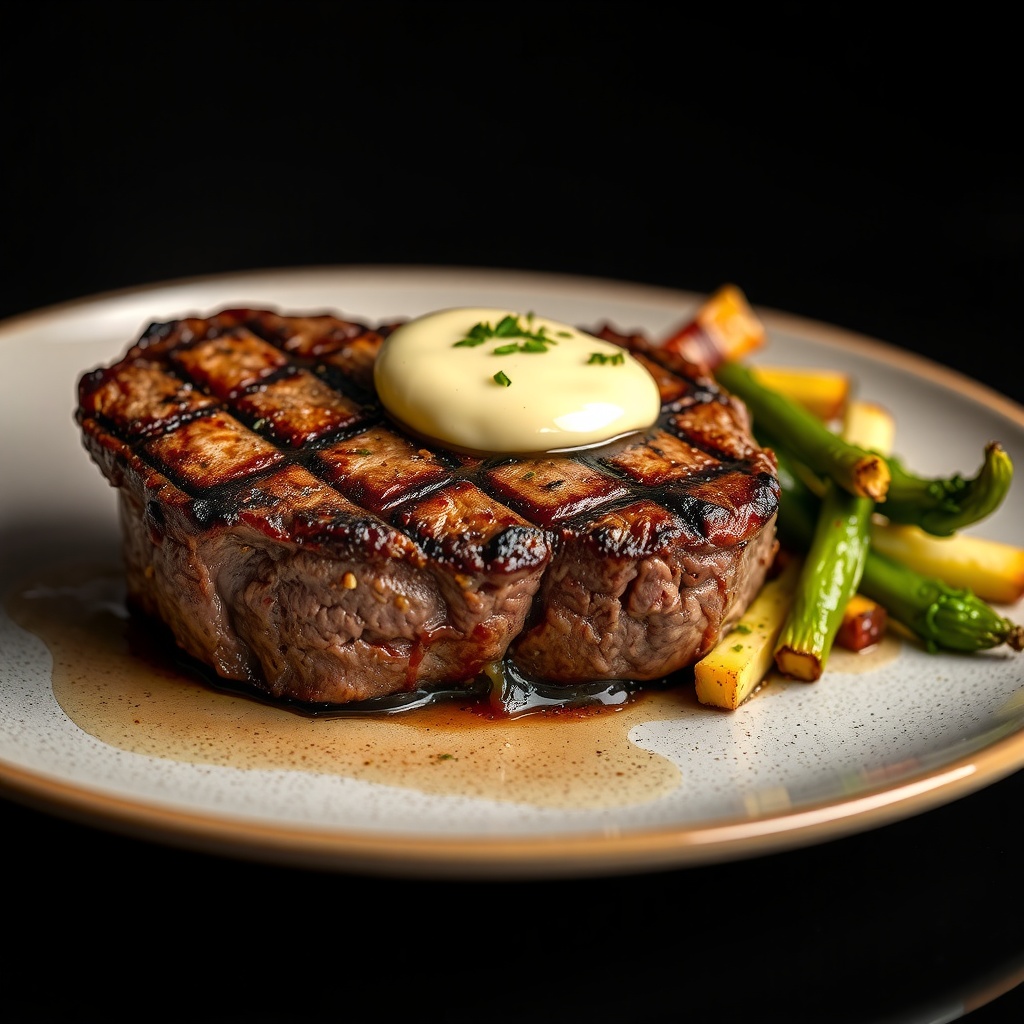
  • The Complete Guide to Reverse Sear Steak: Perfect Results Every Time

    The Complete Guide to Reverse Sear Steak: Perfect Results Every Time

    If you’ve been searching for the ultimate method to cook restaurant-quality steak at home, reverse searing is your answer. This technique has revolutionized home cooking, delivering perfectly cooked steaks with edge-to-edge doneness and an incredible crust.

    What Is Reverse Sear?

    Reverse sear is a two-step cooking method where you slowly cook the steak at low temperature first, then finish it with a high-heat sear. Unlike traditional methods that sear first, this approach gives you unprecedented control over doneness and creates an exceptionally juicy result.

    The beauty of reverse sear lies in its simplicity and reliability. By separating the cooking process into two distinct phases, you eliminate the guesswork and achieve consistent results.

    Why Reverse Sear Works So Well

    Traditional high-heat cooking methods create a gradient of doneness – overcooked edges with a small perfectly cooked center. Reverse sear eliminates this problem by bringing the entire steak to your target temperature gradually.

    The low-and-slow initial cook also dries the surface slightly, which means when you sear, you get an incredible crust without overcooking the interior. This is the secret behind steakhouse-quality results.

    Additionally, the gentle cooking process breaks down tough muscle fibers more effectively, resulting in a more tender bite throughout.

    Choosing the Right Cut

    Reverse sear works best with thick-cut steaks – at least 1.5 inches thick, ideally 2 inches or more. Thinner cuts cook too quickly and don’t benefit from this method.

    Ideal cuts include ribeye, strip steak, filet mignon, and T-bone. Look for good marbling, as the slow cook will render the fat beautifully, adding flavor and moisture.

    Prime or choice grade beef will give you the best results, but even select grade steaks will improve dramatically with this technique.

    Step-by-Step Reverse Sear Method

    Preparation

    Remove your steak from the refrigerator 30-60 minutes before cooking. Season generously with coarse salt and freshly ground black pepper. Some prefer to season just before cooking, but pre-salting helps develop a better crust.

    Pat the steak completely dry with paper towels – moisture is the enemy of a good sear.

    Low-Temperature Cook

    Preheat your oven to 225-275°F. Place the steak on a wire rack over a baking sheet to allow air circulation.

    Insert a meat thermometer into the thickest part. Cook until the internal temperature reaches 10-15°F below your target doneness:

  • Rare: 110°F
  • Medium-rare: 120°F
  • Medium: 130°F
  • Medium-well: 140°F
  • This typically takes 20-45 minutes depending on thickness and desired doneness.

    The Sear

    While the steak rests after the oven, heat a cast-iron skillet or heavy pan over high heat until smoking hot. Add a high smoke-point oil like avocado or grapeseed.

    Sear the steak for 60-90 seconds per side, creating a deep brown crust. Don’t move it during searing – let the Maillard reaction work its magic.

    For extra flavor, add butter, garlic, and fresh herbs during the final moments, basting the steak constantly.

    Temperature Guide and Timing

    Understanding target temperatures is crucial. Remember, the steak will rise another 5°F during searing, which is why you pull it early from the oven.

    For a 2-inch ribeye to medium-rare, expect about 30-35 minutes in a 250°F oven, plus 2-3 minutes total searing time.

    Always use an instant-read thermometer – guessing leads to disappointment. Digital probe thermometers that stay in the meat during cooking are ideal.

    Common Mistakes to Avoid

    The biggest error is overcrowding your timeline. Reverse sear takes patience – trying to rush the low-cook phase defeats the purpose.

    Another mistake is insufficient heat during searing. Your pan should be smoking hot, or you’ll steam rather than sear.

    Don’t skip the rest period after searing. Give your steak 5-10 minutes to allow juices to redistribute.

    Variations and Pro Tips

    Try smoking your steak instead of using the oven for the low cook. A pellet grill or charcoal smoker at 225°F adds incredible flavor.

    Compound butter melted over your finished steak elevates the experience. Mix softened butter with herbs, garlic, or blue cheese.

    For an extra-crispy crust, after the oven and before searing, refrigerate the steak uncovered for 20 minutes. This dries the surface even more.

    Sides That Complement Reverse Sear Steak

    Since your oven is already running low, consider roasting vegetables alongside your steak. Brussels sprouts, asparagus, or carrots develop wonderful caramelization at these temperatures.

    Classic steakhouse sides like creamed spinach, baked potato, or garlic mashed potatoes pair beautifully.

    A simple arugula salad with lemon vinaigrette cuts through the richness perfectly.

    Equipment You’ll Need

    Essential tools include a reliable meat thermometer, wire rack, baking sheet, and heavy skillet or cast-iron pan.

    Optional but helpful: infrared thermometer to check pan temperature, kitchen timer, and tongs (never pierce your steak with a fork).

    Quality equipment makes the process easier, but you don’t need specialty items – basic kitchen tools work fine.

    The Science Behind Perfect Steak

    Reverse sear leverages two key principles: gentle heat denatures proteins without squeezing out moisture, while high heat triggers the Maillard reaction creating complex flavors and aromas.

    The temperature gradient in traditional methods can be 100°F or more from edge to center. Reverse sear reduces this to 10-20°F, meaning almost the entire steak is perfectly cooked.

    Understanding this helps you troubleshoot and adapt the method to your preferences.

    Conclusion

    Reverse sear transforms steak cooking from guesswork to precision. While it takes longer than traditional methods, the superior results are worth every minute.

    Once you master this technique, you’ll never go back to conventional high-heat methods. Your steaks will rival the best steakhouses, with consistent doneness, incredible crust, and maximum juiciness.

    Start with a quality thick-cut steak, be patient with the low cook, and sear with confidence. Your perfect steak awaits.

  • Reverse Sear Steak: The Method That Changes Everything

    Reverse Sear Steak: The Method That Changes Everything

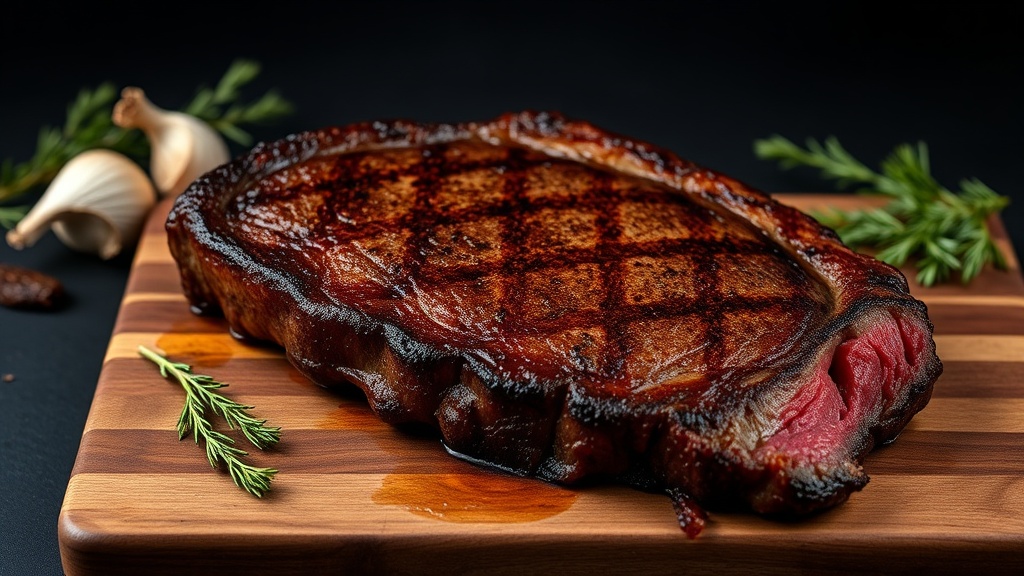
    If you’ve ever cut into a steak and found the edges gray and overcooked while the center barely reached medium-rare, you already know the problem. Traditional high-heat searing works — but it’s unforgiving. One extra minute and you’ve lost it. The reverse sear steak method flips the script, giving you edge-to-edge perfection with a crust that would make a steakhouse chef jealous.

    What Is the Reverse Sear Method?

    The reverse sear is exactly what it sounds like: you cook the steak at low heat first, then finish with a blazing-hot sear. Instead of starting with a hot pan and hoping the inside catches up, you gently bring the steak to just below your target temperature in the oven (or grill set up for indirect heat), then hit it with maximum heat to build the crust.

    The result is a steak cooked to the same temperature from edge to edge — no gray band, no guessing, no stress. It’s not a trick. It’s physics working in your favor.

    Why Reverse Sear Beats Traditional Searing

    Traditional searing relies on speed. You drop a cold steak into a screaming-hot pan and hope the heat penetrates evenly before the outside burns. The problem: meat is a poor conductor of heat. By the time the center reaches 130°F, the outer half-inch has already climbed past 160°F — that’s the gray ring you see in most home-cooked steaks.

    The reverse sear eliminates this entirely. Low oven heat (225–250°F) moves slowly and evenly through the meat. The entire steak reaches close to your target temperature at roughly the same time. Then the quick, final sear — 60 to 90 seconds per side — builds the Maillard crust without pushing the interior any further.

    The Bonus: A Better Crust

    Here’s something most people don’t expect: the reverse sear actually produces a better crust than starting with a sear. During the low-and-slow oven phase, the surface of the steak dries out. Dry surface = faster, more even browning when it hits the hot pan. You get a deeper, crispier crust in less time, with less smoke.

    How to Reverse Sear a Steak: Step by Step

    Step 1: Choose the Right Steak

    Reverse sear shines on thick cuts — at least 1 inch, ideally 1.5 to 2 inches. Think ribeye, New York strip, T-bone, or porterhouse. Thinner steaks cook too fast at low heat for the method to be worth it. For those, a standard sear works fine.

    Prime or Choice grade with good marbling will give you the best results. The fat renders beautifully during the slow oven phase.

    Step 2: Season Generously and Rest

    Pat the steak completely dry with paper towels. Season aggressively with kosher salt and freshly cracked black pepper on all sides, including the edges. For best results, season the night before and leave the steak uncovered in the refrigerator — this dry brining process draws out moisture, then reabsorbs it, seasoning the meat deeper and further drying the surface.

    Step 3: Low and Slow in the Oven

    Preheat your oven to 225–250°F (107–121°C). Place the steak on a wire rack set over a baking sheet — this allows air circulation on all sides. Insert a probe thermometer into the thickest part of the steak.

    Cook until the internal temperature reaches:

    • 115°F for rare (final target: 125°F)
    • 120°F for medium-rare (final target: 130–135°F)
    • 130°F for medium (final target: 140–145°F)

    Pull it 10–15 degrees below your final target — the sear will add those last degrees. Depending on thickness, this takes 25–45 minutes for a 1.5-inch steak.

    Step 4: The Sear

    While the steak is in the oven, get your cast iron skillet (or carbon steel pan) screaming hot. Add a high-smoke-point oil — avocado oil or refined vegetable oil works well. When the oil begins to shimmer and smoke, you’re ready.

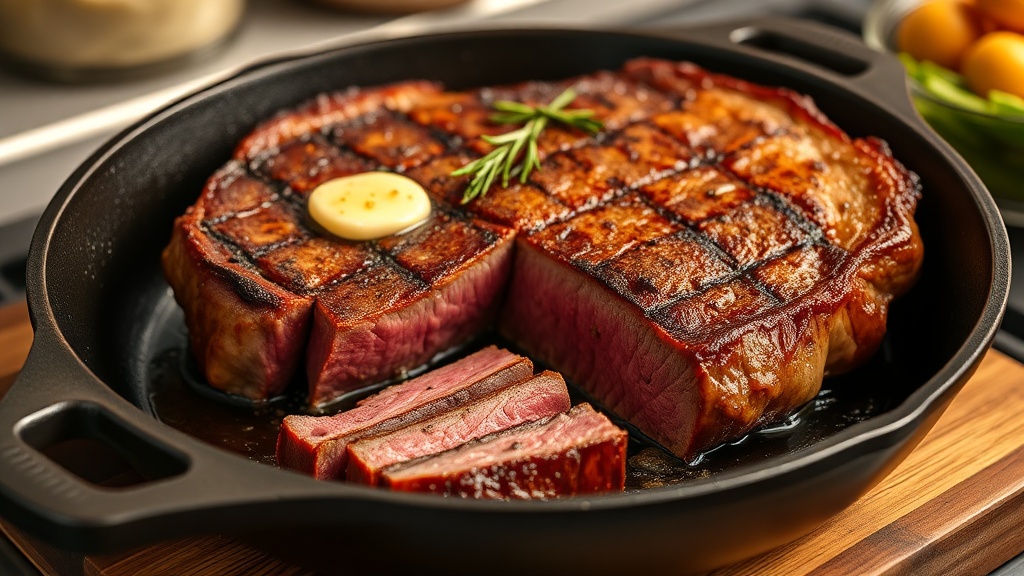
    Sear the steak 60–90 seconds per side without moving it. Press it gently for full contact. Add butter, smashed garlic, and fresh thyme in the last 30 seconds and baste constantly. Sear the edges too — stand the steak up and roll it around the edges for 30 seconds total.

    Because the steak was already dried during the oven phase, the crust forms fast and even. Pull it when the crust is deep brown and the thermometer reads your target temperature.

    Step 5: Rest — or Don’t

    Here’s a surprise: with the reverse sear, you don’t need a long rest. The slow oven phase already allowed the proteins to relax and the juices to redistribute. A 5-minute rest while you plate is sufficient. The steak stays hot, the crust stays crispy, and you can eat it while it’s at its best.

    Reverse Sear on the Grill

    The method works beautifully outdoors too. Set up your grill for two-zone cooking: coals or burners on one side only. Cook the steak on the indirect side with the lid closed until it’s 10–15 degrees below target, then move it directly over the coals for the final sear. You get smokier flavor and the same edge-to-edge precision.

    On a charcoal grill, this approach pairs especially well with a small chunk of hardwood — cherry or hickory adds a light smoke layer that complements the beef without overpowering it.

    Common Mistakes to Avoid

    Pulling at the wrong temperature. Don’t wait until the steak hits your final target in the oven — the sear will add heat. Pull early.

    Skipping the probe thermometer. You cannot do this reliably by feel or time. A $15 instant-read or probe thermometer is non-negotiable.

    Not patting dry. Moisture kills crust. Pat thoroughly before seasoning and again (lightly) before the sear if the surface looks damp.

    A lukewarm pan. The sear has to be fast. If the pan isn’t properly preheated, the steak steams instead of searing and you lose the crust.

    Final Thoughts

    The reverse sear steak method isn’t a gimmick — it’s the most reliable path to a perfectly cooked, beautifully crusted steak that home cooks can replicate every single time. It takes a bit longer than a straight pan sear, but the margin of error is practically zero. Once you cook a steak this way, it’s hard to go back.

    Thick ribeye, bone-in strip, or a tomahawk on the weekend — the reverse sear handles all of it. Try it once and you’ll understand why chefs and serious home cooks have made it their default method.

  • Reverse Sear Steak: The Technique That Changed How We Cook Thick Cuts

    Reverse Sear Steak: The Technique That Changed How We Cook Thick Cuts

    The reverse sear isn’t a trend — it’s a fundamental shift in how to approach thick steaks. If you’ve ever struggled with an overcooked gray band around your medium-rare center, the reverse sear is the solution. Here’s everything you need to know about this game-changing technique.

    What Is the Reverse Sear?

    Traditional searing goes hot-first: you sear the outside in a blazing pan, then finish in the oven. The reverse sear does the opposite — you cook the steak slowly in a low oven first, then blast it with high heat at the end.

    The result: an edge-to-edge, perfectly even doneness with a superior crust. No gray ring. No temperature gradient. Just consistent medium-rare from edge to center, with a Maillard-browned crust that beats the traditional method in both texture and flavor.

    Why It Works: The Science

    When you sear first, the high heat creates a significant temperature gradient — the outer layer reaches 160°F+ while the center is still cold. As the steak finishes in the oven, that outer zone keeps cooking. You get a thick band of overcooked meat surrounding your target doneness.

    With reverse sear, the low oven brings the entire steak up to temperature evenly and slowly. By the time you sear, there’s minimal temperature differential — the crust browns quickly without driving the interior past your target.

    An additional bonus: the slow oven phase dries the surface of the steak, which produces a dramatically better crust when it hits the hot pan. Dry surface = better Maillard reaction = better crust.

    Best Cuts for Reverse Sear

    The technique shines on thick cuts — ideally 1.5 inches or more. Thinner steaks cook too quickly in the oven phase to develop the benefits.

    • Ribeye (bone-in or boneless) — Best overall choice. The fat renders beautifully during the slow phase.
    • Tomahawk — Made for this technique. 2-inch thick cuts benefit enormously.
    • New York Strip — Leaner but excellent results.
    • Filet Mignon — Perfect for those who want center-cut precision.
    • Porterhouse / T-bone — The even cooking is especially valuable with two muscle types.

    What You’ll Need

    • Steak (at least 1.5 inches thick)
    • Wire rack + rimmed baking sheet
    • Oven thermometer (oven temps often lie)
    • Instant-read thermometer
    • Cast iron skillet or carbon steel pan
    • High smoke-point oil
    • Butter, garlic, herbs for finishing

    Step-by-Step Reverse Sear Method

    Step 1: Season and Set Up

    Season your steak generously with kosher salt and black pepper on all surfaces. For optimal results, season the night before and leave uncovered in the refrigerator — this dry brines the meat and further dries the surface for a better crust. If you don’t have time, season 45 minutes before cooking.

    Place the steak on a wire rack set over a rimmed baking sheet. The rack allows air circulation on all sides.

    Step 2: Low Oven Phase

    Preheat your oven to 250°F (120°C). Place the steak in the oven with an oven-safe thermometer probe inserted into the thickest part, or plan to check with an instant-read every 10–15 minutes.

    Cook until the internal temperature is 10–15°F below your target:

    • For medium-rare (target: 130°F): pull at 115–120°F
    • For medium (target: 145°F): pull at 130–135°F

    Time varies by thickness: a 1.5-inch steak takes approximately 25–35 minutes. A 2-inch tomahawk may take 45–60 minutes. Go by temperature, not time.

    Step 3: Rest (Briefly)

    Remove from the oven and let the steak rest uncovered for 10 minutes. This brief rest allows the surface to cool slightly and dry further. Unlike the traditional method, this pre-sear rest is intentional — a cooler surface gives you a longer sear window before the interior overcooks.

    Step 4: The Sear

    Heat your cast iron skillet over the highest heat possible for 4–5 minutes. Add a thin layer of oil and let it begin to smoke. This is where you don’t hold back.

    Place the steak in the pan and press it down gently to maximize contact. Sear each side for 45–90 seconds — you’re not cooking the steak here, you’re creating the crust. Because the interior is already at near-target temperature, you have very little time before it overcooks. Don’t walk away.

    While searing, add butter, garlic, and herbs. Baste continuously. Sear the edges too — stand the steak on its side using tongs for 30 seconds per edge.

    Step 5: Rest and Serve

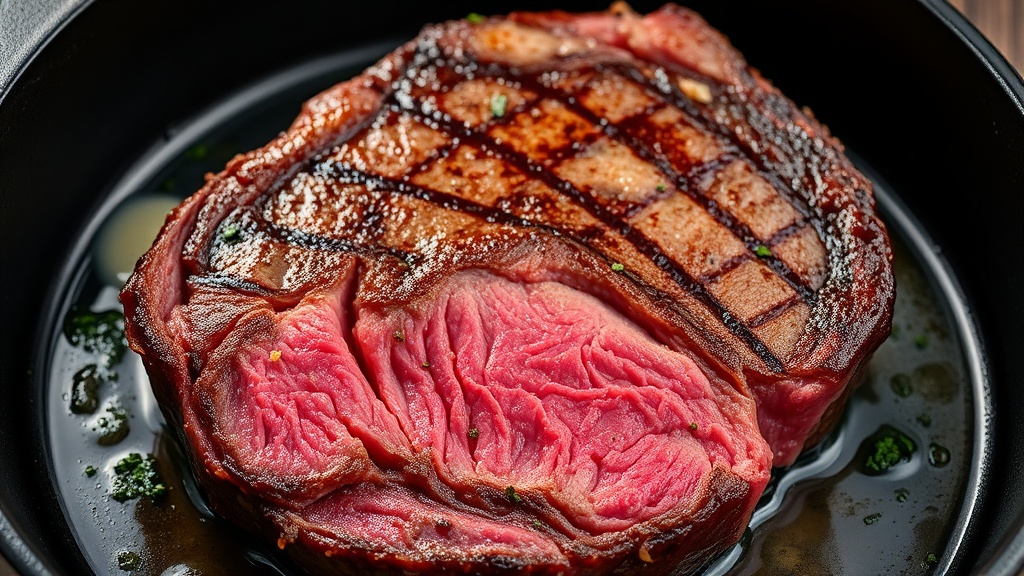
    Rest for 5 minutes after searing. Slice against the grain. You’ll see what perfect even doneness looks like — rosy pink from edge to edge, no gray band, and a deep mahogany crust.

    Reverse Sear vs. Traditional Sear: Which Is Better?

    For thin steaks (under 1 inch), traditional searing is faster and the difference is minimal. For anything over 1.5 inches, the reverse sear wins almost every time. The control, the crust quality, and the edge-to-edge evenness are difficult to match with the traditional method.

    Common Mistakes

    Pulling Too Early From the Oven

    If you pull at too low a temperature, the sear phase will need to be longer — which risks overcooking. Hit your target pull temperature.

    Not Getting the Pan Hot Enough

    A warm pan on a pre-cooked steak is a disaster. You need maximum heat to get a fast crust. Preheat the pan for at least 4 minutes on high.

    Skipping the Wire Rack

    Cooking the steak directly on the baking sheet traps moisture underneath. The rack makes a real difference in surface dryness.

    The Bottom Line

    The reverse sear takes more time than a traditional sear, but the results are consistently better for thick cuts. Once you try it on a 2-inch ribeye or tomahawk, you’ll understand why it’s become the preferred method for serious home cooks and professional chefs alike. It’s not complicated — it just requires patience and a thermometer.

  • Air Fryer Steak: Surprisingly Delicious and Ready in 15 Minutes

    Air Fryer Steak: Surprisingly Delicious and Ready in 15 Minutes

    If someone told you five years ago that an air fryer could produce a genuinely good steak, you’d probably have laughed. But here we are — and air fryer steak has earned its place in the weeknight rotation. It’s fast, low-mess, and with a couple of key techniques, delivers results that are far better than they have any right to be.

    Can You Really Cook Steak in an Air Fryer?

    Yes — and the reason it works is the same reason it works for chicken thighs and Brussels sprouts. The air fryer circulates superheated air at high speed, effectively creating a compact convection oven that cooks quickly and promotes surface browning. You won’t get a cast iron sear, but you’ll get a browned, cooked-through steak with a tender interior in about 12–15 minutes total.

    The limitations are real: air fryers run small, so thick tomahawk cuts are out. And the crust won’t match a properly seared cast iron steak. But for a fast, satisfying weeknight steak? It’s a legitimate option.

    Best Cuts for Air Fryer Steak

    Cuts that work well in the air fryer share one thing: manageable thickness and good marbling.

    • Ribeye (1–1.25 inches) — Fat renders nicely under the hot circulating air
    • New York strip — Firm, forgiving, and holds temperature well
    • Sirloin — Budget-friendly and cooks evenly
    • Filet mignon — Tender and fast-cooking; easy to nail medium-rare
    • Flat iron — Underrated cut that air fries beautifully

    Avoid extremely thin steaks (under 3/4 inch) — they’ll overcook before getting any surface color. And very thick, bone-in cuts likely won’t fit.

    What You Need

    • Air fryer (basket or oven-style, preheated)
    • Instant-read meat thermometer
    • Kosher salt and black pepper
    • Olive oil or avocado oil
    • Optional: garlic powder, onion powder, smoked paprika for the rub
    • Butter and garlic for finishing

    Air Fryer Steak: Step-by-Step

    Step 1: Season Generously

    Pat the steak completely dry. Rub lightly with oil on all sides, then season with kosher salt and black pepper — more than you think you need. For extra flavor, add a light dusting of garlic powder and smoked paprika. Let it sit at room temperature for 20–30 minutes if you have time.

    Step 2: Preheat the Air Fryer

    Preheat your air fryer to 400°F (204°C) for 3–5 minutes. This is important — a cold air fryer basket means the steak starts cooking slowly on the bottom while the top lags behind. Preheating gives you a more even cook from the moment the steak goes in.

    Step 3: Cook to Temperature

    Place the steak in the air fryer basket in a single layer, not touching the sides. Cook at 400°F:

    • Rare (120–125°F): 5–6 min per side for a 1-inch steak
    • Medium-rare (130–135°F): 6–7 min per side
    • Medium (140–145°F): 7–8 min per side
    • Medium-well (150°F+): 9–10 min per side

    These are guidelines — air fryers vary significantly between brands and models. Flip halfway through and check with a thermometer, not a clock. Pull the steak when it’s 3–5°F below target, as it will continue cooking briefly after removal.

    Step 4: Finish with Compound Butter

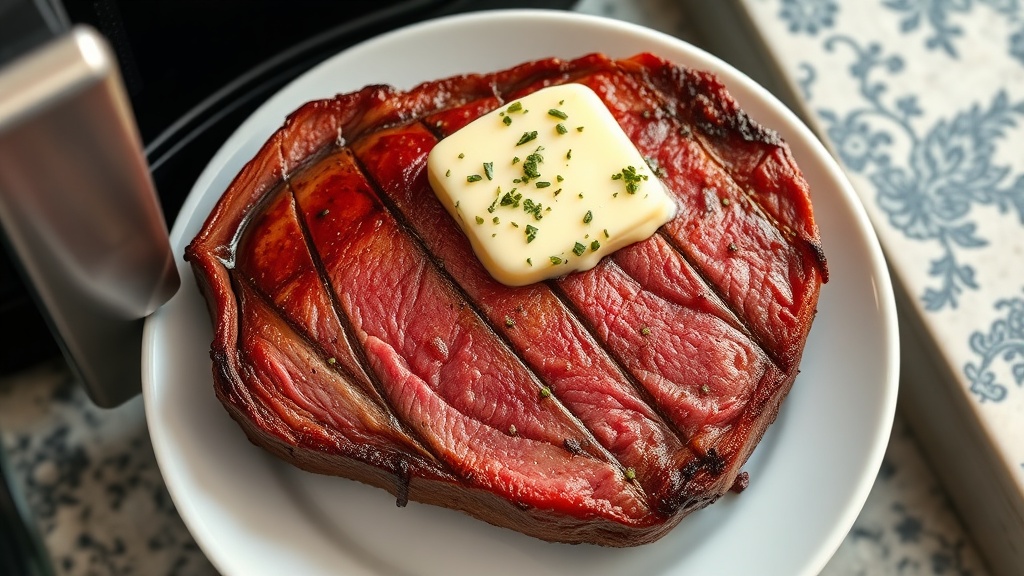
    As soon as the steak comes out of the air fryer, top it with a pat of butter — or even better, a slice of garlic herb compound butter. The residual heat melts it over the surface and adds a richness that rounds out the flavor. Let the steak rest for 3–5 minutes before slicing.

    Tips for Better Air Fryer Steak

    • Don’t skip preheating. Cold basket = uneven cooking.
    • Dry the surface well. Moisture prevents browning. Pat dry before oiling.
    • Don’t overcrowd. One steak at a time for best results. Two small ones is fine if they fit without touching.
    • Check your air fryer’s hot spots. Some basket models cook the back or sides hotter. Rotate or flip accordingly.
    • Add a quick stovetop sear if you want more crust. Air fryer for the cook, cast iron for 60 seconds of sear at the end — a hybrid approach that gives the best of both worlds.

    Air Fryer vs. Stovetop: Which Is Better?

    For pure steak performance, a properly heated cast iron wins — the Maillard reaction crust is deeper and more complex. But the air fryer has clear advantages:

    • No smoke (ideal for apartments and small kitchens)
    • Easier cleanup — no splatter on the stovetop
    • Hands-off cooking — set and check the thermometer
    • Consistent results once you know your machine’s behavior

    For a quick, clean weeknight meal, the air fryer is genuinely competitive. For a Sunday showstopper, break out the cast iron.

    Quick Air Fryer Steak Summary

    • Pat dry → season well → lightly oil
    • Preheat air fryer to 400°F
    • Cook to internal temp, flipping halfway (use a thermometer)
    • Rest 3–5 minutes with butter on top
    • Slice against the grain and serve

    Fast, clean, and better than you expect. Try it tonight.

  • How to Cook Steak in the Oven: Juicy Results Without a Grill

    How to Cook Steak in the Oven: Juicy Results Without a Grill

    No grill? No problem. The oven is one of the most reliable tools for cooking a great steak — especially if you pair it with a quick stovetop sear. Whether you’re dealing with winter weather, a small apartment, or just prefer working indoors, this guide will walk you through everything you need to know to pull off a restaurant-quality steak in your oven.

    The Two-Method Breakdown

    There are two main ways to cook steak in the oven, and which you choose depends on the thickness of your cut:

    • Sear then oven-finish — Best for steaks 1–1.5 inches thick. Sear quickly on the stovetop, then transfer to a hot oven to finish cooking.
    • Reverse sear (oven-first, sear-last) — Better for steaks 1.5 inches and thicker. Slow oven, then finish with a sear for the crust.

    We’ll cover the first method in detail here — it’s the most common approach for weeknight cooking.

    Best Cuts for Oven Cooking

    Not all steaks are equal when it comes to oven cooking. The best choices:

    • Ribeye — Intramuscular fat keeps it juicy through the oven’s dry heat
    • NY Strip — Firm texture holds up well, great crust potential
    • Filet mignon — Lean and tender, benefits from butter basting
    • T-bone / Porterhouse — Oven handles bone-in cuts beautifully
    • Sirloin — Budget-friendly, works well with this method

    What You’ll Need

    • Oven-safe skillet (cast iron is ideal)
    • Instant-read meat thermometer
    • Kosher salt and black pepper
    • High smoke-point oil (avocado, grapeseed)
    • Butter, garlic cloves, fresh rosemary or thyme

    Step-by-Step: Sear and Oven-Finish

    Step 1: Prep Your Steak

    Take the steak out of the fridge 30–45 minutes before cooking. Pat it completely dry with paper towels — moisture is the enemy of a good crust. Season liberally with kosher salt and cracked black pepper on all sides, including the edges.

    Step 2: Preheat Oven and Pan

    Set your oven to 400°F (204°C). While it heats, place your cast iron skillet on the stove over high heat. Let it get screaming hot — 3 to 5 minutes minimum. A properly preheated pan is non-negotiable for a good sear.

    Step 3: Sear on the Stovetop

    Add a thin layer of oil to the hot pan. Carefully lay in the steak away from you to avoid splatter. Sear without moving it for 2 minutes, then flip and sear the other side for 2 minutes. Sear the edges briefly too — this builds flavor on every surface.

    Step 4: Transfer to Oven

    Move the skillet directly into the preheated oven. Cook until your internal temperature is about 5°F below your target, since carry-over cooking will close the gap during resting:

    • Rare (120°F final): Pull at 115°F — about 3–5 min in oven
    • Medium-rare (130°F final): Pull at 125°F — about 5–7 min
    • Medium (140°F final): Pull at 135°F — about 8–10 min
    • Medium-well (150°F final): Pull at 145°F — about 11–13 min

    Times vary based on steak thickness and oven accuracy. Always trust the thermometer over the clock.

    Step 5: Butter Baste (Optional but Worth It)

    Just before pulling from the oven, add 2 tablespoons of butter, a crushed garlic clove, and a sprig of rosemary or thyme to the pan. Tilt the pan and use a spoon to baste the butter over the steak repeatedly for 30–60 seconds. This adds richness and aromatic depth that no marinade can replicate.

    Step 6: Rest Before Cutting

    Remove the steak and let it rest on a cutting board for 5–10 minutes, loosely tented with foil. This allows the internal juices to redistribute throughout the meat. Cutting too early loses those juices to your cutting board instead of keeping them in the steak.

    Oven Temperature Guide

    The standard 400°F approach works for most steaks, but you can adjust:

    • 375°F — Gentler finish, less risk of overcooking thin edges
    • 400°F — All-purpose sweet spot for 1–1.5 inch steaks
    • 450°F — Faster finish, more browning inside the oven (use for very thick cuts or when short on time)

    Broiler Method: Maximum Crust

    If you want an even more aggressive surface sear, use the broiler. Position the rack 3–4 inches from the broiler element. Broil 3–4 minutes per side, watching carefully — broilers vary wildly in intensity. This method is faster and produces a deep, caramelized crust, but requires attention to avoid burning.

    Troubleshooting

    • Steak is grey, not browned: Your pan wasn’t hot enough. Preheat longer next time, and make sure the surface of the steak was completely dry before searing.
    • Steak is overcooked: Oven temperature was too high or you didn’t pull it early enough to account for carry-over. Always pull 5°F early.
    • Steak is tough: Likely underrested or a naturally tougher cut. Slice thin, against the grain.

    The Bottom Line

    Cooking steak in the oven is not a compromise — it’s a legitimate technique that gives you control, consistency, and results that rival the grill. Sear it properly, use a thermometer, rest it fully, and you’ll never look at your oven the same way again.

  • Reverse Sear Steak: The Foolproof Method for a Perfect Crust Every Time

    Reverse Sear Steak: The Foolproof Method for a Perfect Crust Every Time

    The reverse sear method has quietly become the favorite technique of backyard pitmasters and professional chefs alike. Instead of searing first and finishing in the oven, you flip the process: low heat first, blazing hot sear at the end. The result is a steak cooked edge-to-edge to your exact target temperature — with a crust that could win awards.

    What Is the Reverse Sear?

    Traditional searing relies on the idea that a quick blast of high heat "seals in juices" — a myth debunked decades ago. The reverse sear, popularized by food scientist J. Kenji López-Alt, works on a simpler principle: bring the steak’s internal temperature up slowly, then sear it at the very end for the Maillard reaction crust.

    Why does this work better? When steak heats slowly in a low oven, the surface dries out slightly. Dry surface + screaming-hot pan = better crust, faster. You’re not fighting moisture evaporation during the sear — it’s already done.

    What You Need

    • A thick-cut steak — at least 1.5 inches (ribeye, NY strip, or tomahawk work best)
    • Cast iron skillet or heavy stainless pan
    • Oven-safe wire rack and baking sheet
    • Instant-read meat thermometer
    • Neutral oil with high smoke point (avocado or grapeseed)
    • Kosher salt and freshly cracked black pepper
    • Butter, garlic, and fresh thyme for basting

    Step-by-Step: Reverse Sear Steak

    Step 1: Season and Rest

    Season your steak generously with kosher salt and black pepper at least 45 minutes before cooking — ideally overnight in the fridge, uncovered on a wire rack. This dry-brine pulls moisture to the surface, which then gets reabsorbed, seasoning the meat deeper and drying the exterior.

    Step 2: Low Oven, Slow Climb

    Preheat your oven to 225°F (107°C). Place the steak on a wire rack set over a rimmed baking sheet. Insert a probe thermometer into the thickest part of the meat. Roast until the internal temperature reaches:

    • Rare: 115°F (46°C)
    • Medium-rare: 125°F (52°C)
    • Medium: 135°F (57°C)

    A 1.5-inch ribeye will take roughly 25–40 minutes. Thicker cuts take longer. Patience is the ingredient most people skip.

    Step 3: Rest Briefly, Then Sear

    Remove the steak from the oven and let it sit for 5 minutes. This is a short rest — not the long rest you’d give a traditionally cooked steak. You want it warm when it hits the pan.

    Heat your cast iron over the highest heat your stove allows for 3–5 minutes. Add a thin layer of high-smoke-point oil. When the oil begins to shimmer and smoke, lay in the steak. Sear 60–90 seconds per side, pressing gently for full contact. Add butter, crushed garlic, and thyme in the last minute and baste continuously.

    Step 4: Check and Slice

    Because the steak was already brought to temperature in the oven, the final sear adds very little carry-over heat. Your target temperature is essentially your finished temperature. Check with a thermometer, then slice against the grain and serve immediately.

    Reverse Sear on the Grill

    The reverse sear translates beautifully to a two-zone fire. Bank your coals to one side (or use only one burner on a gas grill). Cook the steak on the cool side with the lid closed until it hits your target internal temp. Then move it directly over the hot coals or burner for a 60-second blister on each side. The smoky char you get this way is genuinely extraordinary.

    Common Mistakes to Avoid

    • Using thin steaks. The reverse sear shines on cuts 1.5 inches and above. Thinner steaks cook through before the method has time to do its job.
    • Skipping the thermometer. Guessing by touch is for people who don’t care about consistency. Use a thermometer.
    • Not getting the pan hot enough. A mediocre sear defeats the whole purpose. 5 minutes of pre-heating is not too long.
    • Over-resting after the sear. A traditionally cooked steak needs 5–10 minutes to let juices redistribute. The reverse sear steak needs almost none — it’s already rested during the low oven phase.

    Why the Reverse Sear Beats Sous Vide (Sometimes)

    Sous vide is precise, but it requires equipment and bags. The reverse sear achieves similar edge-to-edge uniformity with nothing but an oven and a thermometer. For most home cooks, it’s the better tradeoff: minimal gear, maximum results.

    The one area where sous vide wins: time flexibility. You can hold a steak in a water bath for hours. With the reverse sear, you’re committing to a timeline. For most dinner situations, that’s perfectly fine.

    Final Notes

    The reverse sear works with any thick-cut beef — tomahawk, bone-in ribeye, cowboy cut, thick NY strip. It even works with pork chops and lamb. Once you understand the principle — slow heat, dry surface, fast sear — it becomes a flexible template you’ll apply constantly.

    Try it once and you’ll wonder why you ever did it the other way.

  • Charcoal Grilling for Beginners: Complete Guide to Success

    Charcoal Grilling for Beginners: Complete Guide to Success

    Essential Charcoal Grilling Equipment for Beginners

    Starting charcoal grilling for beginners doesn’t require an expensive setup, but having the right tools makes a massive difference. A quality grill forms your foundation, while accessories handle the heat and safety concerns that keep you grilling confidently.

    Weber kettle grills dominate the beginner market because they’re affordable, durable, and versatile enough for burgers, ribs, and smoking. The rounded design distributes heat evenly, and the hinged grate lets you access charcoal without removing food. A charcoal chimney starter eliminates lighter fluid and gives you hot coals in 15 minutes—no mess, no chemicals.

    Beyond the grill itself, you’ll need grill grates (or replacement grates if yours are worn), sturdy tongs with a long handle, and a reliable temperature gauge. Long-handled tongs keep your hands away from heat and give you better control flipping steaks. A quality thermometer with a probe eliminates guessing—you’ll know exactly when chicken hits 165°F or your steak reaches medium-rare.

    The five essential charcoal grilling tools for beginners are: (1) a Weber kettle grill or similar 22-inch charcoal grill, (2) a charcoal chimney starter, (3) cooking grates in good condition, (4) long-handled tongs and a grill fork, and (5) a thermometer with a probe for internal temperature checks. Heat-resistant gloves and a stainless steel brush complete your setup for safe, clean cooking sessions.

    Heat-resistant gloves rated for 500°F+ protect your hands when adjusting grates or moving hot charcoal. A brass or stainless steel cleaning brush keeps grates free of buildup, which prevents sticking and extends grate life. Store these tools together so they’re ready whenever you fire up the grill.

    Types of Charcoal: Briquettes vs Lump Charcoal

    Charcoal comes in two main varieties, and choosing between them shapes your entire grilling experience. Understanding the differences helps you pick fuel that matches your cooking style, budget, and the flavors you want on your food.

    Briquettes are compressed charcoal dust mixed with starch binders, shaped into uniform pillow-shaped pieces. Kingsford and Stubbs dominate this market because briquettes burn consistently for 1-2 hours, maintain steady temperatures around 225-250°F without constant adjustment, and cost $3-5 per 10-pound bag. The uniformity means predictable heat—perfect for charcoal grilling for beginners who haven’t yet mastered airflow control.

    Lump charcoal is 100% hardwood with no additives—just chunks of wood burned down to pure carbon. Oak, hickory, and maple create deeper, smokier flavors that briquettes can’t match. Lump charcoal reaches 1200°F+, making it ideal for high-heat searing and quick cooks. A 10-pound bag runs $8-12, costs more per pound than briquettes, but some pieces burn completely in 45 minutes while others last 90 minutes.

    Briquettes burn longer and more consistently (1-2 hours at steady temperatures), while lump charcoal reaches higher temperatures (1200°F+) but burns faster with more temperature fluctuation. Briquettes cost $3-5 per bag, lump charcoal costs $8-12 per bag. Choose briquettes for long, low cooks and temperature stability; choose lump charcoal when you want intense heat and wood smoke flavor.

    Storage differs between the two. Briquettes absorb moisture from humid air and lose their burn quality when damp—store them in an airtight container or sealed bag in a garage or shed. Lump charcoal resists moisture better but costs more, so proper storage still matters. Both types spoil after 6 months in humid climates, so buy what you’ll use within a season.

    How to Light Charcoal Safely and Effectively

    Lighting charcoal safely comes down to using the right method, and the chimney starter beats lighter fluid every single time. A chimney starter is a metal cylinder with a handle, a grate inside, and air vents at the bottom—fill it with charcoal, light newspaper underneath, and physics does the rest. Hot air rises through the vents, ignites the charcoal from bottom to top, and in 15 minutes you have glowing coals ready to dump into your grill.

    The chimney starter method: (1) Crumple two sheets of newspaper and place them in the bottom chamber of your chimney starter. (2) Fill the top chamber with charcoal—either briquettes or lump chunks—packing them loosely so air flows around each piece. (3) Light the newspaper with a long-reach lighter or match, positioning the flame at multiple spots so the paper catches fully. (4) Wait 5-7 minutes for the charcoal on top to turn gray and ashy. (5) Carefully pour the lit charcoal into your grill’s bottom basket, arranging it for either direct heat (spread flat) or indirect heat (pushed to one side). (6) Let coals burn another 2-3 minutes before placing your grill grate on top and cooking.

    Lighter fluid leaves chemical residue that taints meat flavors and produces bitter, off-tasting food—especially noticeable on chicken and fish where subtle flavors matter. The smell alone signals amateur grilling to experienced cooks. Since a chimney starter costs $15-25 and lights charcoal with just newspaper, there’s zero reason to use lighter fluid. Newspaper is free, burns completely without lingering taste, and you control exactly when ignition happens.

    Coal arrangement shapes how your food cooks. For burgers, steaks, and hot-and-fast cooking, spread coals in a single layer across your grill’s entire bottom—this creates direct heat around 400-500°F, perfect for searing. For low-and-slow cooking like ribs or brisket, pile coals on one side only, leaving the other side empty for indirect heat. Place a drip pan with water on the cool side to catch juices and stabilize temperature around 225-250°F.

    Direct vs Indirect Heat Cooking Methods

    Direct and indirect heat are the two fundamental cooking methods on a charcoal grill, and mastering the difference transforms your ability to cook everything from thin steaks to whole chickens. Direct heat means your food sits directly over hot coals, exposing it to intense, immediate heat that sears surfaces and cooks quickly. Indirect heat positions food away from coals, cooking it with ambient heat circulating around your grill’s chamber—more like an oven than a stovetop.

    Direct heat cooking uses coals spread directly beneath food, reaching 400-500°F for fast searing. Indirect heat moves coals to one side of the grill, leaving the opposite side empty, and cooks food at lower temperatures (225-350°F) using surrounding heat. Direct heat works best for steaks, burgers, chicken breasts, and vegetables. Indirect heat suits thick cuts like whole chickens, roasts, ribs, and brisket that need time for heat to penetrate without burning the outside.

    Setting up a two-zone fire takes less than two minutes and gives you maximum flexibility. After dumping hot coals from your chimney starter into the grill, divide your charcoal into two piles. Push all coals to one side of your kettle grill’s basket, leaving the other half completely empty. This creates your hot zone (direct heat) and your cool zone (indirect heat).

    Steaks and burgers demand direct heat because they need crust and char. Lay your meat directly over hot coals, sear for 3-4 minutes per side for medium thickness, and you’re done. The intense heat browns the surface through the Maillard reaction—the chemical process that creates savory flavor and color. High heat (400°F+) is non-negotiable for this task.

    Temperature control separates amateur grilling from confident cooking. Your grill’s bottom vents control airflow, and airflow controls temperature. More air = hotter fire. Less air = cooler fire. When coals are glowing and you want to raise temperature, open the bottom vents fully and crack the top vent open about halfway. To lower temperature on a direct heat side, partially close bottom vents—close them 25-50% depending on how much cooling you need.

    Common mistakes with heat zones happen because people new to charcoal grilling for beginners don’t plan ahead. You might dump all your charcoal into a single pile, creating one-zone cooking where everything is either too hot or too cool. Or you arrange coals correctly but forget the drip pan, so meat drippings fall directly onto coals, create flare-ups, and char your food unevenly. The drip pan solves both problems—it catches flare-causing drippings and provides water vapor that keeps your cooking environment moist and stable.

    Temperature Control and Food Safety Tips

    Temperature control and food safety form the foundation of every successful charcoal grilling session. Your grill’s vents are your primary tool for managing heat, while internal meat temperatures and proper resting techniques ensure both safety and flavor.

    Your charcoal grill has two sets of vents: bottom vents that control airflow into the fire, and a top vent (usually on the dome lid) that lets smoke escape. Opening bottom vents increases oxygen flow to the coals, which accelerates combustion and raises temperature. Closing them restricts oxygen, cooling the fire gradually. The top vent should stay open during cooking to prevent smoke buildup, but you can adjust it partially to fine-tune heat output.

    Vent adjustment for temperature control: To raise grill temperature, open bottom vents fully and crack the top vent halfway. To lower temperature on direct heat, close bottom vents 25-50%. For indirect heat cooking, close bottom vents 50-75% to maintain 225-250°F. Check your thermometer after each adjustment and wait 5 minutes before making the next change.

    Internal meat temperatures protect your family from foodborne illness while achieving the doneness level you want. Chicken and turkey must reach 165°F in the thickest part (thigh for whole birds, the center for breasts) to eliminate salmonella and campylobacter bacteria. Ground beef and ground pork require 160°F throughout. Whole beef steaks and roasts only need 145°F for medium-rare because bacteria live on the surface, not inside—searing that surface at high heat kills pathogens before they penetrate.

    1. Chicken and poultry: 165°F in the thickest part (thigh for whole birds)
    2. Ground beef and ground pork: 160°F throughout
    3. Whole beef steaks and roasts: 145°F (medium-rare)
    4. Pork chops and roasts: 145°F
    5. Lamb: 160°F for medium
    6. Fish: 145°F, should flake easily with a fork

    Resting meat after cooking is non-negotiable if you want juicy results. When meat finishes cooking, muscle fibers are contracted and stressed from heat. Resting allows those fibers to relax and reabsorb juices that were driven to the surface. A steak needs just 5-10 minutes of resting on a clean cutting board away from direct heat. Whole chickens need 10-15 minutes so juices redistribute throughout the meat.

    Resting times for charcoal-grilled meat: Steaks and thin cuts rest 5-10 minutes. Whole chickens rest 10-15 minutes. Large roasts and briskets rest 20-30 minutes. Cover resting meat loosely with foil to retain heat while allowing steam to escape. Resting redistributes meat juices, preventing them from running onto the plate and creating drier, less flavorful results.

    Cross-contamination happens when bacteria from raw meat spreads to surfaces, utensils, or other foods. Use separate cutting boards for raw meat and vegetables—once a board touches raw chicken, don’t use it for salads or bread without washing. Wash your hands with soap and warm water after handling raw meat, especially poultry. Never place cooked meat back on the same platter that held raw meat unless you’ve washed it thoroughly.

    Frequently Asked Questions

    How long does charcoal take to heat up for grilling?

    Charcoal typically takes 15-20 minutes to reach proper grilling temperature when using a chimney starter. The coals are ready when they're covered with a thin layer of ash and glowing orange.

    How much charcoal do I need for grilling?

    For direct grilling, use about 30 briquettes or fill a chimney starter halfway. For indirect cooking or longer sessions, use 50-60 briquettes or a full chimney starter to maintain heat for 2-3 hours.

    Can I add more charcoal while cooking?

    Yes, you can add pre-lit charcoal from a second chimney starter during cooking. Avoid adding unlit charcoal directly to the fire as it will lower the temperature and may produce unpleasant smoke.

    What's the biggest mistake beginners make with charcoal grilling?

    The most common mistake is starting to cook before the charcoal is properly heated. Wait until coals are covered with ash and glowing evenly – rushing this step leads to uneven cooking and poor flavor.

  • How to Grill the Perfect Steak: Charcoal and Gas Methods That Actually Work

    How to Grill the Perfect Steak: Charcoal and Gas Methods That Actually Work

    How to Grill the Perfect Steak: Charcoal and Gas Methods That Actually Work

    Great grilled steak is not luck. It is heat management, timing, and temperature control. Most home mistakes happen before the steak even touches the grates: weak preheat, wrong zone setup, wet steak surface, or no resting plan. Fix those fundamentals and your results become repeatable.

    This guide gives you a complete system for grilling steak on charcoal or gas, including doneness targets, two-zone setup, reverse sear workflow, and practical solutions for common failures like flare-ups or uneven cooking.

    🥩 Pro Tip The fastest upgrade for home grilling is two-zone heat. One side for intense sear, one side for controlled finishing.

    Choose the Right Steak for Grilling

    Not all cuts behave the same over open flame. For reliable results, use steaks at least 1.25 inches thick.

    Best grilling cuts

    • Ribeye (rich, forgiving)
    • New York strip (beef-forward, firm)
    • T-bone/Porterhouse (two textures in one)
    • Top sirloin (value cut when cooked carefully)
    • Flank/skirt (great for hot-fast grilling, slice thin against grain)

    Thickness targets

    • 1.25–1.5 in: easiest for direct sear + short finish
    • 1.75–2 in: ideal for reverse sear
    • <1 in: risky (overcooks before crust develops)

    Prep Before Heat: Set Up for Success

    1) Dry the steak thoroughly

    Surface moisture kills sear. Pat dry with paper towels.

    2) Season with intent

    Use kosher salt and black pepper. Dry brine 40 minutes to overnight for deeper flavor and better crust.

    3) Light oiling

    Apply a thin coat of high-smoke-point oil to the steak, not a heavy pour onto grates.

    4) Bring close to room temp (optional)

    20–30 minutes out of the fridge helps even cooking for thick steaks.

    🌡️ Key Takeaway Dry surface + high heat + thermometer = 90% of steak grilling success.

    How to Set Up a Two-Zone Grill

    Charcoal Grill

    • Bank coals to one side for direct high heat.
    • Leave opposite side with little/no coals for indirect finishing.
    • Clean and oil grates once hot.

    Gas Grill

    • Preheat all burners first.
    • Then leave one burner high and another medium/low (or off) for cool zone.
    • Lid closed during preheat and indirect finishing.

    Two-zone setup prevents burning the outside while the inside stays undercooked.

    Steak Doneness Temperatures (Use a Thermometer)

    Doneness Pull Temp Final After Rest
    Rare 120–125°F (49–52°C) 125–130°F (52–54°C)
    Medium-Rare 125–130°F (52–54°C) 130–135°F (54–57°C)
    Medium 135–140°F (57–60°C) 140–145°F (60–63°C)
    Medium-Well 145–150°F (63–66°C) 150–155°F (66–68°C)

    Medium-rare to medium is the sweet spot for most premium steaks.

    Classic Grill Method (Direct + Finish)

    1. Preheat aggressively: grates should be hot enough to sear immediately.
    2. Sear on direct zone: 1.5–3 minutes first side.
    3. Flip and sear: 1.5–3 minutes second side.
    4. Render edges: hold fat side briefly with tongs.
    5. Move to indirect zone: finish to target internal temperature.
    6. Rest: 5–10 minutes before slicing.

    This method is ideal for 1.25–1.5 inch steaks.

    Reverse Sear Method (Best for Thick Steaks)

    For steaks above 1.75 inches, reverse sear gives more even doneness and less gray overcooked band.

    1. Cook on indirect heat first until steak is about 10–15°F below target.
    2. Move to hot direct zone and sear hard 45–90 seconds per side.
    3. Rest and serve.
    🥩 Pro Tip Reverse sear is the easiest way to avoid “burnt outside, raw inside” on thick cuts.

    How to Prevent Flare-Ups

    Fat dripping on flame is normal, but uncontrolled flare-ups create bitterness and burnt crust.

    • Keep a cooler zone ready and move steak temporarily when flare-ups spike.
    • Trim extreme exterior fat (not all fat).
    • Avoid sugary marinades at high heat.
    • Clean old grease from grill before session.
    ⚠️ Common Mistake Fighting flare-ups by constantly flipping every few seconds. Move to cool zone instead, stabilize, then continue cooking.

    Charcoal vs Gas for Steak

    Charcoal strengths

    • Deeper smoke and fire flavor
    • Higher max heat potential
    • Excellent for crust and live-fire style

    Gas strengths

    • Faster setup and cleanup
    • Precise burner control
    • Ideal for repeatable weeknight grilling

    Both can produce excellent steak. Technique matters more than fuel type.

    When to Use Marinades vs Dry Seasoning

    For premium cuts like ribeye, strip, and porterhouse, simple seasoning usually wins. Marinades are more useful for leaner or thinner cuts (flank, skirt, sirloin tip) where tenderizing and flavor layering help.

    If marinating for high heat grilling:

    • Pat dry before grilling
    • Avoid excess sugar
    • Reserve fresh sauce for post-grill finishing

    Resting and Slicing: Final 10% of Quality

    Resting is mandatory. Pulling steak and slicing immediately dumps juice onto the board.

    • Thin steaks: 3–5 minutes
    • Standard steaks: 5–8 minutes
    • Large bone-ins: 8–12 minutes

    Always slice against the grain for tenderness, especially flank and skirt.

    Common Grilling Mistakes and Fixes

    Mistake: weak preheat

    Fix: preheat longer with lid closed.

    Mistake: no thermometer

    Fix: use instant-read probe in thickest section.

    Mistake: wet steak surface

    Fix: pat dry before seasoning and searing.

    Mistake: one heat zone only

    Fix: build two-zone setup every time.

    Mistake: skipping rest

    Fix: rest on warm plate before slicing.

    🌡️ Key Takeaway If your grilling results are inconsistent, the issue is usually temperature control—not the cut of meat.

    Simple Grilled Steak Workflow (Cheat Sheet)

    1. Buy 1.25+ inch steak
    2. Dry and season
    3. Set two-zone grill
    4. Sear hard over direct heat
    5. Finish on indirect to target temp
    6. Rest and slice against grain

    Follow this system and your grilled steak quality becomes predictable, whether you cook for yourself on a Tuesday or for guests on the weekend.

    Final Takeaway

    Perfect grilled steak is not about fancy tricks. It is about controlling heat, respecting temperature, and finishing with discipline. Master two-zone grilling and you can cook almost any steak cut with confidence.

    Wind, Weather, and Grill Performance

    Outdoor conditions change everything. Wind increases oxygen flow and can spike charcoal heat unexpectedly, while cold weather can force gas grills to work harder for the same grate temperature. If your results vary from day to day, this is often the hidden reason.

    Use lid thermometers as directional indicators, but trust probe thermometers at the steak level for real control. In windy conditions, shield the grill and rotate steaks more deliberately between zones.

    Batch Cooking Multiple Steaks

    When grilling for a group, avoid dropping all steaks onto the hottest zone at once. That causes flare-up chaos and uneven doneness. Instead, stagger your sears and keep a structured sequence: sear group A, move to indirect; sear group B; then finish by target temperatures in order.

    Labeling steaks by doneness preference on separate warm trays helps avoid service mistakes. For large parties, reverse sear all steaks first, then finish each to preference with short direct-heat bursts.

    Sauce and Finishing Strategy for Grilled Steak

    Grilled steak benefits from finishing contrast. Char and smoke create intensity; acids and herbs rebalance the palate. A practical approach:

    • Fatty cuts: chimichurri or salsa verde
    • Leaner cuts: peppercorn cream or garlic butter
    • Party service: two sauces on side, not on top

    This keeps crust intact and lets guests customize.

    Food Safety Basics Without Overcooking

    Safe steak cooking does not require turning premium beef into shoe leather. Keep raw and cooked tools separate, avoid cross-contamination on boards, and use clean thermometers. For whole-muscle steaks, high-heat sear plus proper internal targets gives excellent safety and quality balance.

    If you use marinades that touched raw meat, do not reuse them as serving sauces unless boiled thoroughly.

    Build Your Personal Grill Log

    Advanced grillers keep a simple log: steak cut, thickness, grill type, weather conditions, pull temp, and final result. After a few sessions, your own data beats generic online timing charts. This is how you move from “sometimes great” to “consistently great.”

    A log also helps diagnose recurring issues like hot spots, flare-up zones, or specific cuts that need different workflows.

    FAQ: Grilling Steak

    How long should I preheat the grill?

    15–20 minutes for gas, 20–30 minutes for charcoal. Grates should be visibly hot and ready to sear immediately.

    Can I grill frozen steak?

    Possible, but not recommended. It creates uneven cooking and weak crust. Thaw first for best results.

    What if I don’t have two zones?

    Control heat by moving steak to grill edges or briefly pulling off heat entirely. Two-zone is much easier though.

    How do I know when to flip?

    When first side has deep brown crust and releases cleanly from grates—usually 1.5–3 minutes depending on thickness and heat.