Category: Recipes

Step-by-step steak and grilling recipes

  • How to Cook Steak for Beginners: A Simple, Foolproof Guide

    How to Cook Steak for Beginners: A Simple, Foolproof Guide

    Cooking your first steak can feel intimidating — one wrong move and you’ve wasted an expensive cut. But here’s the truth: steak is forgiving if you understand a few key principles. This guide covers everything a beginner needs to cook a restaurant-quality steak at home.

    Choosing Your First Steak

    Don’t start with the most expensive cut. As a beginner, you want something with good marbling and enough thickness to work with. These three are ideal for learning:

    • Ribeye — Rich, fatty, and forgiving. Hard to dry out. Best choice for beginners.
    • New York Strip — Leaner than ribeye but still flavorful. Great for learning technique.
    • Sirloin — Budget-friendly with solid flavor. Perfect for practicing without risk.

    Aim for a steak that’s at least 1 inch thick. Thin steaks cook too fast and are harder to control.

    Essential Equipment

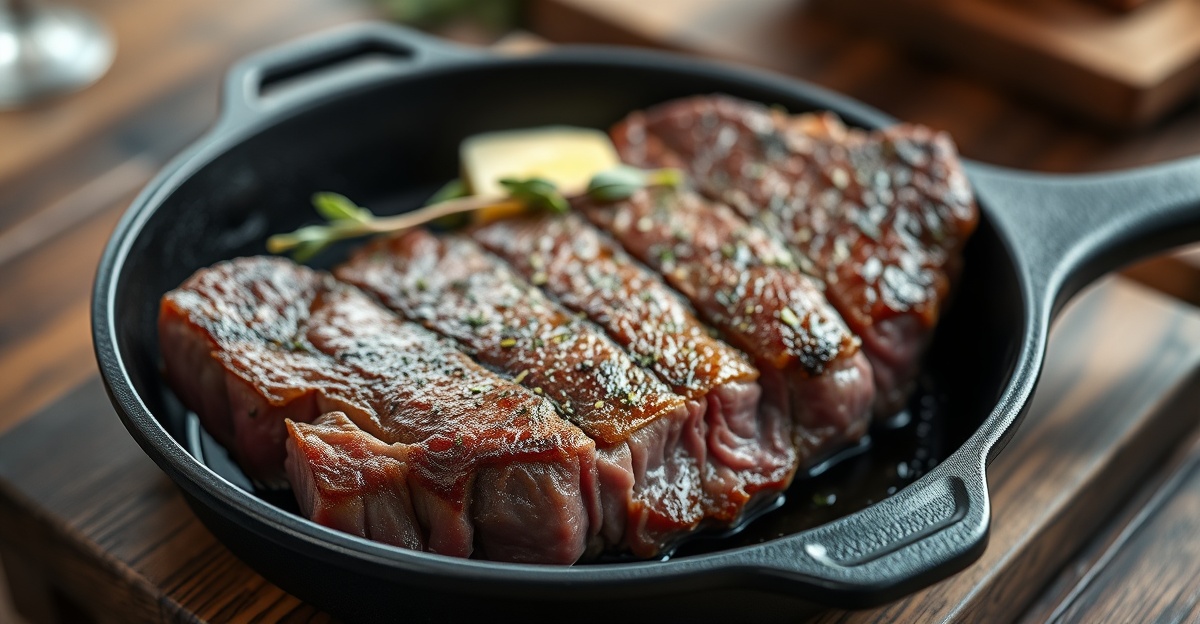
    • Cast iron skillet — Holds heat evenly and creates a better crust than nonstick
    • Instant-read thermometer — The most important tool for a beginner
    • Tongs — Never use a fork (piercing the steak releases juices)
    • Timer — Consistency matters

    How to Prep Your Steak

    Bring It to Room Temperature

    Take your steak out of the refrigerator 30–45 minutes before cooking. A cold center means uneven cooking — the outside will overcook before the inside comes up to temperature.

    Pat It Dry

    Use paper towels to thoroughly dry the surface. Moisture is the enemy of a good crust. Wet steak = steamed steak.

    Season Generously

    Salt and pepper is all you need for a beginner’s steak. Use kosher salt (not table salt) and coarse black pepper. Season both sides and the edges. Don’t be timid — steaks need more salt than you think.

    The Cooking Method: Pan-Sear

    For beginners cooking at home, pan-searing in a cast iron skillet is the most reliable method. Here’s how:

    Step 1: Heat Your Pan

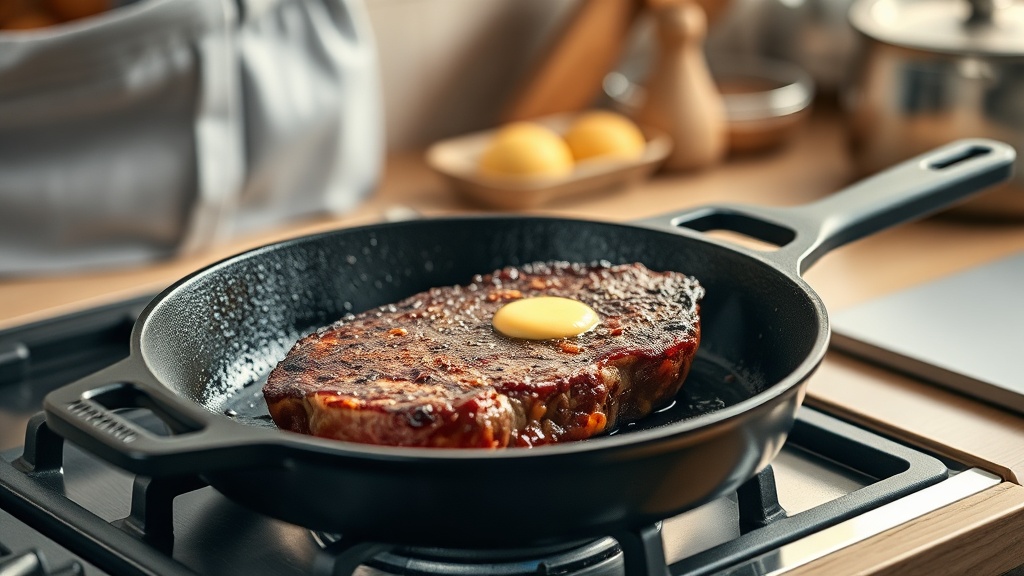
    Place your cast iron skillet over high heat for 3–4 minutes. The pan should be extremely hot before the steak touches it. Add a thin layer of oil with a high smoke point — avocado oil or vegetable oil work best. Avoid olive oil at this stage (it burns too easily).

    Step 2: Sear the First Side

    Lay the steak away from you into the pan. You should hear a loud, aggressive sizzle. Don’t touch or move the steak for 2–3 minutes. Resist the urge. Moving it prevents a proper crust from forming.

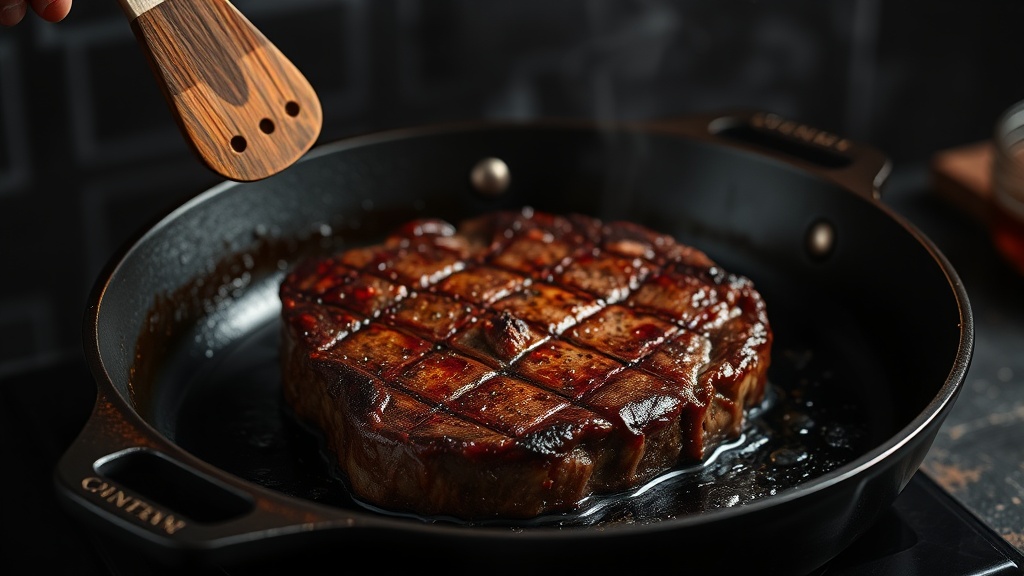
    Step 3: Flip Once

    Flip the steak once. The first side should have a deep brown crust. If it’s gray or pale, your pan wasn’t hot enough.

    Step 4: Baste with Butter

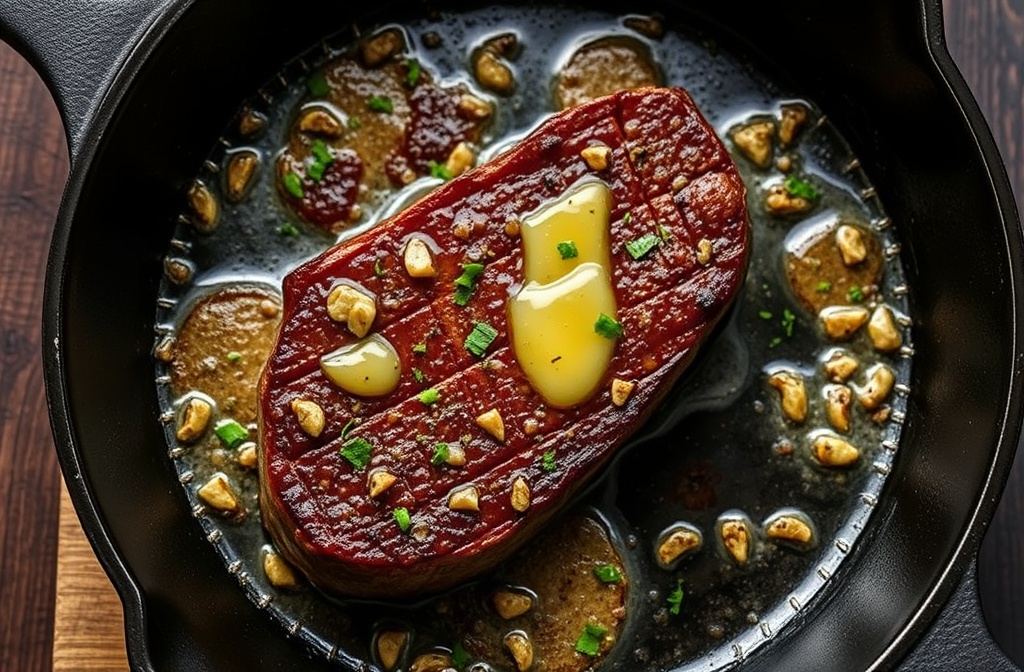
    This is what makes steaks taste like a steakhouse. Add 2 tablespoons of butter, 2 garlic cloves (smashed), and a sprig of thyme or rosemary to the pan. Tilt the pan slightly and use a spoon to continuously pour the melted butter over the steak. Do this for the last 1–2 minutes of cooking.

    Step 5: Check the Temperature

    Insert your thermometer into the thickest part of the steak, horizontally. Pull the steak off heat when it’s 5°F below your target temperature — it will continue cooking while resting.

    Doneness Temperatures for Beginners

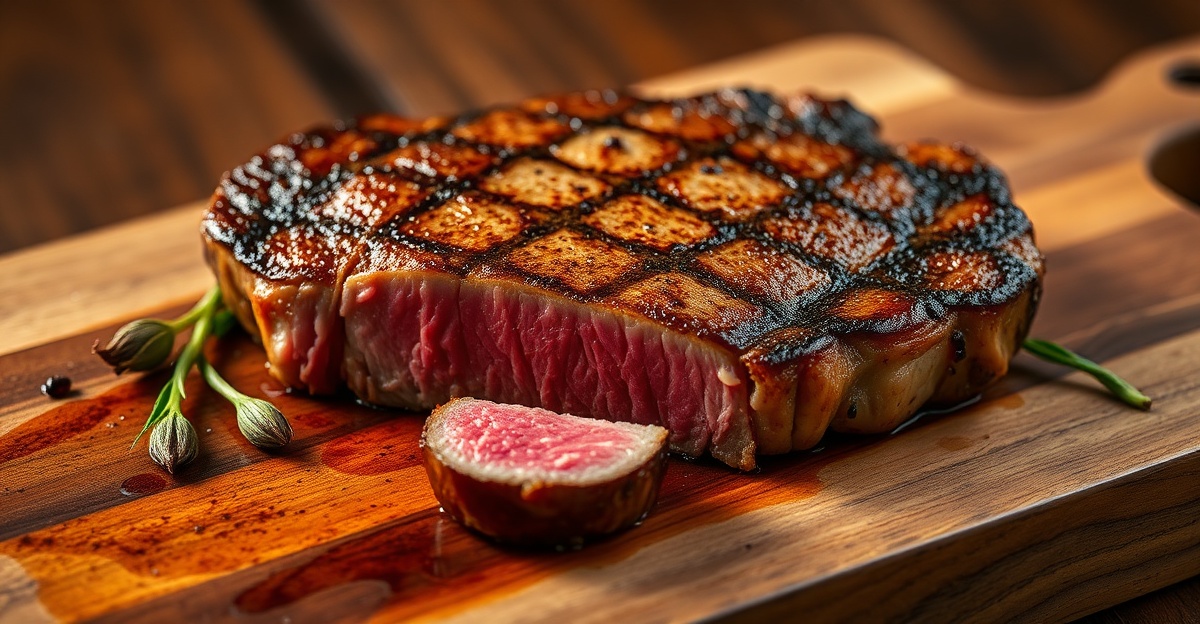
    • Medium-rare (recommended): 130–135°F — warm, red center with maximum juiciness
    • Medium: 140–145°F — pink center, less juicy but still good
    • Medium-well: 150–155°F — slightly pink, noticeably drier

    For your first few steaks, aim for medium-rare. It’s the most forgiving and shows off the steak’s flavor best.

    The Rest: Don’t Skip This

    Once the steak comes off the pan, let it rest on a cutting board for 5 minutes before cutting. During cooking, juices are pushed toward the center. Resting lets them redistribute throughout the meat. Cut too soon and you’ll watch those juices pour out onto the board instead of staying in the steak.

    Beginner Mistakes to Avoid

    Cooking Cold Steak

    Cold steak from the fridge = uneven cooking. Always rest at room temperature first.

    Not Drying the Surface

    Moisture on the surface creates steam instead of sear. Pat dry thoroughly.

    Cooking on Low Heat

    Low heat gives you gray, steamed steak. High heat gives you crust and color. Don’t be afraid of the smoke.

    Cutting Before Resting

    Impatience is the enemy of a juicy steak. Five minutes of resting makes a significant difference.

    You’re Ready

    With a hot pan, a dry seasoned steak, and a thermometer, you have everything you need to cook an excellent steak. The first one might not be perfect — and that’s fine. After two or three attempts, you’ll have the feel for it. Steak cooking is a skill, and like all skills, it gets easier with practice.

  • How to Cook Steak from Frozen: The No-Thaw Method That Actually Works

    How to Cook Steak from Frozen: The No-Thaw Method That Actually Works

    Forgot to thaw your steak? Don’t panic — cooking steak from frozen isn’t just a workaround. Done right, it can produce results that rival a properly thawed cut. Here’s everything you need to know.

    Why Cooking Frozen Steak Actually Works

    The science here is counterintuitive but real. When you cook from frozen, the exterior heats up while the interior thaws gradually — giving you a wider window to nail a perfect medium-rare without overcooking the outer layers. The reverse-from-frozen technique creates a more even temperature gradient than cooking a warm steak.

    A study from America’s Test Kitchen found that frozen steaks lost significantly less moisture during cooking compared to refrigerator-thawed cuts. Less moisture loss means more flavor in the pan.

    What You’ll Need

    • 1 frozen steak (ribeye, New York strip, or sirloin — at least 1 inch thick)
    • Cast iron skillet or heavy stainless pan
    • High smoke-point oil (avocado or vegetable)
    • Butter, garlic, fresh thyme (for basting)
    • Instant-read thermometer
    • Salt and black pepper

    Step-by-Step: How to Cook Steak from Frozen

    Step 1: Season Before Cooking

    Remove the steak from the freezer and season generously with kosher salt and coarse black pepper on both sides. The seasoning won’t penetrate deeply when frozen, but it creates a great crust. Let it sit for 5 minutes while your pan heats up.

    Step 2: Get Your Pan Screaming Hot

    Heat your cast iron skillet over high heat for 3–4 minutes until it’s visibly smoking. Add a thin layer of high smoke-point oil. This is non-negotiable — frozen steak drops pan temperature dramatically, and you need maximum heat to get a proper sear.

    Step 3: Sear Both Sides

    Place the frozen steak in the pan and do not move it for 90 seconds. You’ll hear aggressive sizzling — that’s good. Flip and sear the other side for another 90 seconds. The goal here is crust, not doneness.

    Step 4: Lower and Finish

    Reduce heat to medium-low. Add butter, a few garlic cloves, and fresh thyme to the pan. Tilt the skillet and use a spoon to continuously baste the steak with the foamy butter. Keep flipping every 2 minutes.

    Total cooking time from frozen for a 1-inch steak: approximately 18–22 minutes for medium-rare (130–135°F internal temp). Thicker cuts will take longer.

    Step 5: Rest Before Slicing

    Transfer to a wire rack and tent loosely with foil. Rest for at least 5 minutes. This step is even more critical with frozen-start steaks because the internal temperature continues rising.

    Internal Temperature Guide

    • Rare: 120–125°F — very red center
    • Medium-rare: 130–135°F — warm red center (recommended)
    • Medium: 140–145°F — pink center
    • Well done: 160°F+ — no pink

    Common Mistakes to Avoid

    Using a Thin Cut

    Cuts under ¾ inch will overcook before the center thaws properly. Stick with steaks that are at least 1 inch thick — ribeye and strip work best.

    Starting with a Cold Pan

    A lukewarm pan means steaming, not searing. Your crust suffers. Always preheat until the pan is visibly smoking.

    Skipping the Thermometer

    Touch tests are unreliable with frozen-start cooking. An instant-read thermometer is the only way to know exactly where you are.

    Can You Use the Oven Instead?

    Yes — and for thicker cuts (1.5 inches or more), the oven-plus-sear method is excellent. Place the frozen steak on a wire rack over a baking sheet and cook at 275°F until the internal temp hits 90–95°F (about 25–35 minutes). Then sear in a screaming-hot cast iron for 90 seconds per side. This is essentially the reverse sear method, starting from frozen.

    Final Thoughts

    Cooking steak from frozen isn’t a compromise — it’s a legitimate technique. With a hot enough pan, good basting, and a thermometer, you can produce a beautifully crusted, evenly cooked steak straight from the freezer. The only thing you’ll regret is not trying it sooner.

  • Garlic Butter Steak Recipe: Pan-Seared Perfection in 15 Minutes

    Garlic Butter Steak Recipe: Pan-Seared Perfection in 15 Minutes

    Garlic butter steak is a pan-seared steak basted with melted butter, fresh garlic, and herbs during the final minute of cooking. The butter amplifies the steak’s richness, the garlic adds aromatic depth, and the herbs (typically thyme or rosemary) provide a subtle earthy note that balances the fat. This technique is sometimes called arroser in French kitchens — the act of spooning hot fat over meat to build flavor and create a golden, aromatic crust.

    Ingredients

    • 2 ribeye, New York strip, or sirloin steaks (1 to 1.5 inches thick, 10–14 oz each)
    • Kosher salt and freshly cracked black pepper
    • 2 tablespoons neutral oil (vegetable, canola, or avocado oil — high smoke point required)
    • 4 tablespoons unsalted butter
    • 4 garlic cloves, smashed (not minced — you want large pieces that release flavor slowly)
    • 3–4 sprigs fresh thyme or 2 sprigs fresh rosemary

    Step-by-Step Instructions

    1. Bring steaks to room temperature. Remove from refrigerator 30–45 minutes before cooking. Pat completely dry with paper towels — surface moisture prevents browning.
    2. Season aggressively. Coat both sides with kosher salt and cracked black pepper. Press the seasoning into the meat. Don’t add garlic powder — fresh garlic comes later.
    3. Preheat cast iron skillet. Place skillet over high heat for 3–4 minutes until it just begins to smoke. Cast iron retains heat better than stainless, which is critical for maintaining temperature when cold steak hits the pan.
    4. Add oil, then steak. Pour neutral oil into the hot skillet and swirl to coat. Immediately lay steaks in the pan — you should hear an aggressive sizzle. If not, the pan isn’t hot enough.
    5. Sear first side without moving. Cook for 3–4 minutes depending on thickness. Resist the urge to lift, peek, or shift the steak. You’re building a Maillard reaction crust — movement interrupts it.
    6. Flip once. Use tongs (not a fork — puncturing releases juice). Sear second side for 2–3 minutes.
    7. Add butter, garlic, and herbs. Tilt the pan slightly away from you. Add butter, smashed garlic cloves, and herb sprigs to the lower side of the pan where the butter will pool. As the butter melts and foams, it will absorb the garlic and herb aromatics.
    8. Baste continuously. Using a large spoon, scoop the melted garlic butter and pour it over the top of the steak repeatedly for 60–90 seconds. This bastes the surface, adds flavor, and helps the steak finish cooking evenly. Tilt the pan as needed to gather the butter.
    9. Check internal temperature. Insert an instant-read thermometer into the thickest part. Target 130°F (54°C) for medium-rare. If it’s not there yet, continue basting and flipping every 30 seconds until it reaches temperature.
    10. Rest for 5 minutes. Transfer steaks to a plate. Spoon some of the garlic butter from the pan over the top. Tent loosely with foil. Resting allows juices to redistribute.
    11. Slice and serve. Cut against the grain into ½-inch slices. Pour any remaining garlic butter from the pan over the sliced steak. Serve immediately.

    Why Use Smashed Garlic Instead of Minced?

    Minced garlic burns in 15–20 seconds in hot butter. Smashed whole cloves release flavor more gradually because they have less surface area exposed to the heat. The result is a mellow, sweet garlic flavor rather than the acrid bitterness of scorched garlic. You can remove the cloves before serving or leave them on the plate as aromatic garnish.

    Best Cuts for Garlic Butter Steak

    CutWhy It Works
    RibeyeHigh fat content pairs perfectly with butter — fat amplifies fat
    New York StripFirm texture holds up to high heat; leaner than ribeye but still flavorful
    Filet MignonExtremely tender; butter compensates for its lower natural fat
    SirloinBudget-friendly and benefits significantly from butter basting

    Avoid very thin cuts (under ¾ inch) — they overcook before the butter has time to develop flavor. Avoid extremely thick cuts (over 2 inches) unless you’re using the reverse sear method, because the basting time required to reach target internal temp will burn the garlic.

    Garlic Butter Variations

    Once you master the base technique, you can modify the butter compound:

    • Herb butter: Add fresh parsley, chives, or tarragon along with thyme
    • Lemon garlic butter: Squeeze half a lemon into the pan after basting — the acid brightens the richness
    • Shallot butter: Replace 2 garlic cloves with 1 finely sliced shallot
    • Blue cheese butter: Crumble 2 tablespoons blue cheese into the butter after removing from heat — it melts into a creamy sauce
    • Anchovy butter: Add 2 minced anchovy fillets to the butter for umami depth (classic French technique)

    Common Mistakes to Avoid

    Adding butter too early. If you add butter at the start of the sear, the milk solids will burn before the steak is done. Butter goes in only during the final 60–90 seconds.

    Using salted butter. You’ve already salted the steak. Salted butter can push the dish into over-salted territory. Always use unsalted butter and control seasoning separately.

    Not drying the steak. Wet steak steams instead of searing. Pat it completely dry before it goes in the pan.

    Crowding the pan. If cooking multiple steaks, leave at least 1 inch of space between them. Crowding drops the pan temperature and prevents proper browning. Cook in batches if necessary.

    Frequently Asked Questions

    Can you make garlic butter steak without a cast iron skillet?

    Yes. Stainless steel or carbon steel pans work, though they don’t retain heat quite as well as cast iron. Avoid nonstick pans — they can’t handle the high heat required for a proper sear, and the coating may degrade above 500°F.

    Can you use garlic powder instead of fresh garlic?

    You can season the steak with garlic powder before searing, but it won’t replicate the aromatic, mellow flavor of fresh garlic basted in butter. Garlic powder also burns easily at high heat. If you use it, apply it lightly mixed with the salt and pepper, and still add fresh garlic to the butter at the end.

    What temperature should the pan be?

    450–500°F (232–260°C) when the steak goes in. You can test by flicking a drop of water into the pan — if it sizzles and evaporates instantly, you’re ready. If the water beads and rolls, it’s too hot and you risk burning the exterior before the interior cooks.

    Should you baste steak with butter on the grill?

    It’s harder to control on a grill because the butter drips through the grates and can cause flare-ups. If you want garlic butter flavor on a grilled steak, finish it with compound butter (softened butter mixed with garlic and herbs) after it comes off the grill and during the rest period.

    How do you store leftover garlic butter?

    Strain out the garlic and herb solids (they’ll spoil quickly). Pour the clarified butter into a sealed container and refrigerate for up to 5 days. It’s excellent for basting chicken, shrimp, or vegetables, or tossed with pasta.

  • How Long to Rest Steak: The Complete Guide to Juicier Results

    How Long to Rest Steak: The Complete Guide to Juicier Results

    Resting steak is the practice of allowing cooked meat to sit undisturbed — off heat, loosely tented with foil — before cutting into it. The purpose is to give the muscle fibers time to relax and allow the myoglobin (the protein responsible for the red color in meat juices) to redistribute evenly throughout the steak. Without resting, up to 30% of the steak’s internal moisture escapes onto the cutting board the moment you slice it.

    How Long to Rest Steak

    The general rule is 5 minutes minimum for any steak under 1.5 inches thick, and 10 minutes for anything thicker or larger. The rest time allows the internal temperature to stabilize and juices to reabsorb into the muscle tissue. Here’s a detailed breakdown:

    Steak Thickness / WeightRecommended Rest Time
    ¾ inch to 1 inch (6–8 oz)5 minutes
    1 to 1.5 inches (8–12 oz)5–7 minutes
    1.5 to 2 inches (12–16 oz)10 minutes
    2+ inches or whole roasts (16+ oz)15–20 minutes

    For bone-in cuts like T-bone or porterhouse, add 2–3 minutes to the rest time. The bone retains heat longer and continues to cook the surrounding meat slightly during the rest period.

    What Happens During the Rest

    When steak cooks, heat causes muscle fibers to contract and squeeze moisture toward the center of the meat. If you cut immediately, the pressure differential drives all that liquid out onto the plate. Resting gives the fibers time to relax, which allows capillary action and osmotic pressure to pull moisture back into the cells.

    This process also allows carryover cooking. The steak’s internal temperature will rise 5–10°F (3–5°C) after removal from heat, depending on thickness and initial temperature gradient. That’s why you pull a medium-rare steak at 130°F — it finishes at 135°F during the rest.

    How to Rest Steak Properly

    1. Remove from heat at the correct pull temperature. Use an instant-read thermometer inserted into the thickest part, away from bone. Pull the steak 5°F below your target final temperature.
    2. Transfer to a clean plate or cutting board. Don’t rest on the hot pan or grill grates — residual surface heat will continue to cook the exterior and dry it out.
    3. Tent loosely with aluminum foil. The foil retains some heat but allows steam to escape. Do not wrap tightly — trapped steam will soften the crust you worked to build.
    4. Let it sit undisturbed. No poking, no cutting “just to check.” Every puncture releases juice.
    5. Slice and serve immediately after the rest period. Don’t let the steak sit for 30+ minutes or it will drop below optimal serving temperature (120–130°F / 49–54°C for medium-rare).

    Should You Rest Steak After Reverse Sear?

    Yes, but only briefly — 3 to 5 minutes maximum. The reverse sear method already minimizes the temperature gradient from edge to center, so the steak doesn’t need a long rest to redistribute juices. The final high-heat sear is short (60–90 seconds per side), so less moisture is driven toward the center compared to a traditional hot-start sear.

    If you rest a reverse-seared steak for 10+ minutes, it may cool too much and lose the benefit of that perfect medium-rare doneness throughout.

    Can You Rest Steak Too Long?

    Yes. After about 15–20 minutes (for standard 1–1.5 inch steaks), the internal temperature drops below the ideal serving range. The steak is still safe to eat, but it won’t deliver the same sensory experience — warm fat doesn’t render on the tongue, and the texture becomes firmer as myosin proteins cool and re-stiffen.

    If you need to hold a steak longer (for example, waiting for sides to finish), rest it for the standard time, then hold it in a 150°F (65°C) oven loosely tented. This keeps it warm without continuing to cook it.

    What If You Skip Resting?

    Cutting into a steak immediately after cooking causes a visible flood of red liquid onto the plate. This liquid is mostly myoglobin-rich sarcoplasmic fluid, not blood (beef is fully exsanguinated during slaughter). Losing this moisture means:

    • The first few bites taste juicy, but the steak dries out quickly as you eat
    • The texture becomes noticeably tougher because the muscle fibers haven’t relaxed
    • You lose flavor — many flavor compounds are water-soluble and leave with the escaping juices

    The difference is measurable: studies on meat science show that rested steaks retain approximately 25–30% more moisture compared to steaks cut immediately after cooking.

    Frequently Asked Questions

    Do you rest steak covered or uncovered?

    Loosely covered with aluminum foil. The foil holds enough heat to maintain temperature but allows steam to escape so the crust doesn’t get soggy. Don’t wrap tightly or seal the edges.

    Does steak continue cooking while resting?

    Yes. This is called carryover cooking. The internal temperature will rise 5–10°F depending on thickness and how much heat remains in the outer layers. That’s why you pull steak early — to account for this rise during rest.

    Can you rest steak on the cutting board you’ll slice it on?

    Yes, as long as the board is clean and at room temperature. Avoid resting directly on a cold surface (like marble or metal) — it will pull heat out of the steak too quickly and reduce the effectiveness of the rest.

    Should thin steaks rest?

    Yes, but for less time. A ¾-inch steak should rest for 3–5 minutes. Anything thinner than ½ inch can be sliced after 2–3 minutes, but frankly steaks that thin are hard to cook properly regardless of rest time.

    How do restaurants serve steak immediately without resting?

    Most high-end steakhouses do rest their steaks — just very briefly (2–3 minutes) because they’re working with professional broilers that cook at 1200°F+, which creates a thinner heat-affected zone and requires less rest time. Lower-tier restaurants that serve immediately often sacrifice juice retention for speed — you’ll notice the pool of liquid on the plate.

  • Complete Reverse Sear Steak Guide: Perfect Results Every Time

    Complete Reverse Sear Steak Guide: Perfect Results Every Time

    What Is the Reverse Sear Method for Steak?

    The reverse sear method flips traditional steak cooking on its head. Instead of searing the meat first in a hot pan, you slowly cook the steak in a low-temperature oven until it reaches your target internal temperature, then finish it with a blazing-hot sear that creates a golden crust in seconds.

    This approach diverges sharply from conventional cooking. Traditional searing happens at the start—you blast a cold steak in a screaming-hot pan to build a crust, then move it to lower heat to finish cooking through. The reverse sear steak guide does exactly the opposite: gentle heat first, aggressive sear last.

    The reverse sear technique cooks steak in two stages: first in a 275°F oven until the internal temperature reaches 10°F below your target (about 120°F for medium-rare), then seared for 60-90 seconds per side in a cast-iron skillet heated to 500°F+. This method ensures edge-to-edge evenness with a restaurant-quality crust.

    The benefits stack up quickly with this reverse sear steak guide approach. You gain precise temperature control throughout the cooking process—the low oven temperature prevents overcooking the exterior while the interior reaches perfection. The steak stays tender because it cooks slowly and evenly. You also get a superior crust since the meat’s surface is dry before searing, allowing for better browning through the Maillard reaction.

    Best Cuts of Steak for Reverse Searing

    The reverse sear method isn’t equally effective for every cut or thickness. Thicker steaks are the sweet spot—they need substantial time in the low oven to reach your target temperature, which is exactly what this technique provides. Thin steaks (under 1 inch) cook too quickly in the oven and don’t benefit from the slow, even heating that makes reverse searing superior.

    Reverse searing works best with steaks 1.5 inches thick or thicker. Thinner cuts cook too rapidly in the oven and lose the advantage of even heat distribution that defines this technique. For steaks under 1.5 inches, traditional searing produces better results with less risk of uneven cooking.

    Certain cuts naturally excel with reverse searing. Ribeye steaks rank at the top—their marbling keeps the meat juicy during the long oven phase, and the fat renders beautifully when seared. New York strip steaks deliver excellent results thanks to their leaner structure and consistent shape, which promotes even cooking. Filet mignon works wonderfully if thickness allows, creating an incredibly tender interior with a crispy exterior.

    Meanwhile, thickness matters more than you might think when following any reverse sear steak guide. A 2-inch ribeye gives you a 30-40 minute window in the oven to reach temperature, allowing moisture to stay locked in while the interior climbs slowly toward medium-rare. A 1-inch steak might only need 12-15 minutes, which provides barely enough time for the benefits to accumulate.

    Step-by-Step Reverse Sear Steak Instructions

    Mastering the reverse sear technique requires attention to temperature milestones and timing across two distinct cooking phases. The process demands a reliable meat thermometer—an instant-read digital thermometer removes guesswork and prevents overcooking. Success hinges on understanding exactly when to transition from the oven to the searing stage.

    1. Place your steak on a wire rack set over a baking sheet and pat the surface completely dry with paper towels. This removes surface moisture that would inhibit browning during the final sear.
    2. Season the steak generously with kosher salt and freshly ground black pepper at least 40 minutes before cooking, or up to 24 hours in advance. Early seasoning allows salt to penetrate the meat and enhance flavor throughout.
    3. Preheat your oven to 275°F and allow it to reach temperature fully before inserting the steak. Insert the thermometer probe into the thickest part of the steak, positioning it horizontally to capture the true center temperature.
    4. Place the steak in the oven and monitor the internal temperature every 10 minutes. A 1.5-inch ribeye typically reaches 110°F in 20-25 minutes; a 2-inch cut needs 30-40 minutes. Remove the steak when it reaches 10°F below your target temperature (110°F for medium-rare, 100°F for medium).
    5. Let the steak rest on the counter for 5-10 minutes while you heat a cast-iron skillet to 500°F+. Test readiness by holding your hand 2 inches above the pan—you should only tolerate the heat for 2-3 seconds.
    6. Add a high-smoke-point oil (avocado oil or ghee work well) to the screaming-hot skillet, then immediately place the steak in the pan. Sear for 60-90 seconds without moving the steak, allowing a thick crust to form through the Maillard reaction.
    7. Flip the steak once and sear the second side for another 60-90 seconds. In the final 20 seconds, add a pat of butter, crushed garlic, and fresh rosemary to the pan, tilting the skillet to baste the steak with the foaming butter.
    8. Transfer the finished steak to a cutting board and rest it for 5 minutes before serving. During rest, carryover cooking raises the internal temperature another 2-3°F, landing you at your exact target temperature.

    Temperature precision separates successful reverse sear results from disappointing outcomes. A medium-rare steak pulls from the oven at 110°F internal temperature and finishes at 125°F after rest and searing. Medium targets 120°F in the oven, reaching 135°F finished. These specific benchmarks prevent the common mistake of overshooting your preferred doneness during the high-heat sear phase.

    Timing varies dramatically based on steak thickness, oven calibration, and starting temperature. A room-temperature 1.5-inch steak requires roughly 25 minutes in a 275°F oven when following this reverse sear steak guide. A cold steak straight from the refrigerator adds 5-10 minutes. Always rely on your thermometer reading rather than clock time, as individual ovens fluctuate and ambient temperature affects cooking speed.

    Temperature Control and Internal Doneness Guide

    Temperature control defines the reverse sear method’s greatest advantage over traditional cooking techniques. Unlike conventional methods where you estimate doneness by touch or appearance, reverse searing lets you cook to an exact internal temperature, then finish with confidence. A reliable meat thermometer transforms guesswork into precision—your steak reaches your preferred doneness every single time.

    The target temperatures for different doneness levels are non-negotiable benchmarks in reverse searing. Remove your steak from the oven when the thickest part reads 110°F for medium-rare (finishing at 125°F), 120°F for medium (finishing at 135°F), or 130°F for medium-well (finishing at 145°F). These specific pull temperatures account for carryover cooking—the 2-3°F temperature rise that happens during the searing phase.

    Target Internal Temperatures for Reverse Sear Steaks: Pull your steak from the oven at 110°F for medium-rare (125°F final), 120°F for medium (135°F final), or 130°F for medium-well (145°F final). These benchmarks include 2-3°F of carryover cooking that occurs during searing and resting. Always measure temperature in the thickest part of the steak, away from any bone.

    Using a meat thermometer effectively requires correct placement and timing when following any comprehensive reverse sear steak guide. Insert an instant-read digital thermometer horizontally into the thickest portion of the steak, positioning the probe in the exact center without touching bone. Check the temperature every 10 minutes starting around the 15-minute mark for thinner cuts and 20-minute mark for thicker steaks.

    Carryover cooking continues climbing your steak’s temperature long after you remove it from heat. During the 60-90 second sear on each side, the exterior reaches 500°F+ while the interior climbs another degree or two from residual heat. The 5-minute rest period after searing adds another 1-2°F as heat redistributes from the hot exterior toward the cooler center.

    Common Reverse Sear Mistakes to Avoid

    The reverse sear method demands attention to detail across every stage, and even small mistakes can sabotage your results. Understanding where things go wrong helps you execute flawlessly and produces restaurant-quality steaks consistently. Most failures stem from rushing the process or ignoring temperature precision that makes this technique superior.

    Overcrowding the pan during the searing phase destroys the high-heat advantage you’ve built through patient oven cooking. When you cram multiple steaks into a skillet simultaneously, the pan temperature plummets as the cold meat makes contact with hot metal. The steaks release moisture that pools in the pan, creating a steaming environment rather than the dry, high-heat searing you need.

    Sear only one steak per skillet at a time. Multiple steaks lower the pan temperature and trap steam, preventing proper browning and crust formation. If cooking for more than one person, sear steaks individually or use multiple skillets heated to 500°F+ simultaneously.

    Skipping or shortening the rest period leaves your steak unnecessarily hot and unevenly cooked. The 5-minute rest after searing allows heat to redistribute from the scorching exterior toward the center, equalizing temperature throughout the meat. This resting phase also allows muscle fibers to relax and reabsorb juices that were driven outward by the intense searing heat.

    Rest your finished steak for 5 minutes on a cutting board or warm plate before slicing or serving. This allows carryover cooking to complete, heat to redistribute evenly, and muscle fibers to relax and retain juices for maximum tenderness and flavor.

    Incorrect oven temperature is perhaps the most common mistake because many home ovens drift significantly from their set temperature. An oven that reads 275°F on the dial might actually sit at 265°F or 290°F, throwing off your entire timing equation. At 265°F, a 1.5-inch steak takes 30-35 minutes instead of 25, and you lose the precision that makes this reverse sear steak guide effective.

    Check your oven’s actual temperature with a standalone oven thermometer before cooking. Many home ovens run 15-25°F off from their dial setting. If your oven runs consistently hot or cold, adjust your target temperature accordingly (for example, set it to 260°F if your oven runs 15°F hot) to maintain precise 275°F cooking conditions.

    Additional mistakes compound these core errors and derail otherwise perfect execution. Using a skillet that isn’t screaming hot before adding the steak produces a gray, rubbery exterior instead of a caramelized crust. Flipping the steak multiple times during searing interrupts crust formation and allows the interior temperature to climb too quickly. Moving the steak around the pan prevents proper contact between meat and heat, generating steam instead of crust.

    Tools and Equipment for Perfect Reverse Searing

    Reverse searing success hinges on having the right tools before you start cooking. Three pieces of equipment make or break your results: a reliable meat thermometer, a heavy-bottomed skillet, and an accurate oven thermometer to verify your cooking environment. Without these essentials, even perfect technique can’t guarantee consistent outcomes.

    An instant-read digital meat thermometer is non-negotiable for reverse searing success. Models with thin probes (2-3mm diameter) read temperatures in 2-3 seconds and minimize surface damage to your steak. Thermometers like the Thermapen Mk4 or ThermoWorks Dot display accurate readings within ±1°F, eliminating the guesswork that ruins countless steaks.

    An instant-read digital thermometer with a thin probe is essential for reverse searing. Insert the probe horizontally into the thickest part of the steak, positioning it in the exact center without touching bone. Check temperature every 10 minutes starting at the 15-20 minute mark, depending on steak thickness. Digital models that read within ±1°F ensure you pull your steak at the correct internal temperature for your target doneness.

    Cast iron skillets dominate reverse searing kitchens because they retain heat better than any other cookware material when following this reverse sear steak guide. A 12-inch cast iron pan distributes heat evenly across its cooking surface and maintains the 500°F+ temperature needed for proper crust formation. Lodge or vintage cast iron options work equally well—what matters is seasoning and mass.

    1. Cast iron skillets (12-inch) retain heat at 500°F+ and distribute temperature evenly for consistent crust formation
    2. Carbon steel pans offer a lightweight alternative with similar heat retention properties, though requiring slightly more careful temperature management
    3. Stainless steel and non-stick skillets should be avoided—they can’t maintain adequate heat and prevent proper browning

    An independent oven thermometer solves the single biggest source of reverse searing failure: oven temperature drift. Home ovens commonly run 15-25°F hotter or cooler than their dial setting, throwing off your entire cooking timeline and ruining temperature precision. A hanging oven thermometer or standing thermometer like the Rubbermaid or AcuRite models costs $8-15 and instantly reveals your oven’s actual temperature.

    High-smoke-point oils enable successful searing at 500°F+ temperatures. Avocado oil (520°F smoke point) and refined ghee (485°F smoke point) withstand extreme heat without breaking down or imparting burnt flavors. Regular butter has a 350°F smoke point and will burn at searing temperatures—use it only for the final basting step, not for initial pan heating.

    Paper towels and kosher salt complete your essential equipment list for any proper reverse sear steak guide. Paper towels absorb surface moisture from your steak before cooking, and kosher salt’s larger crystals dissolve more slowly than table salt, allowing better flavor penetration when you salt 40 minutes to 24 hours in advance.

    Frequently Asked Questions

    How long does reverse searing take for a 2-inch steak?

    A 2-inch thick steak typically takes 25-35 minutes in a 250°F oven to reach medium-rare doneness (115°F internal temperature), plus 2-4 minutes for the final searing phase.

    Can you reverse sear frozen steaks?

    Yes, you can reverse sear frozen steaks by adding 15-20 minutes to the oven cooking time. Season the steaks once they're partially thawed during cooking.

    What's the difference between reverse sear and sous vide?

    Reverse sear uses dry oven heat while sous vide uses water bath cooking. Both achieve precise temperature control, but reverse sear is faster and doesn't require specialized equipment.

    Do you need to flip steaks during reverse searing?

    No flipping is needed during the oven phase. Only flip once during the final searing step, cooking 1-2 minutes per side for optimal crust development.

  • Master the Reverse Sear Steak Method: Perfect Results Every Time

    Master the Reverse Sear Steak Method: Perfect Results Every Time

    What is the Reverse Sear Steak Method?

    The reverse sear steak method is a cooking technique that flips traditional searing on its head. Instead of searing meat first in a hot pan, you slow-cook the steak in a low-temperature oven until it reaches your target internal temperature, then finish it with a quick, hard sear in a screaming-hot pan or cast iron skillet.

    This approach differs dramatically from conventional steak cooking. Traditional searing happens immediately—you start with a cold pan, crank the heat, and sear the exterior while the inside cooks. The reverse sear steak technique inverts this process entirely. You control the internal doneness first through gentle, even heat in the oven (usually around 200-275°F), which prevents overcooking the center while you develop a crust.

    The reverse sear method involves cooking a steak low and slow in the oven until it reaches target temperature, then searing it briefly in a very hot pan for crust development. This technique eliminates the common problem of overcooked edges surrounding a rare center.

    Professional chefs and home cooks embraced this reverse sear steak method in the early 2000s as sous vide cooking became more mainstream. The technique gained serious traction after high-end restaurants published their methods and food scientists documented why it produces superior results.

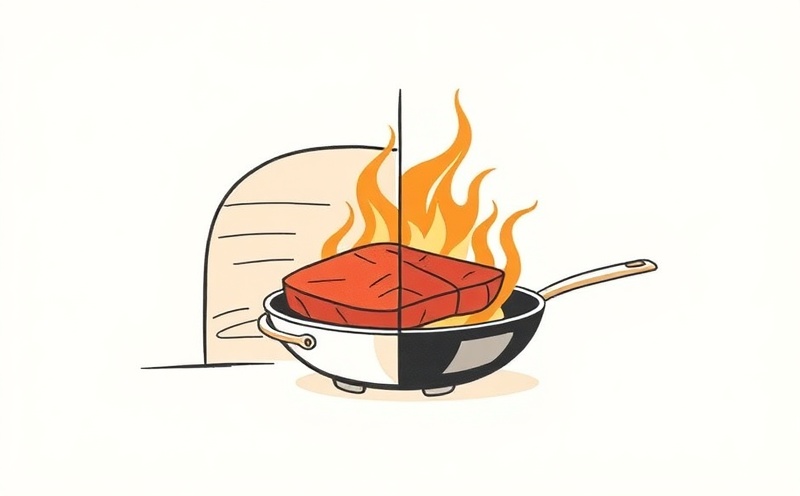
    Visual representation of reverse sear method showing oven then searing process

    Step-by-Step Reverse Sear Steak Instructions

    Executing a perfect reverse sear steak requires precision at three distinct stages: the oven phase, the resting period, and the final sear. Each step builds on the previous one, and timing matters more than you might expect.

    1. Pat your steak completely dry with paper towels and season generously with salt and pepper at least 40 minutes before cooking (or overnight in the refrigerator). Place the steak on a wire rack set over a baking sheet.
    2. Preheat your oven to 225°F and insert a meat thermometer into the thickest part of the steak, positioning it horizontally so it reads the center without touching bone.
    3. Place the baking sheet in the oven and cook until the internal temperature reaches 10°F below your target doneness: 120°F for rare, 130°F for medium-rare, 135°F for medium.
    4. Remove the steak from the oven when it reaches the target temperature. This typically takes 25-40 minutes depending on thickness (a 1.5-inch ribeye usually needs about 30 minutes).
    5. Let the steak rest on a cutting board for 5-10 minutes while you heat a cast iron skillet or heavy pan over high heat until it’s smoking—a full 2-3 minutes of aggressive heating.
    6. Sear the steak for 45-90 seconds per side, working quickly to build a dark brown crust without raising the internal temperature more than 3-5°F.
    7. Transfer to a plate, add a pat of butter and fresh herbs like rosemary or thyme to the hot pan, and baste the steak for the final 30 seconds.

    The temperature differential between stages prevents the common mistake of pushing meat past your target doneness. A 225°F oven environment moves heat into the steak extremely slowly—roughly 1°F of internal temperature rise every 2-3 minutes once it enters the meat.

    Timing varies based on steak size and your oven’s actual temperature. A thin 1-inch steak might finish in 15-20 minutes, while a thick 2-inch porterhouse can take 45-55 minutes. Your meat thermometer removes guesswork entirely—it’s the only tool that matters in the oven phase.

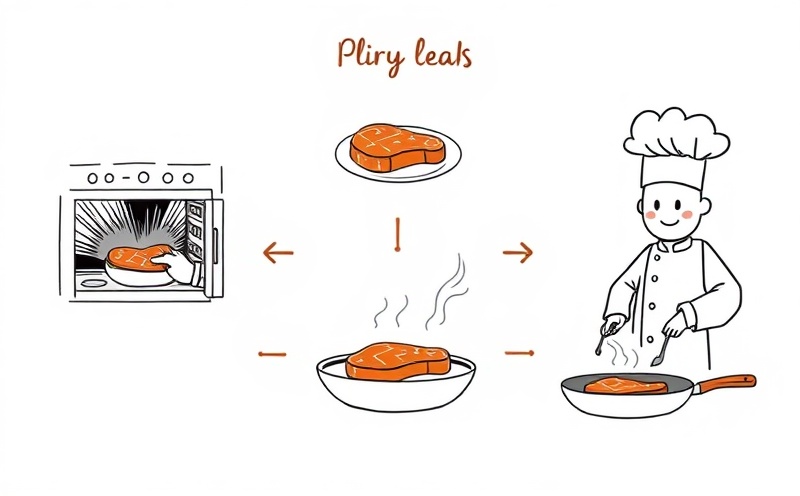
    Step-by-step demonstration of reverse sear steak cooking technique

    Best Cuts of Steak for Reverse Searing

    Reverse searing works best with steaks that are at least 1.5 inches thick. Thinner cuts lack the thermal mass to benefit from the low-temperature oven phase—they’ll reach target temperature too quickly, and the time spent waiting for the pan to heat becomes proportionally longer than the actual searing window.

    Ribeye steaks are the gold standard for the reverse sear steak method. Their heavy marbling means fat renders during the slow oven phase, distributing flavor throughout the meat while the low heat prevents that fat from burning before the interior reaches doneness. New York strip steaks perform excellently too—their leaner structure develops a superior crust during the final sear.

    Best reverse sear steak cuts: Ribeye steaks excel due to high intramuscular fat that renders during slow oven cooking. New York strip steaks develop superior crusts from their leaner muscle structure. Porterhouse and T-bone steaks work well because the bone conducts heat, and you can manage two different muscle groups with one cooking session. Filet mignon works but lacks the flavor intensity of fattier cuts.

    Thickness fundamentally changes how the reverse sear steak process performs. A 2-inch steak spends 40-50 minutes in the oven, creating a steady temperature gradient from edge to center. When you’re investing time in a two-stage cooking process, you want a steak substantial enough to showcase the results.

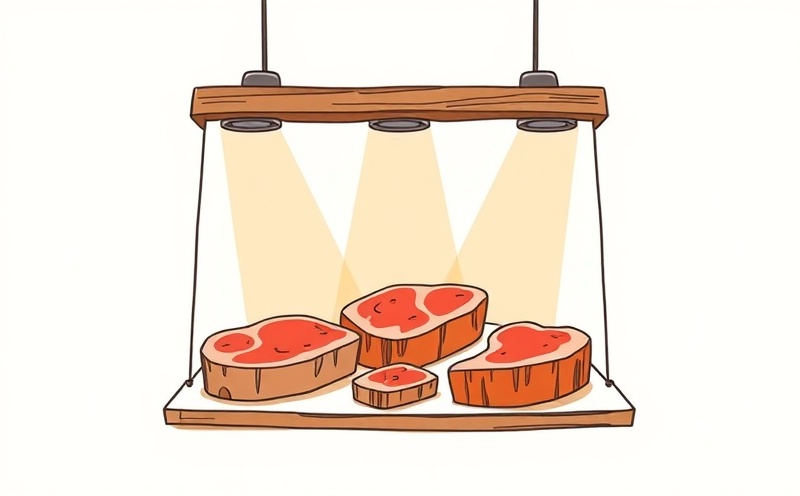
    Premium steak cuts ideal for reverse searing displayed attractively

    Temperature and Timing Guide for Perfect Results

    Hitting your target doneness requires understanding both the internal temperature you’re aiming for and how the oven phase gets you there. The reverse sear method relies entirely on precision temperature reading because you’re stopping the oven cook deliberately short of your final target.

    Internal temperature targets for reverse sear steaks: Remove the steak from the oven when it reaches 120°F for rare (final temp 125°F), 130°F for medium-rare (final temp 135°F), 135°F for medium (final temp 140°F), or 145°F for medium-well (final temp 150°F). These stopping points account for 5°F of carryover cooking during the resting phase.

    The oven phase timing depends on three variables: steak thickness, your oven’s actual calibration, and whether the cut includes bone. A 1.5-inch boneless ribeye typically requires 25–35 minutes at 225°F to climb from raw to 130°F. A 2-inch porterhouse might need 40–50 minutes because the extra thickness means heat must travel farther into the center.

    Carryover cooking contributes 3–5°F of additional temperature rise after you pull the steak from the oven. This happens during the 5–10 minute resting period while you’re heating your searing pan. A steak that reads 130°F when it comes out of the oven will climb to roughly 133–135°F by the time it hits the hot skillet.

    Comparison between perfectly reverse-seared steak and traditionally cooked steak

    Reverse Sear vs Traditional Searing: Key Differences

    Traditional searing cooks steak hot-side-first: you blast the exterior in a smoking pan until it develops a brown crust, then finish the interior in the oven or on lower heat. This approach works fine for thin steaks (under 1 inch) where speed matters more than precision.

    The reverse sear steak technique flips this sequence entirely. You start in a low oven (225°F) and finish with a scorching pan sear—the opposite direction from conventional cooking. This staged approach gives you complete control over doneness because the slow oven phase raises internal temperature at a predictable rate.

    Reverse sear vs. traditional searing compared: Traditional searing sears first at high heat (400–500°F for 2–3 minutes per side) then finishes in a 400°F oven. Reverse searing starts in a 225°F oven until 10°F below target doneness, then sears for 45–90 seconds per side in a smoking-hot pan. Traditional searing works best for steaks under 1.25 inches; reverse searing excels with steaks 1.5–2+ inches thick.

    Temperature control separates these methods fundamentally. During a traditional sear, the pan’s surface temperature exceeds 400°F, which means the steak’s exterior instantly reaches temperatures well above your target doneness while the interior remains cold. The reverse sear steak method eliminates this tension entirely.

    When to use reverse searing: Choose the reverse sear steak technique for steaks 1.5–2.5 inches thick where doneness precision matters. Choose it when you’re cooking premium, expensive cuts you can’t afford to waste. Traditional searing works better for steaks under 1.25 inches, for cooking multiple steaks simultaneously, or when you need dinner in 20 minutes rather than 45.

    Frequently Asked Questions

    How long does reverse sear steak take?

    Total time is 30-60 minutes: 20-40 minutes in the oven at 250°F, plus 2-4 minutes for searing and 5-10 minutes resting time.

    Can you reverse sear thin steaks?

    Reverse searing works best with steaks at least 1.5 inches thick. Thin steaks cook too quickly in the oven phase and don't benefit from this method.

    What temperature should I reverse sear at?

    Use 225-275°F for the oven phase, with 250°F being ideal for most steaks. The searing phase should be done over high heat in a preheated cast iron pan.

  • How to Pan-Sear the Perfect Steak

    How to Pan-Sear the Perfect Steak

    You do not need a backyard grill, expensive equipment, or restaurant training to make an exceptional steak. A heavy skillet, high heat, and a few core techniques are enough. The truth is simple: most home steaks fail because of process, not ingredients. People use cold pans, skip temperature checks, flip too often, or cut too early. Fix those mistakes and your steak quality jumps immediately.

    This guide is a complete pan-searing playbook for home cooks. You’ll learn which cuts work best, how to season, when to salt, how to build a crust, and exactly how to hit your target doneness with confidence.

    🥩 Pro Tip For pan-searing, steak thickness matters more than price. A well-marbled 1.25–1.5 inch Choice steak usually outperforms a thin “premium” cut.

    Why Pan-Searing Works So Well

    Pan-searing is built around the Maillard reaction—the browning chemistry that creates deep savory flavor. A hot skillet maximizes contact between meat and metal, producing a dark crust and rich aroma. Compared with many grills, a pan gives better control over heat and timing, especially in apartment kitchens or cold weather.

    Other advantages:

    • Consistent heat and precise doneness control
    • Easy butter-basting with herbs and garlic
    • No flare-ups from dripping fat
    • Excellent results with common kitchen gear

    Best Steak Cuts for Pan-Searing

    Almost any tender steak can be pan-seared, but these cuts are the most reliable:

    Ribeye

    Rich, forgiving, flavorful. Great for medium-rare to medium.

    New York Strip

    Firm texture, cleaner beef flavor, less fat than ribeye.

    Filet Mignon

    Extremely tender and lean; benefits from butter-basting and careful timing.

    Top Sirloin

    Affordable, beefy, and great when cooked to medium-rare.

    Ideal thickness: 1.25–1.75 inches (3.2–4.5 cm). Thin steaks overcook before crust forms.

    ⚠️ Common Mistake Buying very thin steaks and trying to chase a dark crust. By the time color appears, the center is usually overcooked.

    Gear You Actually Need

    • 12-inch cast-iron or heavy stainless steel skillet
    • Instant-read thermometer
    • Tongs
    • Paper towels
    • High-smoke-point oil (avocado, grapeseed, refined sunflower)
    • Kosher salt and black pepper
    • Optional: butter, thyme/rosemary, garlic cloves

    Pre-Cook Setup: The 15-Minute Advantage

    1) Dry the Surface Thoroughly

    Pat steak dry with paper towels. Moisture is the enemy of browning.

    2) Salt Correctly

    Best option: dry brine 40 minutes to overnight in the fridge (uncovered). If short on time, salt right before searing. Avoid salting 10–20 minutes ahead; it pulls moisture to the surface at the wrong time.

    3) Lightly Oil the Steak (or the Pan)

    Use a thin layer. Too much oil causes splatter and can mute browning.

    4) Preheat the Pan Properly

    Heat over medium-high until the surface is visibly hot and oil shimmers immediately. Cast iron needs patience. Underheated pans are the #1 reason for weak crust.

    🌡️ Key Takeaway A steak should sizzle hard the second it touches the pan. If you hear a soft hiss, wait and reheat.

    Step-by-Step: Pan-Sear Method

    Step 1: Place and Leave It Alone

    Lay the steak away from you. Press very lightly for full contact, then don’t move it for 2–3 minutes.

    Step 2: Flip Once Crust Forms

    Turn with tongs when first side is deep brown. Sear second side another 2–3 minutes.

    Step 3: Sear the Edges

    Hold steak on fat cap/edges for 20–40 seconds each if needed.

    Step 4: Add Butter and Aromatics

    Lower heat slightly. Add butter, smashed garlic, and herbs. Tilt pan and baste for 30–60 seconds.

    Step 5: Check Internal Temperature

    Insert thermometer from side into thickest part.

    Doneness Pull Temp Final Temp After Rest
    Rare 120–125°F (49–52°C) 125–130°F (52–54°C)
    Medium-Rare 125–130°F (52–54°C) 130–135°F (54–57°C)
    Medium 135–140°F (57–60°C) 140–145°F (60–63°C)
    Medium-Well 145–150°F (63–66°C) 150–155°F (66–68°C)
    Well Done 155°F+ (68°C+) 160°F+ (71°C+)

    Step 6: Rest Before Slicing

    Rest 5–8 minutes on a warm plate. This keeps juices in the steak, not on your cutting board.

    Reverse Sear in a Pan + Oven (For Thick Steaks)

    For steaks over 1.75 inches, reverse sear gives better edge-to-edge doneness:

    1. Cook in 250°F (120°C) oven until 10–15°F below target temp.
    2. Finish with a hard sear in a very hot skillet, 45–90 seconds per side.
    3. Rest and serve.

    This method reduces the gray overcooked band and improves consistency.

    How to Season a Steak (Without Overcomplicating It)

    For excellent pan-seared steak, simple seasoning wins:

    • Kosher salt
    • Fresh black pepper
    • Optional garlic powder after searing

    Avoid sugary rubs for high-heat searing—they burn quickly and turn bitter.

    🥩 Pro Tip Pepper can scorch in very hot pans. If you like a clean crust, add some pepper after searing or during resting.

    How Long to Cook Steak in a Skillet?

    There is no universal timer, but for a 1.25–1.5 inch steak in a hot cast-iron pan:

    • Rare: ~4–5 minutes total
    • Medium-rare: ~5–7 minutes total
    • Medium: ~7–9 minutes total

    Use these as starting points only. Thermometer beats clock every time.

    Common Pan-Searing Problems and Fixes

    No Crust, Pale Surface

    Pan not hot enough or steak surface too wet. Dry better and preheat longer.

    Burned Outside, Raw Inside

    Heat too aggressive for steak thickness. Lower heat after first sear and finish gently.

    Steak Is Tough

    Could be overcooked, under-rested, or sliced with the grain. Rest and slice against grain.

    Too Much Smoke

    Expected at high heat, but reduce by using clean oil, wiping burned bits, and controlling pan temperature between batches.

    ⚠️ Common Mistake Constant flipping in the first minute. Let the crust set first, then flip confidently.

    Should You Use Butter Every Time?

    Butter adds flavor but burns easily at very high heat. The best approach:

    1. Sear first with high-smoke-point oil.
    2. Add butter later when heat is slightly lower.
    3. Baste briefly for aroma and color.

    This gives both crust and classic steakhouse flavor.

    What to Serve with Pan-Seared Steak

    • Crispy potatoes or mashed potatoes
    • Garlic mushrooms
    • Asparagus or green beans
    • Arugula salad with lemon
    • Peppercorn sauce or chimichurri

    Balance rich steak with something acidic or fresh.

    Final Notes: Your Repeatable Steak Formula

    If you remember only five things, make them these:

    1. Buy thicker steaks.
    2. Dry the surface well.
    3. Preheat pan aggressively.
    4. Cook to temperature, not time.
    5. Rest before slicing.

    Master this sequence once, and pan-seared steak becomes one of the easiest “special occasion” meals you can make at home.

    🌡️ Key Takeaway Great steak is a system, not a trick. Control moisture, heat, and temperature, and your results become predictable every single time.

    Pan-Searing Different Steak Cuts: Quick Adjustments

    Ribeye

    Ribeye has enough marbling to handle aggressive heat. You can sear hard, then finish at medium heat. Render fat cap for extra flavor. Best doneness: medium-rare to medium.

    New York Strip

    Strip is firmer and slightly leaner. Build crust first, then finish a little gentler than ribeye. Let it rest longer (6–8 minutes) so the fibers relax before slicing.

    Filet Mignon

    Filet cooks quickly and dries fast when overcooked. Use high heat for short initial sear, then finish low with butter-basting. Best around rare to medium-rare.

    Sirloin

    Sirloin rewards precision. Avoid medium-well and well-done if tenderness matters. Dry brine and proper slicing against grain make a major difference.

    🌡️ Key Takeaway The leaner the cut, the less margin for overcooking. Keep a thermometer nearby and pull early.

    Pan Temperature Management During Multi-Steak Cooking

    If you cook multiple steaks in one session, your pan behavior changes over time. Residual fond, rendered fat, and butter solids can burn and create bitterness. Professional kitchens solve this with strict heat management between rounds:

    1. After each steak, reduce heat and wipe burned solids carefully.
    2. Add a fresh small amount of clean oil.
    3. Reheat pan to searing temperature before the next steak.
    4. Avoid crowding—one or two steaks max in a 12-inch pan.

    Crowding drops surface temperature, which leads to steaming instead of searing. If your first steak looks great but later ones look pale, this is usually why.

    Finishing Options: Sauce, Butter, or Plain?

    A perfectly seared steak can be served plain with flaky salt and still taste incredible. But finishing can elevate specific cuts:

    • Compound butter (garlic, parsley, lemon zest) for filet or strip
    • Peppercorn cream sauce for classic steakhouse flavor
    • Chimichurri for bright acidity with fatty ribeye
    • Red wine reduction for deeper savory complexity

    Keep sauces light enough to support, not hide, the meat. A heavy sauce can flatten the crust flavor you worked hard to build.

    ⚠️ Common Mistake Pouring cold sauce directly on a just-seared crust. Warm the sauce and serve partly on the side to keep texture crisp.

    Meal Prep and Reheating Without Ruining Steak

    Fresh is best, but leftovers can still be excellent if reheated gently:

    • Slice steak and reheat in a skillet over low heat with a little butter for 30–60 seconds.
    • Or warm in oven at 250°F until just heated through.
    • Avoid microwave reheating at full power—it overcooks edges and toughens center.

    Leftover steak is ideal for steak salads, sandwiches, breakfast hash, tacos, or rice bowls. The key is minimal second-cook time.