How to Cut Steak: Complete Guide for Perfect Slices
Essential Tools for Cutting Steak Properly
Getting the right equipment transforms how to cut steak from frustrating to fluid. A dull knife tears meat fibers, while a sharp blade creates clean, professional slices that showcase your cooking. Beyond the knife itself, your cutting board, thermometer, and fork all play supporting roles in achieving restaurant-quality results at home.
A chef’s knife between 8 and 10 inches works best for most steaks. The blade needs to be sharp enough to glide through meat without pressure—test it on paper or tomato skin. High-carbon stainless steel holds an edge longer than regular stainless, though it requires more maintenance. Hone your knife weekly with a honing steel to realign the blade, and sharpen it every few months using a whetstone or professional sharpening service.
Your cutting board should be at least 12 by 18 inches to give you workspace and safety. Wood boards like maple or teak grip meat naturally and won’t dull your blade as quickly as plastic or glass. A meat thermometer (instant-read digital models work fastest) tells you when your steak hits the exact doneness you want—medium-rare sits at 130-135°F. A carving fork with two long tines stabilizes the meat while you slice, preventing slippage and keeping fingers clear of the blade.
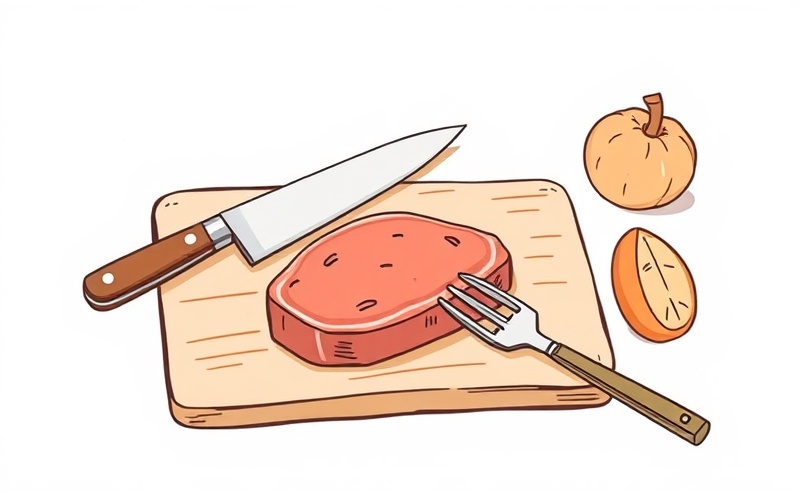
Essential tools for cutting steak: An 8-10 inch chef’s knife sharpened weekly with a honing steel, a wood cutting board at least 12 by 18 inches, an instant-read digital meat thermometer for doneness checking, and a two-tined carving fork for meat stabilization.
Understanding Grain Direction in Different Cuts
Muscle fibers in meat run in specific directions depending on which part of the cow the cut comes from. Understanding grain direction is the single most important factor in how to cut steak correctly—slicing against the grain shortens those fibers, making each bite tender, while slicing with the grain leaves long fibers intact and creates a chewy texture.
Different steak cuts have different grain patterns. A ribeye has grain running in multiple directions because of its location in the rib section, making it more forgiving if your knife angle isn’t perfect. A strip steak has grain running lengthwise along the steak’s long side. A flank steak has very pronounced grain running diagonally across the entire surface. A sirloin’s grain can vary depending on where it comes from—the upper portion has different fiber orientation than the tip.
Visual inspection reveals grain direction before you cut. Look at the steak’s surface and you’ll see fine lines running across the meat—those are the muscle fibers. Run your finger along those lines to feel which direction they travel. In some cuts like flank, the grain is so obvious you can see it from arm’s length away. In others like ribeye, the fibers are less pronounced, so look closely at the meat’s natural striations. Angling your cutting board under better light helps you spot these patterns more easily.
To identify grain in your steak: Look for fine lines or striations running across the meat’s surface, feel those lines with your finger to determine their direction, and remember that proper grain identification means slicing perpendicular to those fibers for maximum tenderness.
Step-by-Step Steak Cutting Technique
Resting your steak before cutting is non-negotiable if you want juicy results. When you cook steak, the heat pushes moisture toward the surface and the center. Cutting immediately after cooking lets all that juice run out onto the plate instead of staying in the meat. A 5-10 minute rest at room temperature allows the muscle fibers to relax and reabsorb those juices throughout the meat. Thicker cuts (over 1.5 inches) benefit from the longer end of that window, while thinner steaks need just 5 minutes.
During resting, tent your steak loosely with aluminum foil—just enough to keep it warm without trapping steam that could make the exterior soggy. The steak won’t cool down significantly in 5-10 minutes, and the residual carryover cooking is minimal at this point. Don’t cover it completely or you’ll undo the browning and crust you worked to develop. A loose tent lets heat escape gradually while the interior temperatures stabilize.
Rest cooked steak for 5-10 minutes before cutting to allow muscle fibers to relax and reabsorb internal juices. Thicker cuts (over 1.5 inches) need the full 10 minutes, while thinner steaks require only 5 minutes. Tent loosely with foil to retain warmth without trapping excess steam.
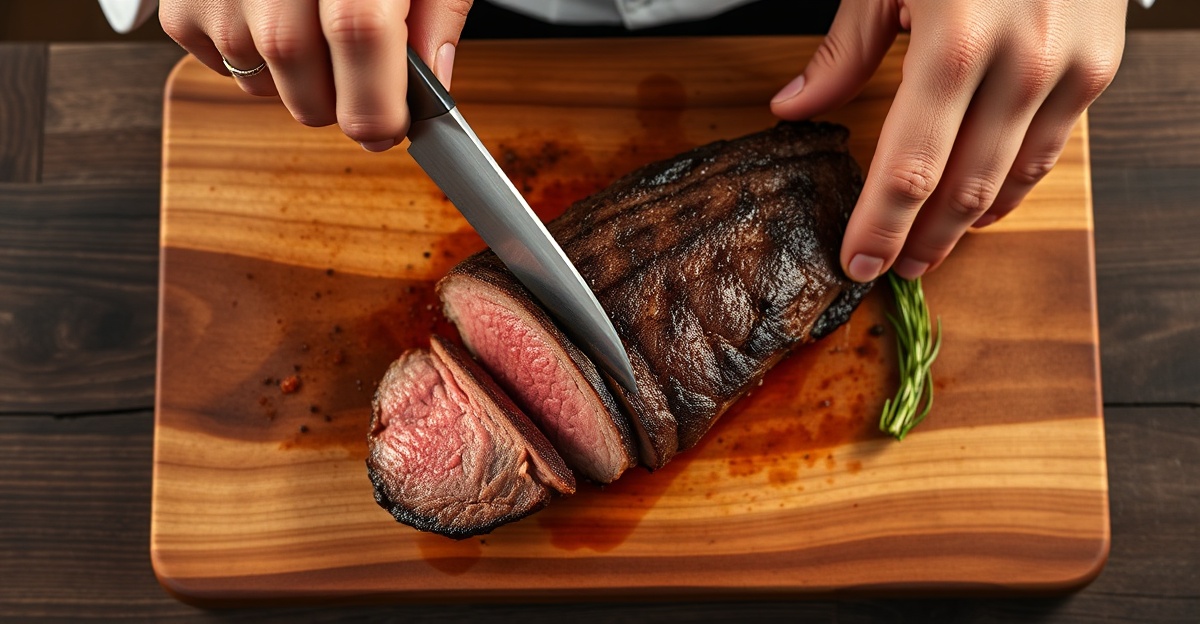
Once resting is complete, position your knife at a 90-degree angle to the grain direction you’ve already identified. Hold the knife handle with a relaxed grip—tension makes your cuts uneven and slows you down. Your other hand grips the carving fork, positioning its tines into the meat’s side to stabilize it. The fork prevents the steak from sliding across your board as you apply downward pressure with the knife.
Your blade should do the work, not your muscle. Use smooth, even strokes from the knife’s heel to its tip, letting the sharp edge glide through the meat rather than sawing back and forth. Applying steady downward pressure while pulling the blade toward you creates a single clean slice in one motion. Sawing motions tear muscle fibers and create a ragged edge that looks less appetizing and feels less tender on the tongue.
For slice thickness, aim for ¼-inch to ½-inch slices depending on the cut and how you plan to serve the steak. A standard ⅜-inch slice balances visual appeal with practical eating—thick enough to stay warm longer but thin enough to cut easily with a fork. Thinner slices (¼ inch) work better for cuts with pronounced grain like flank steak, since they feel more tender in the mouth. Thicker slices (½ inch) showcase premium cuts like ribeye or tenderloin, especially when grain is less directional. Consistency matters more than hitting a specific measurement—aim for uniform thickness throughout so each slice cooks and cools at the same rate if you’re serving multiple pieces.
How to cut steak step-by-step: Rest cooked steak 5-10 minutes with loose foil tent, identify grain direction through visual inspection and finger testing, position knife at 90-degree angle perpendicular to grain lines, hold carving fork in non-knife hand to stabilize meat, use smooth downward strokes from knife heel to tip, cut slices between ¼-inch and ½-inch thick depending on steak type, and maintain consistent thickness across all slices for even cooling.
Cutting Against the Grain: Why It Matters
Muscle fibers in beef are organized into bundles that run in specific directions based on the animal’s anatomy and the steak’s location on the carcass. When you cut perpendicular to these fibers—against the grain—your knife severs them into shorter pieces. Shorter fibers feel more tender in your mouth because they require less chewing force to break apart, while longer fibers intact after cutting with the grain create resistance and a chewy sensation.
The science is straightforward: meat tenderness depends on fiber length. A ribeye from the rib section has grain running in multiple directions because that muscle moved in many ways during the animal’s life. A strip steak’s grain runs lengthwise, making it critical to identify that single dominant direction. A flank steak’s pronounced diagonal grain is immediately visible and demands respect—cut it the wrong way and even a perfectly cooked steak becomes tough and unpleasant to eat.
Cutting against the grain shortens muscle fibers, reducing chewing resistance and creating a tender texture. The grain direction varies by steak cut: ribeye has multidirectional grain, strip steak runs lengthwise, and flank steak displays pronounced diagonal striations. Identifying and cutting perpendicular to these fiber bundles is the single most important factor in achieving restaurant-quality tenderness.
Most home cooks make the mistake of cutting steaks without first identifying grain direction. They slice at whatever angle feels natural, sometimes with the grain, sometimes across it, and inconsistently within the same steak. This creates a disappointing eating experience where half the slices are tender and half are tough—a dead giveaway that proper cutting technique wasn’t applied. Another common error is cutting too thickly when the grain is pronounced, as in flank steak. A ½-inch slice with long fibers still intact feels chewy regardless of how well you cooked it.
Sawing motions rather than clean, confident strokes also undermines the benefits of cutting against the grain. When your knife tears through muscle fibers with back-and-forth pressure instead of a single smooth stroke, it damages the fiber structure itself and creates a ragged surface. The tenderness advantage of proper grain cutting disappears because the fibers are mechanically damaged. A sharp blade moving in one fluid downward motion through perpendicular fibers creates clean edges that feel silky on your tongue.
Premium cuts like tenderloin and ribeye are more forgiving because their grain is less directional or less pronounced. You can cut these steaks at slightly imperfect angles and still achieve acceptable tenderness. Budget cuts like flank, skirt, and round steak demand precision—their obvious, single-direction grain structure means cutting with the grain instead of against it produces noticeably tough results. Understanding your specific steak cut and its grain pattern before you pick up your knife separates mediocre results from exceptional ones.
Specific Techniques for Different Steak Cuts
Ribeye steaks present a unique challenge because their grain runs in multiple directions rather than one dominant path. The ribeye comes from the rib section where the muscle moved in many different ways during the animal’s life, creating a complex fiber structure. This multidirectional grain is actually forgiving—you can cut at slightly imperfect angles and still achieve tender results because at least some of your cuts will be perpendicular to some of the grain directions present in the meat.
Start by examining your ribeye from different angles under good light. You’ll notice faint striations running in several directions across the surface. Choose the most prominent grain pattern you can identify and position your knife perpendicular to that primary direction. For ribeye, achieving perfect precision on every single slice is less critical than with other cuts, so don’t stress if your angle isn’t exactly 90 degrees—the multidirectional nature of the muscle fibers forgives minor imperfections.
For ribeye cutting: Identify the most prominent grain direction on the meat’s surface, position your knife at a 90-degree angle to that primary fiber orientation, and cut ⅜-inch to ½-inch slices using smooth downward strokes. Ribeye’s multidirectional grain means slight angle variations won’t significantly impact tenderness, making it a forgiving choice for less experienced cooks.
Use a carving fork to stabilize the ribeye’s side as you cut, applying steady downward pressure while pulling the knife toward you in one fluid motion. The large eye of fat running through the center of a ribeye can make it slightly more slippery on the cutting board, so anchor the meat firmly with your fork hand before each stroke. Aim for consistent ⅜-inch to ½-inch thickness to showcase the beautiful marbling and tender texture that makes ribeye so prized.
Filet mignon, also called tenderloin, is the most tender cut available because the tenderloin muscle does minimal work on the living animal. This extreme tenderness means grain structure is less pronounced and matters less than with other cuts. The grain in filet mignon generally runs lengthwise along the muscle, but because the meat is already so tender, cutting technique focuses more on presentation than on achieving additional tenderness through precise grain-cutting.
Before cutting filet mignon, identify the general grain direction running along the length of the meat. Position your knife at a perpendicular angle to that direction, but understand that even imperfect cuts will result in tender eating because the muscle fibers are naturally shorter and more delicate than those in tougher cuts. Filet mignon allows you to prioritize appearance and your desired slice thickness without worrying that grain-cutting technique will dramatically impact tenderness.
Filet mignon requires identifying lengthwise grain and cutting perpendicular to it, but the meat’s natural tenderness means exact angle precision is less critical than with other cuts. Cut filet mignon into ½-inch to ¾-inch thick slices to showcase its premium quality and buttery texture. The tenderloin’s minimal grain directional emphasis means you can focus on visual presentation and consistent thickness rather than compensating for tough muscle fibers.
Flank steak presents the opposite challenge from ribeye: instead of multidirectional grain, flank has extremely pronounced, obvious grain running diagonally across the entire surface. This muscle, located on the cow’s abdominal area, moves in one consistent direction during the animal’s life, creating clearly visible striations you can see from arm’s length away. Cutting flank steak with the grain instead of against it results in long, tough fibers that make even a perfectly cooked steak feel chewy and unpleasant.
Visual inspection of flank steak is straightforward because the grain lines are so obvious. Look at the meat’s surface and you’ll immediately see diagonal striations running across it—these are muscle fibers you must cut perpendicular to. Run your finger along those lines to confirm the direction, then position your knife at a 90-degree angle to those diagonal fibers. Unlike ribeye, there’s no room for imprecision here; cutting with or nearly with the grain on flank steak creates a noticeably inferior eating experience.
Flank steak has pronounced diagonal grain that demands precision cutting. Identify the obvious grain lines running diagonally across the meat’s surface, then position your knife perpendicular to those fibers. Cut flank steak into thin slices—¼-inch to ⅜-inch—because shorter pieces of long muscle fibers feel more tender than thicker slices. This combination of perpendicular angle and thin thickness is essential for transforming flank’s naturally chewy muscle into a tender eating experience.
Skirt steak shares flank’s pronounced, unidirectional grain but comes from a different location on the animal—the plate, which lies below the rib. Like flank, skirt steak demands identification and respect for grain direction because the muscle fibers run in one dominant direction. The grain in skirt steak runs lengthwise along the meat’s long dimension, making it immediately visible when you examine the raw steak on your cutting board.
Position your knife perpendicular to skirt steak’s lengthwise grain, understanding that this cut is even less forgiving than flank for improper grain cutting. Some parts of skirt steak can be quite tough even after proper cooking, so precise grain-cutting and thin slicing are non-negotiable if you want acceptable texture. The muscle moved in one primary direction during the animal’s life, creating muscle fibers that are longer and more resistant to chewing than those in ribeye or tenderloin.
Skirt steak grain runs lengthwise along the meat’s long dimension and demands perpendicular cutting for edibility. Cut skirt steak into thin slices—¼-inch to ⅜-inch—using smooth downward knife strokes perpendicular to the obvious fiber direction. Skirt steak’s naturally tough muscle structure means that improper grain cutting or thick slicing creates an unpleasantly chewy result, so this cut requires more precision than forgiving cuts like ribeye or tender cuts like filet mignon.
Common Mistakes and Professional Tips
Cutting steak at the wrong temperature ruins texture and presentation faster than any other mistake. Most home cooks pull their steak off the heat and immediately slice it, or they wait until it cools completely to room temperature. Both approaches create problems—hot steak bleeds juice onto the plate while cold steak becomes dense and less flavorful because the fats solidify. The ideal cutting window is when your steak has rested for 5-10 minutes and sits at approximately 130-140°F internally, warm enough to feel pleasant on your tongue but cool enough that juices have reabsorbed into the meat.
Cut steak when it reaches 130-140°F internally after a 5-10 minute rest. This temperature range allows muscle fibers to relax and retain juices while remaining warm enough for optimal flavor and texture. Cutting too hot (above 150°F) causes immediate juice loss; cutting too cold (below 110°F) makes fats solidify and reduces the eating experience’s quality.
Temperature control extends beyond the cutting moment to how you handle the meat after slicing. If you’re plating steaks for immediate service, keep cut slices on a warmed plate and serve within 2-3 minutes of cutting. The residual heat from a hot plate maintains temperature while preventing the meat from sitting in its own juices, which causes the exterior to become soggy. For a steakhouse-style presentation, some restaurants plate slices slightly fanned with a light drizzle of pan sauce or compound butter, which adds flavor while the warmth keeps the meat at serving temperature.
Presentation separates a home-cooked steak from a restaurant-quality experience, and slicing technique directly impacts visual appeal. Consistent thickness creates a professional appearance because each slice catches light the same way, highlighting the meat’s color and marbling. Ragged, uneven slices torn by sawing motions look amateur and signal to diners that the cooking process wasn’t handled with care. A sharp knife creating clean, straight edges makes even a simple plated steak look elegant and intentional.
Professional plating of cut steak requires three elements: consistent slice thickness (uniform width throughout), clean edges created by single smooth strokes, and proper plate temperature. Arrange slices slightly overlapping or fanned on a heated plate, serve within 2-3 minutes of cutting, and complement with finishing touches like fleur de sel, cracked pepper, or compound butter. This presentation style signals care and technical skill to diners.
The angle and arrangement of slices on the plate affect how diners perceive the steak’s quality. Arrange premium cuts like ribeye or filet mignon with slices slightly overlapping in a fan pattern, which showcases the beautiful cross-section and marbling while making the portion look substantial. For tougher cuts like flank or skirt that are served sliced, arranging thin slices in a shingled pattern (overlapped like roof tiles) emphasizes that the thinness is intentional and complements the cut’s characteristics. Avoid piling slices haphazardly or standing them upright on edge, which looks careless and prevents sauce or juices from coating the meat evenly.
Storing cut steak properly preserves quality for leftovers or meal prep, though whole steaks always maintain superior texture. If you’ve cut more steak than you’ll serve immediately, store slices in an airtight container in the refrigerator at 40°F or below. Exposure to air causes oxidation, which turns the meat’s surface gray-brown and creates unpleasant flavors. An airtight container prevents this degradation and maintains moisture, keeping the meat tender rather than allowing the exterior to dry out.
The timeframe for storing cut steak is shorter than whole steaks because slicing increases the surface area exposed to bacteria and air. Eat refrigerated cut steak within 3-4 days for best quality; after that window, flavors decline and texture deteriorates noticeably. For longer storage, freeze cut steak in a vacuum-sealed bag or airtight container at 0°F or below, which halts bacterial growth and preserves quality for 2-3 months. Thaw frozen cut steak in the refrigerator overnight before reheating, never at room temperature, to prevent bacterial multiplication.
Store cut steak in airtight containers at 40°F or below and consume within 3-4 days for optimal quality. Freezing in vacuum-sealed bags at 0°F extends storage to 2-3 months. Thaw frozen steak in the refrigerator overnight and reheat gently in a low oven (275°F) to restore texture without overcooking the interior.
Reheating cut steak requires a gentler approach than initial cooking because the meat is already cooked and prone to overcooking if exposed to high heat. A low oven at 275°F takes 8-12 minutes to bring cold cut steak back to serving temperature without drying the exterior. Alternatively, a quick sear in a cast-iron skillet over medium heat for 30-60 seconds per side restores the crust and warms the interior, though this method requires attention to prevent burning. Understanding how to cut steak properly the first time reduces the need for reheating later.
Plate temperature itself becomes a professional tool when you understand its impact on steak presentation and the dining experience. A warm plate—preheated in a 200°F oven for 10-15 minutes—keeps cut steak at serving temperature longer and prevents the meat from cooling unevenly. Cold plates absorb heat from the steak’s bottom surface, cooling it quickly while the top surface remains relatively warm, creating an inconsistent eating experience. Restaurant kitchens maintain stacks of hot plates for exactly this reason: the technical detail of plate temperature separates professional service from careless plating.
Frequently Asked Questions
How long should steak rest before cutting?
Let steak rest 5-10 minutes after cooking to allow juices to redistribute throughout the meat, preventing juice loss when slicing.
What's the best knife for cutting steak?
A sharp 8-10 inch chef's knife or carving knife with a thin blade works best for clean, precise cuts through cooked steak.
How thick should steak slices be?
Cut steak slices ¼ to ½ inch thick for optimal texture and easy chewing, adjusting based on the specific cut and preference.
Can you cut steak when it's hot?
Avoid cutting steak immediately when hot as juices will run out; wait for resting period to ensure moist, flavorful slices.